Configure Email Notification
AutomationEdge supports sending notifications via email to different stakeholders such as Admin, Tenant Users. One of the scenarios for sending notifications is sending emails to users if a workflow request fails.
The SMTP server configuration is at the Tenant level. All Agents configured under this tenant have access and can use this SMTP server to send emails.
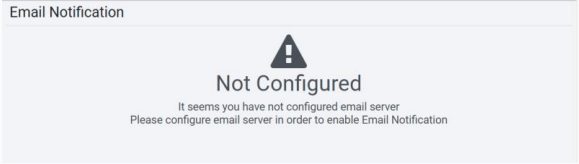
To set email configuration settings, you must first set up the email configuration. Else, you will see the following on the Email Notification page:
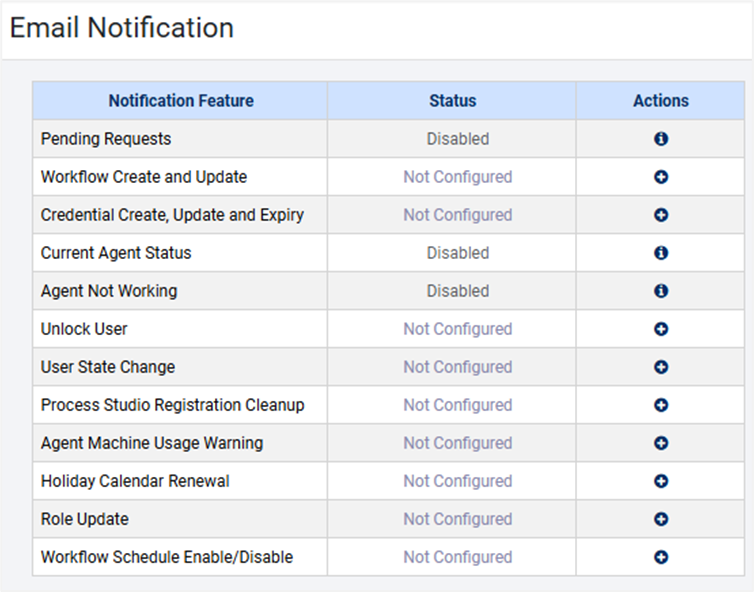
Notification scenarios
AutomationEdge will support sending notifications in the following scenarios:
Configure Pending Requests notification
Set the higher and lower thresholds for pending requests. When the number of pending requests reaches the higher threshold, AutomationEdge stops accepting new requests. Scheduled requests also fail. In such a scenario, a notification is sent to all System Administrators and Admins by default.
However, one can enable notification for pending requests, which triggers notification once the number of pending requests reaches the lower threshold, and notification can be sent to System Administrators, Admins, and email IDs as configured.
To configure pending requests notification:
-
In the menu, click Settings → Email Notification. The Email Notification page appears.
-
In the Actions column, next to Pending Requests, click
 . The Pending requests notification page appears.
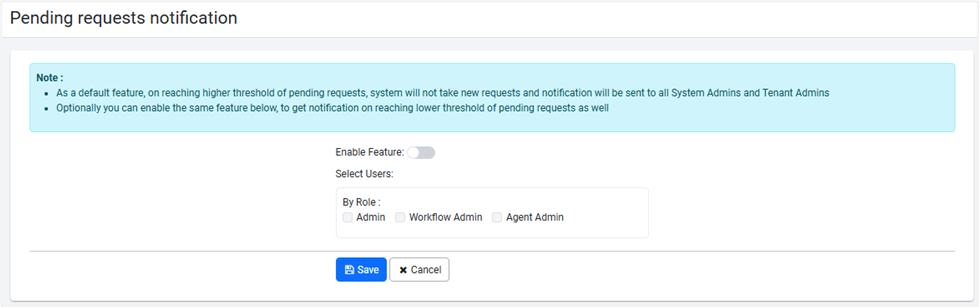
-
Toggle the Enable Feature switch. The feature is activated for use.
-
In Select Users
*: By Role select the checkboxes to next to roles, and then click Save. The configuration is saved.Note:- Select Users is mandatory only if the feature is enabled.
- Users with the selected roles and having Active and Enabled status, and who have added email addresses will receive the notifications.
Configure Worflow create and update notification
When workflow configuration parameters are changed while editing a workflow, an email notification can be sent to all Admins, Workflow Administrators and configured email IDs.
To configure email notification for workflow:
-
In the menu, click Settings → Email Notification. The Email Notification page appears.
-
In the Actions column, next to Workflow Create and Update, click
. The Workflow create and update notification page appears.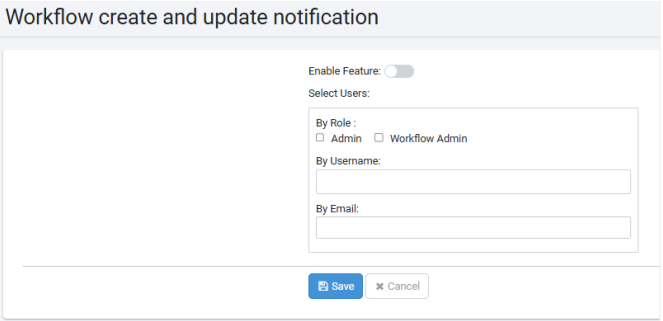
-
Toggle the Enable Feature switch. The feature is activated for use.
-
In Select Users
*:- By Role: Select the checkboxes next to the roles. You can select one or both checkboxes.
- By Username: Select the user to whom you want to send the notification. Depending on the checkbox selected, you will see the names of users in the list.
- By Email: Select the email of the user you want to send the notification to.
-
Click Save. The configuration is saved.
Note:Select Users is mandatory only if the feature is enabled.
Configure Credential Create, Update and Expiry notification
Use the feature when you want to send email notification to configured users such as the Admins and Workflow Administrators when a credential is about to expire or is modified.
To configure credential notification:
-
In the menu, click Settings → Email Notification. The Email Notification page appears.
-
In the Actions column, next to Credential Create, Update and Expiry, click
. The Credential create, update and expiry notification page appears.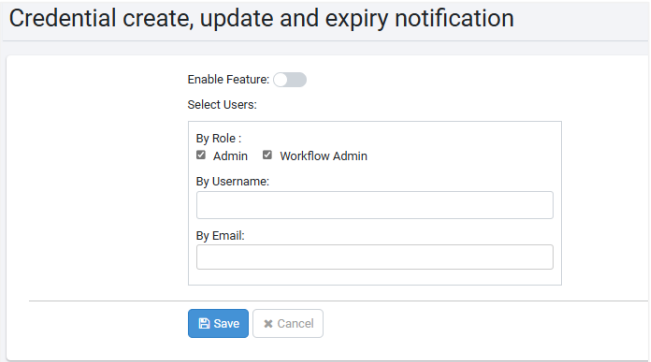
-
Toggle the Enable Feature switch. The feature is activated for use.
-
In Select Users
*:- By Role: Select the checkboxes next to the roles. You can select one or both checkboxes.
- By Username: Select the user to whom you want to send the notification. Depending on the checkbox selected, you will see the names of users in the list.
- By Email: Select the email of the user you want to send the notification to.
-
Click Save. The configuration is saved.
Note:Select Users is mandatory only if the feature is enabled.
Configure Current agent status notification
A notification regarding the number of running requests, number of Running agents and their status, can be periodically sent to all Admins, Workflow Administrators and configured email ids. Set the period in hours.
To configure current agent status notification:
-
In the menu, click Settings → Email Notification. The Email Notification page appears.
-
In the Actions column, next to Current Agent Status, click
. The Current Agent Status page appears.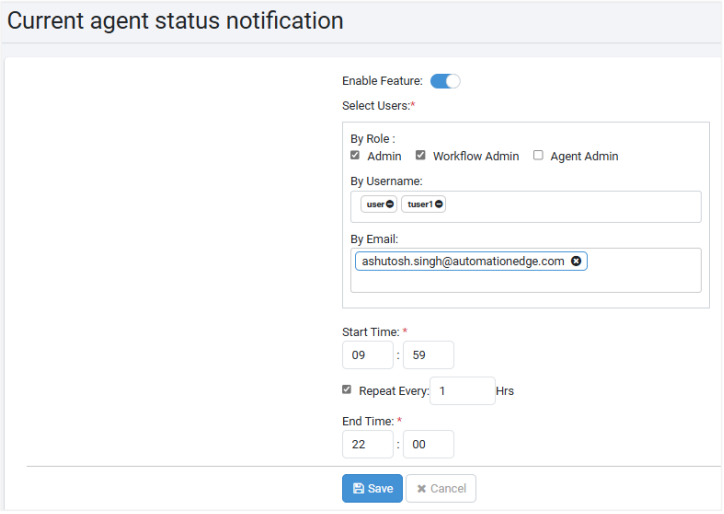
-
Toggle the Enable Feature switch. The feature is activated for use.
-
In Select Users
*:- By Role: select the checkboxes next to the roles. You can select one or two or all three checkboxes.
- By Username: Select the user to whom you want to send the notification. Depending on the checkbox selected, you will see the names of users in the list.
- By Email: Select the email of the user you want to send the notification to.
-
In Start Time
*, select the time you want to start sending the notification.Select the Repeat Every checkbox and then enter the interval period in hours when you want to send the notification. For example, the user will receive an email notification every one hour.
In End Time
*, select a time if the interval is non-zero. -
Click Save. The configuration is saved.
Note:Select Users is mandatory only if the feature is enabled.
Configure Agent not working (Unknown/Dead) notification
The notification is for unknown or dead state of the agents.
If an Agent goes to an unknown state or stops, configure Agent Not Working to send an email notification. The notification can be sent to all Admins, Workflow Administrators, and configured email IDs.
In addition, the notification lists the workflows assigned to the agent.
If the workflows are not assigned to other agents, then the workflows will not get executed.
To configure agent not working notification:
-
In the menu, click Settings → Email Notification. The Email Notification page appears.
-
In the Actions column, next to Agent Not Working, click
. The Agent not working notification page appears.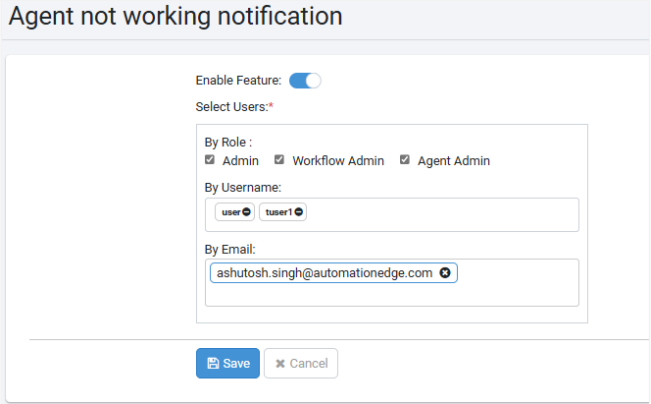
-
Toggle the Enable Feature switch. The feature is activated for use.
-
In Select Users
*- By Role: Select the checkboxes next to the roles. You can select one or both checkboxes.
- By Username: Select the user to whom you want to send the notification. Depending on the checkbox selected, you will see the names of users in the list.
- By Email: Select the email of the user you want to send the notification to.
-
Click Save. The configuration is saved.
Select Users is mandatory only if the feature is enabled.
Configure Unlock User notification
Unlocking a user account sends an email to the user with the new password. SMTP configuration is a prerequisite to send the email.
To configure the unlocking user notification:
-
In the menu, click Settings → Email Notification. The Email Notification page appears.
-
In the Actions column, next to Unlock USer, click
. The Unlock User page appears.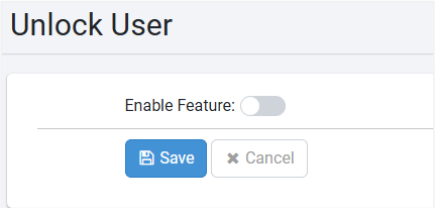
-
Toggle the Enable Feature switch. The feature is activated for use.
-
Click Save. The configuration is saved. With the notification setting, users unlocked with a new password receive an email.
Configure User State Change notification
User State Change sends an email to the user when there is a change in the status of the user when nightly jobs are run. SMTP configuration is a prerequisite to send the email.
Configure user state change notification:
-
In the menu, click Settings → Email Notification. The Email Notification page appears.
-
In the Actions column, next to User State Change, click
 . The User State Change page appears.
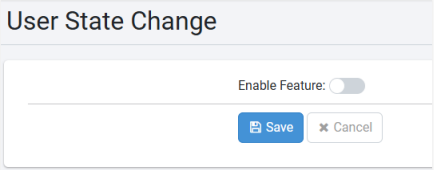
-
Toggle the Enable Feature switch. The feature is activated for use.
-
Click Save. The configuration is saved.
Configure Process Studio Registration Cleanup notification
All the Process Studio licenses are released by the AE Midnight Scheduler for PS registrations that are deleted during a day. Use the Process Studio Registration Cleanup feature to send an email notification to users.
To configure Process Studio registration cleanup notification:
-
In the menu, click Settings → Email Notification. The Email Notification page appears.
-
In the Actions column, next to Process Studio Registration Cleanup, click
. The Process Studio Registration Cleanup page appears.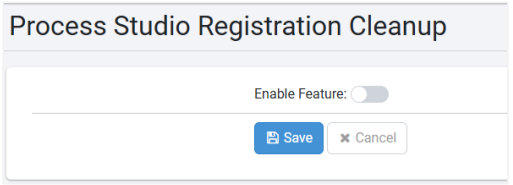
-
Toggle the Enable Feature switch. The feature is activated for use.
-
Click Save. The configuration is saved.
Configure Agent Machine Usage Warning notification
You can configure Agent Not Working to send an email notification if machine usage in terms of CPU, disk usage, memory usage and Heap usage exceeds the threshold set under Agent → Agent Settings.
The notification can be sent to all Admins, Workflow Administrators, and configured email ids.
To configure Agent not working notification:
-
In the menu, click Settings → Email Notification. The Email Notification page appears.
-
In the Actions column, next to Agent Machine Usage Warning, click
. The Agent Machine Usage Warning page appears.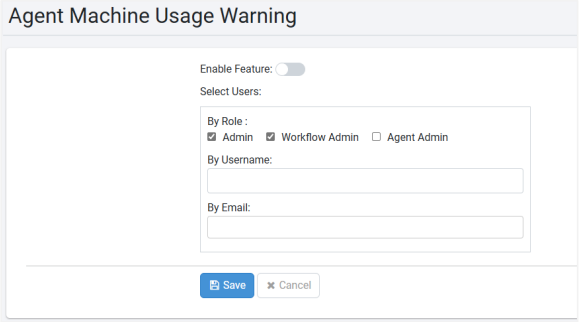
-
Toggle the Enable Feature switch. The feature is activated for use.
-
In Select Users
*:- By Role: Select the checkboxes next to the roles. You can select one or two or all three checkboxes.
- By Username: Select the user to whom you want to send the notification. Depending on the checkbox selected, you will see the names of users in the list.
- By Email: Select the email of the user you want to send the notification to.
-
Click Save. The configuration is saved.
Select Users is mandatory only if the feature is enabled.
Configure License Consumption notification
Use the License Consumption feature to notify users about license renewal. SMTP configuration is a prerequisite to send the email.
-
The License Consumption notifications are applicable for Tenants using Consumption Based License.
-
All the license related notifications will be sent to all the admins by default. You need to configure for other admin roles of a tenant and additional email ids, if required.
To configure license consumption notification:
-
In the menu, click Settings → Email Notification. The Email Notification page appears.
-
In the Actions column, next to License Consumption, click
. The License Consumption page appears.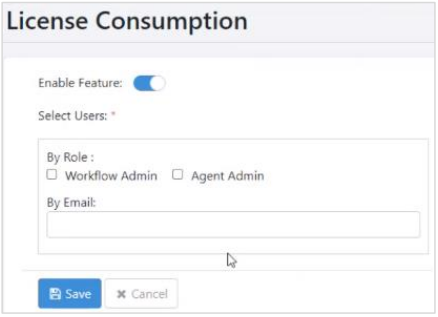
-
Toggle the Enable Feature switch. The feature is activated for use.
-
In Select Users
*:
- By Role: Select the checkboxes next to the roles. You can select one or both checkboxes.
- By Email: Select the email of the user you want to send the notification to.
- Click Save. The configuration is saved.
Select Users is mandatory only if the feature is enabled.
Configure Holiday Calendar Renewal notification
Use the Holiday Calendar Renewal feature to configure email notifications, which will notify the users to renew / create holiday calendar for the upcoming year. SMTP configuration is a prerequisite to send the email.
To use the feature, ensure that you have created the first holiday calendar. For details, see [HolidayCalendar].
As the current year comes to an end, the application checks if the holiday calendar for the new year exists for each tenant. If the holiday calendar does not exist and schedules are associated with the calendar, then the users receive email notifications depending on the notification settings.
Users will receive notifications as follows:
December 01, December 15, and every day between, December 26 to 30.
To configure holiday renewal calendar notification:
-
In the menu, click Settings → Email Notification. The Email Notification page appears.
-
In the Actions column, next to Holiday Calendar Renewal, click
. The Holiday Calendar Renewal page appears.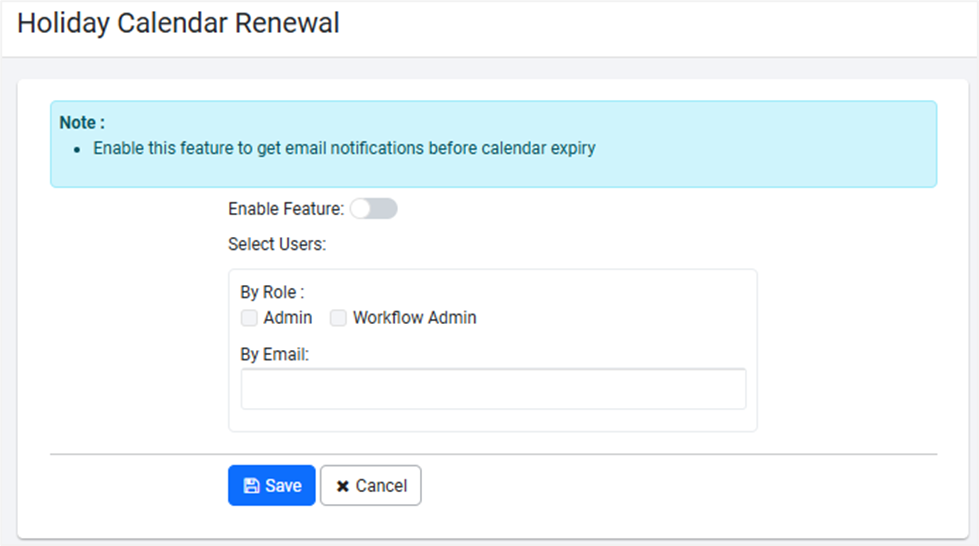
-
Toggle the Enable Feature switch. The feature is activated for use.
-
In Select Users
*:- By Role: Select the checkboxes next to the roles. You can select one or both checkboxes.
- By Email: Select the email of the user you want to send the notification to.
-
Click Save. The configuration is saved.
Select Users is mandatory only if the feature is enabled.
Configure Role Update notification
Use the Role Update feature to configure email notifications, which will notify users when a user defined role is added, modified, or deleted. SMTP configuration is a prerequisite to send the email.
To configure role update notification:
-
In the menu, click Settings → Email Notification. The Email Notification page appears.
-
In the Actions column, next to Role Update, click
. The Role Update Notification page appears.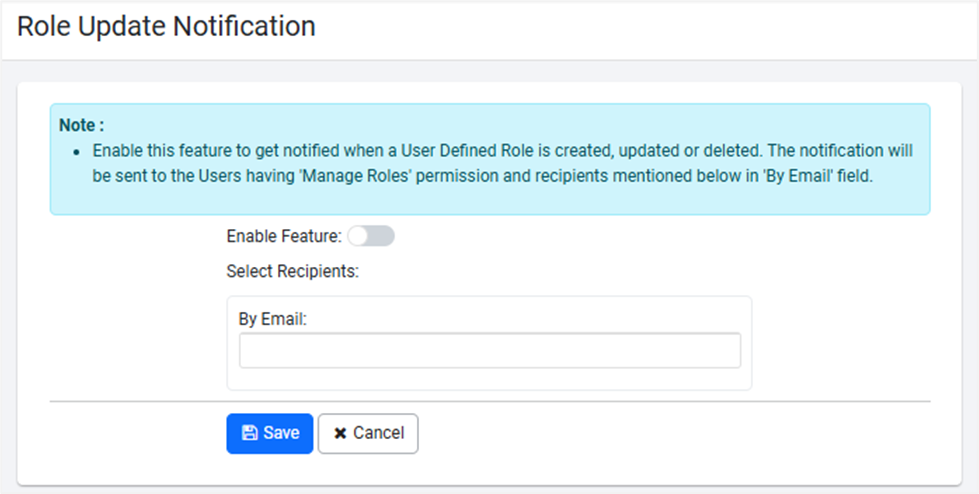
-
Toggle the Enable Feature switch. The feature is activated for use.
-
In Select Recipients:
- By Email: Select the email of the user you want to send the notification to. In addition, users with Manage Roles permission will receive the email.
-
Click Save. The configuration is saved.
Configure Workflow Schedule Enable/Disable notification
You can configure Workflow Schedule Enable/Disable to send an email notification if workflow schedular is enabled or disabled. The Notification can be sent to all Admins, Workflow Administrators and configured email ids.
To configure workflow schedule enable/disable notification:
-
In the menu, click Settings → Email Notification. The Email Notification page appears.
-
In the Actions column, next to Workflow Schedule Enable/Disable, click
. The Workflow Schedule Enable/Disable page appears.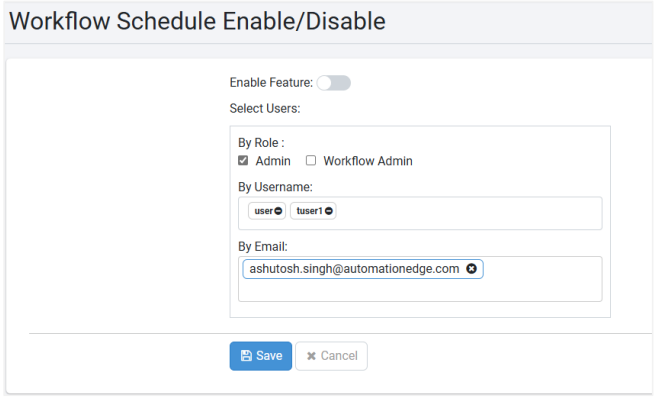
-
Toggle the Enable Feature switch. The feature is activated for use.
-
In Select Users
**:- By Role: Select the checkboxes next to the roles. You can select one or both checkboxes.
- By Username: Select the user to whom you want to send the notification. Depending on the checkbox selected, you will see the names of users in the list.
- By Email: Select the email of the user you want to send the notification to.
-
Click Save. The configuration is saved.
Select Users is mandatory only if the feature is enabled.