Workflow Schedular
Workflow Scheduler is used for scheduling workflow execution automatically at specified times. However, assisted workflows cannot be scheduled.
Add New Schedule
To add a new schedule:
-
Click the Workflows menu. Click Scheduler sub-menu.
-
Add New Schedule
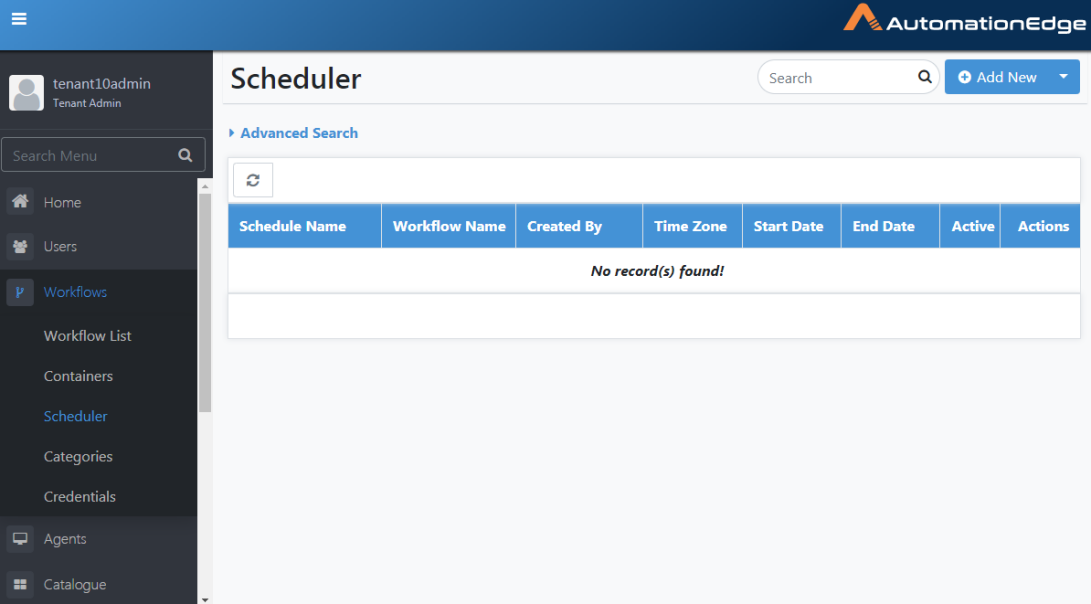
Figure 6.102: Adding New Schedule
- Workflow scheduler screen appears. It has two sections, Workflow Details and Schedule Details.
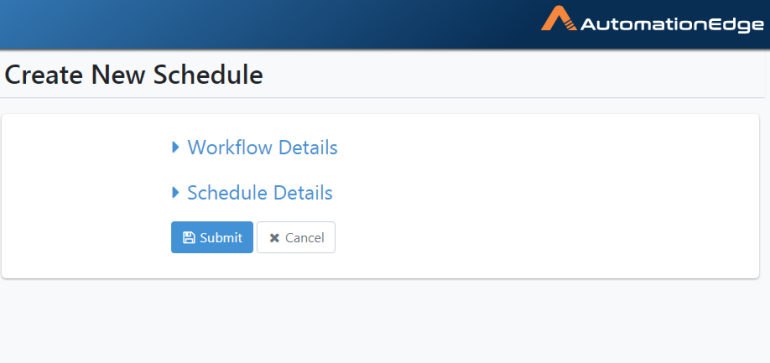
Figure 6.103: Create new Schedule section
- Enter Workflow Details. First, choose the workflow to be scheduled by enabling the checkbox next to the workflow. Alternatively, type a workflow name in the search region as seen below. It will filter the list of workflows, and then you may enable the checkbox next to the workflow desired.
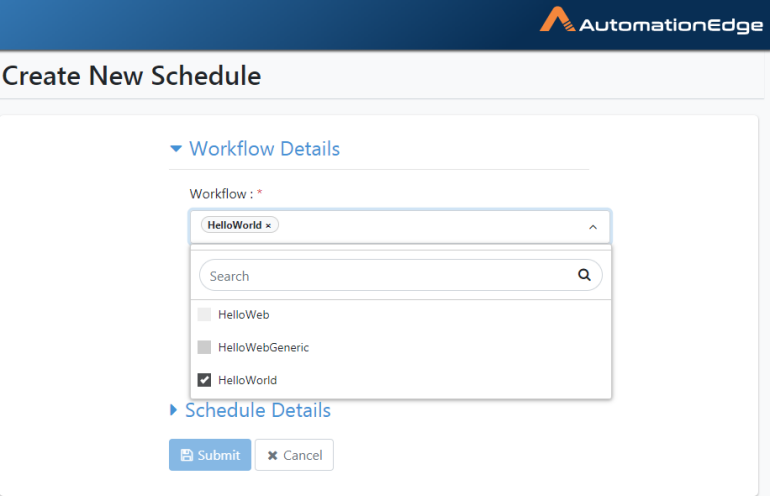
Figure 6.104: Choose workflow to be scheduled
- Select the workflow and provide desired values for the associated runtime parameters.
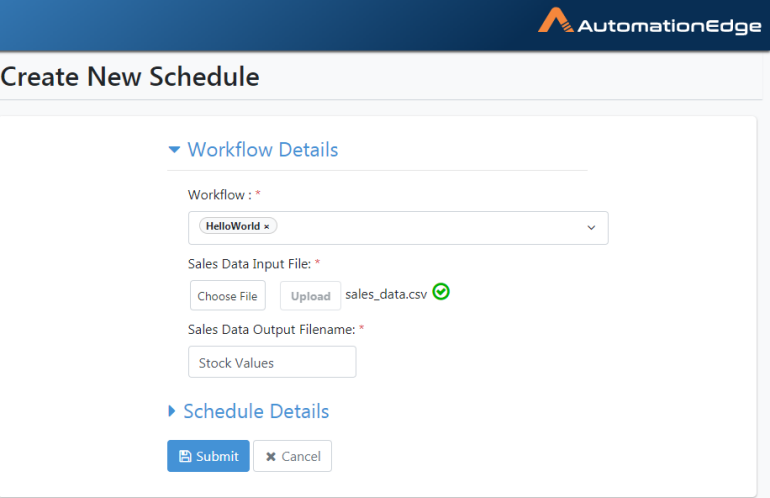
Figure 6.105: Provide values for runtime parameters
- Now populate Schedule Details as shown below. Click Submit.
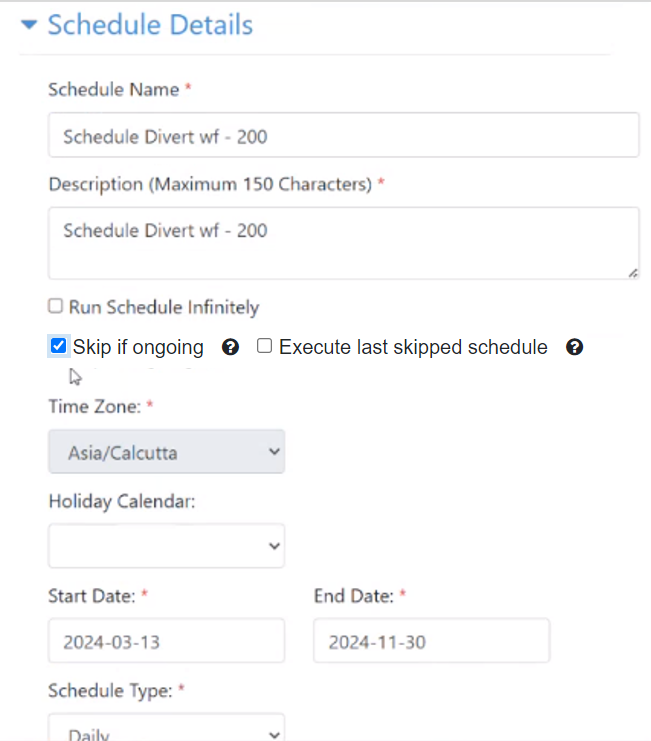
Figure 6.106: Entering Workflow Schedule Details
- The schedule is saved successfully message appears. The field descriptions are shown in the table below.
| Field Name | Description |
|---|---|
| Workflow | Select a workflow from the drop-down list. This field is Mandatory. |
| Workflow Runtime Parameters | Provide values for runtime parameters of the workflow as per workflow definition. |
| Schedule Details: | |
| Schedule Description | To specify schedule description. This field is |
| Schedule Start Date | To specify scheduler, start date. This field is Mandatory. |
| Run Schedule Infinitely | Select this to run the schedule forever. If enabled, the Schedule End Date becomes invisible. Else, Schedule End has to be specified. |
| Skip if ongoing | Select the checkbox if you want to skip the workflow execution as per the schedule. The option is applicable only if the existing request is in the following state: New, Retry, ExecutionStarted, and AwaitingInput. Note: You can view the details of the request in the Audit Logs page. |
| Execute last skipped schedule | Select the checkbox if you want to skip the workflow execution when existing request created by the schedule is ongoing (in progress). Requests having status New, Retry, ExecutionStarted, or AwaitingInput are considered as an existing ongoing request. Note: - The checkbox is available only if you select the Skip if ongoing checkbox. - If more than one schedule is skipped, then only the last skipped schedule is executed. |
| - If a request's status is Expired (as the request is unattended by an Agent), then a new request is created for the skipped schedule, which is executed. | |
| - Even if the schedule date range exceeds or times out the skipped trigger will still execute. | |
| Schedule End Date | Option Available only if "Run Schedule infinitely" is not selected, and when visible the field is Mandatory. |
| Schedule Type | It displays different options for daily, monthly and weekly. This field is Mandatory. Note: If you have added the ae.schedules.enable.cron.expression .input property in the ae.properties file, and set the flag as true, then an additional schedule type, Custom, is available in the list. The option allows you to provide a Cron Expression for the schedule. 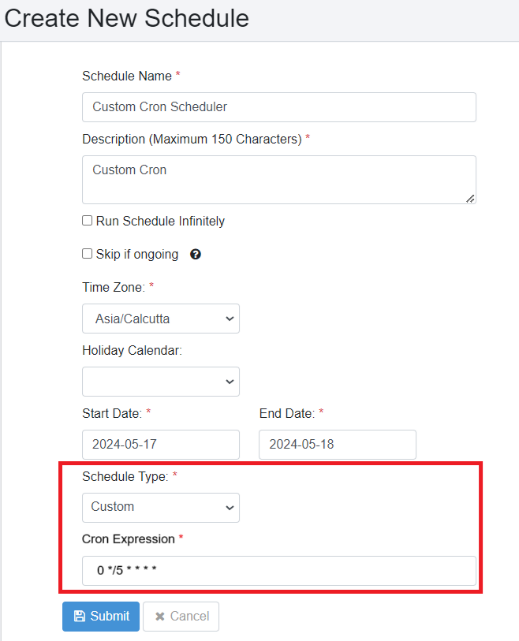 |
| Time Zone | The user's (browser) time zone is populated by default. Users can change the time zone if needed. Once a schedule is created time zone is not editable. |
| Schedule Execution Time/ Schedule Start Time | Specify the start time in hours and minutes. The schedule will start execution at a time greater than or equal to the Start time specified.If ‘Repeat Every’ is enabled, then Schedule Execution Time is labelled as Schedule Start Time. This field is Mandatory.- If the schedule type is Daily, the schedule starts running at this time every day. - If the schedule type is Weekly, the schedule starts running at this time on the weekdays selected. If the schedule type is Monthly, the schedule starts running for the selected months and selected days. |
| Repeat Every | Check this box to add repeat instructions. If no selected schedule runs once per day. If checked, it enables repeat by the hour or minute. |
| - If Hours is selected, 1-24 values are available in the drop-down list. | |
| - If Minutes are selected 1, 2, 3, 4, 5, 10, 15, 20, 30, 45 values are available in the dropdown list. | |
| Schedule End Time | Specify the end time in hours and minutes. The schedule will execute until a time less than the end time specified. This field is enabled if ‘Repeat Every’ is enabled, and w When visible, the field is Mandatory.- If the schedule type is Daily, the schedule stops running at this time every day.- If the schedule type is Weekly, the schedule stops running at this time on the weekdays selected.If the schedule type is Monthly, the schedule stops running at this time for selected months and selected days. |
| Buttons: | |
| Submit | To submit workflow scheduler details |
| Cancel | To cancel adding a new workflow scheduler |
Table 6.15: Add New Schedule: Workflow Scheduler Field/Button Description
Search Schedule
Following are the steps to search for a schedule.
-
Navigate to the Workflows🡪Scheduler menu.
-
Type a search string for schedule description in the Search Schedule free text box.
-
The Schedule list gets filtered as per text entered or click the search icon.
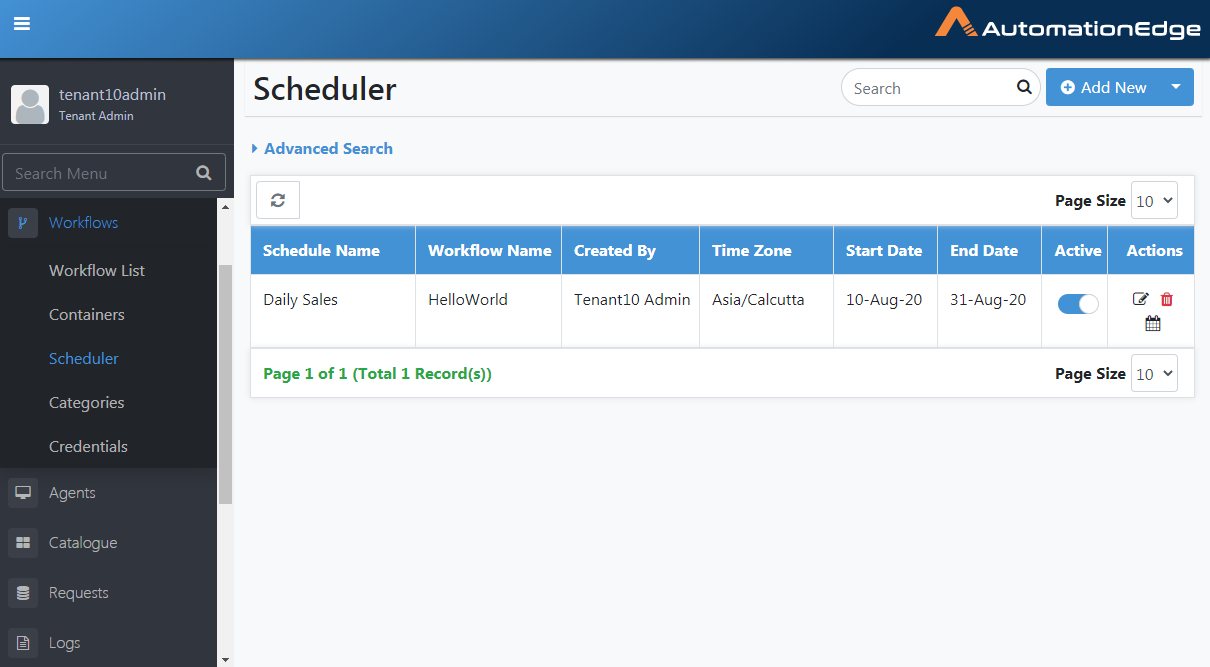
Figure 6.107: Search Schedule
Table 6.16: List of Schedulers
| Field Name | Description |
|---|---|
| Schedule Description | Displays schedule description. |
| Workflow Name | Select workflow from the drop-down list |
| Created By | Displays username that created the Schedule |
| Start Date | Displays scheduled start date. |
| End Date | Displays scheduled end date. |
| Actions: | |
| Active | Select checkbox to activate the schedule. |
| Edit | Click the Edit Pencil icon to edit schedule |
| Delete Button | Click the Delete icon to delete the schedule. |
| View upcoming fire times | Click to view the list of upcoming fire times for the schedule. |
Scheduler Advanced Search
Following are the steps for Scheduler Advanced Search.
-
Click on the arrow beside Advanced Search. The Column Name field is displayed.
-
Once a value is selected, the Criterion field is enabled. Select from the drop-down list.
-
Next, the Search Phrase field is displayed. Provide a phrase for Advanced Search.
-
Click the Add Filter button to add the filter. You can add more filters, if required.
-
Click Search. The search result based on the filter criteria is displayed.
-
Click Remove Filters to clear the filter criteria.
The table below summarizes the column names and corresponding comparators available for Advanced Search for Scheduler.
Table 6.17: Advanced Search filter criteria
| Column | Comparator | Value |
|---|---|---|
| - Schedule Name | - equal to | Specify a Value for the Column and Comparator filter criteria. |
| - not equal to | ||
| - like | ||
| - begins with | ||
| - ends with | ||
| - Status | - equal to | Specify a Value for the status based on the Comparator selected. |
| - not equal to |
Deactivate Schedule
Following are the steps to deactivate a schedule,
-
Click Workflows menu and Scheduler sub-menu.
-
Search a Scheduler to edit from the list.
-
Under the Active column, click the toggle to make the schedule inactive.
(Note: Expired schedules can also be deactivated).
Figure 6.108: Deactivate Schedule
- The schedule is now deactivated, as seen below.
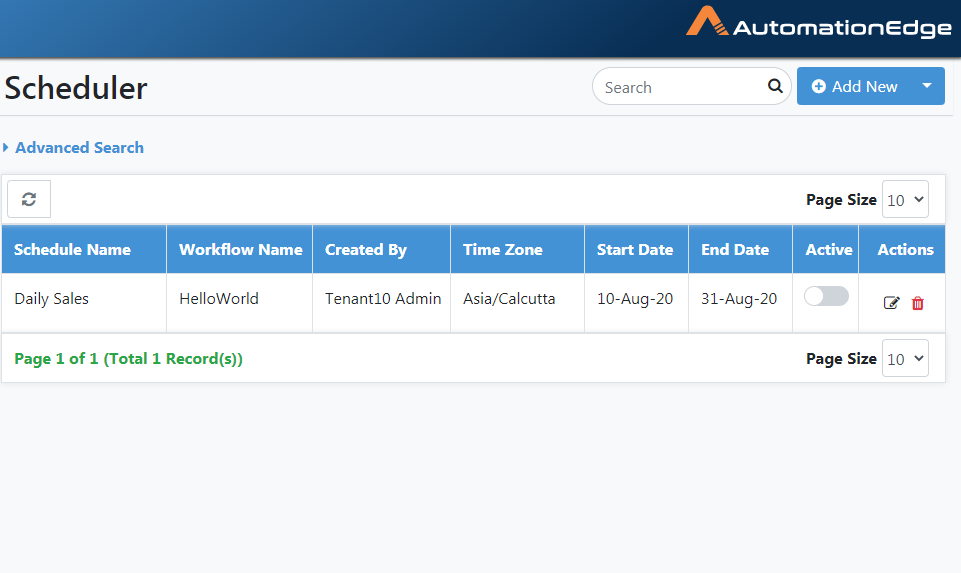
Figure 6.109: Schedule Deactivated
Edit Schedule
Following are the steps to edit a schedule.
-
Navigate to the Workflows 🡪 Scheduler menu.
-
Search a Scheduler to edit from the list, and under the Actions column, click edit.
Edit Schedule details as shown below and Click Submit.
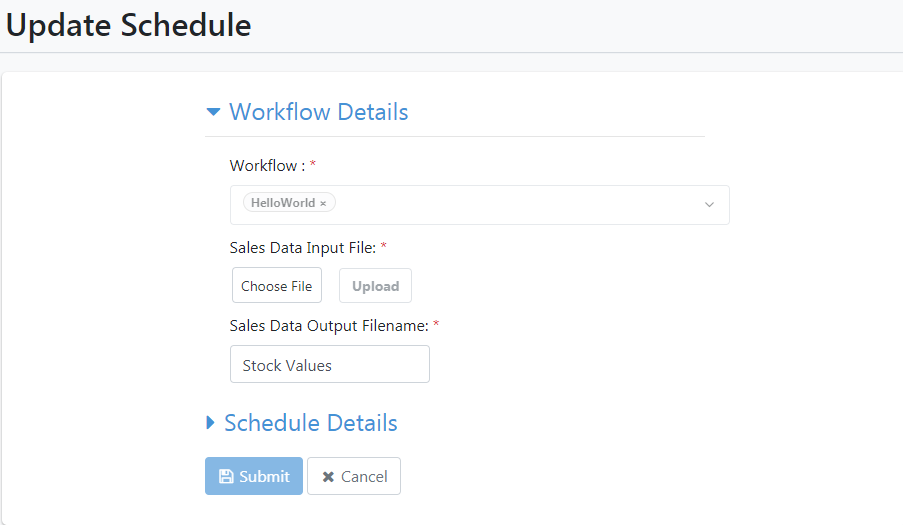
Figure 6.110: Edit Schedule
- Choose File and upload a file as part of edit. Click Submit. Schedule edited successfully message appears.
Delete Schedule
Following are the steps to delete a schedule.
-
Navigate to the Workflows 🡪 Scheduler menu.
-
Search a Scheduler to edit from the list.
-
Under the Active column, click the toggle to make the schedule inactive.
-
Under the Actions column, click the delete icon.
-
Acknowledge the Schedule delete confirmation pop-up message.
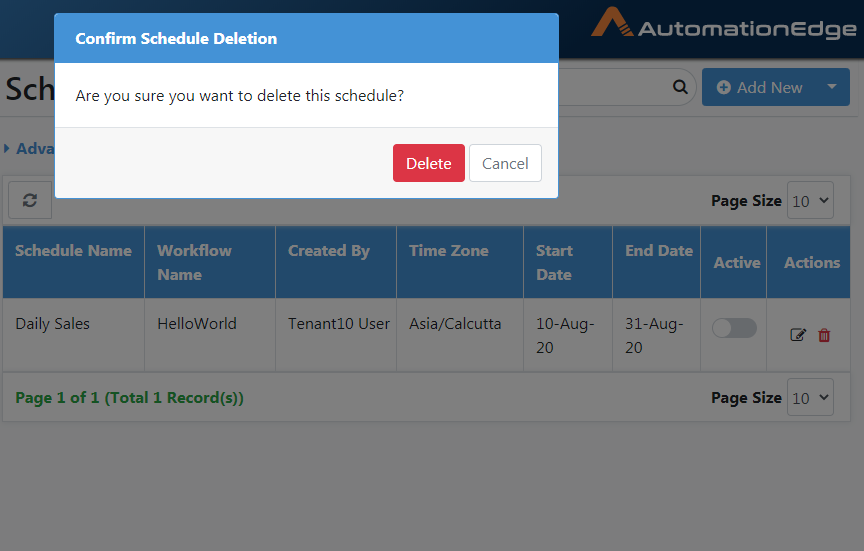
Figure 6.111: Delete Schedule
- Schedule Deleted successfully message appears.
View upcoming fire times
Following are the steps to view upcoming fire times.
-
Navigate to Workflows🡪Scheduler menu.
-
Click on the View upcoming fire times icon.
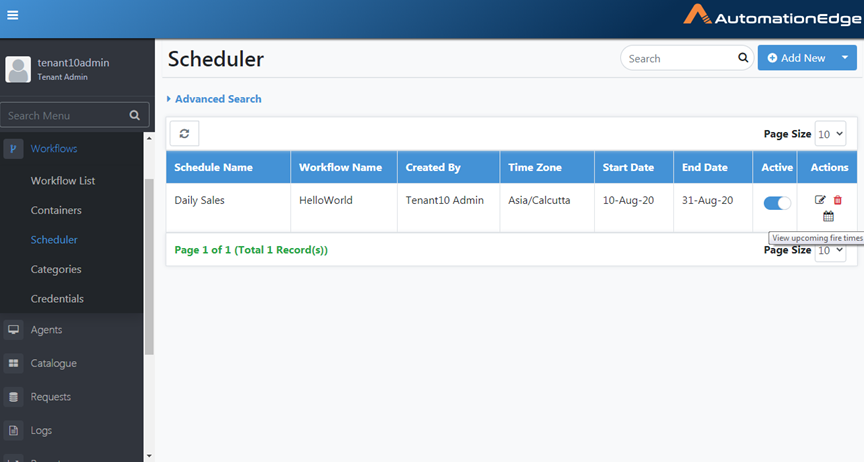
Figure 6.112: Upcoming Fire times icon
- The upcoming fire times are displayed as seen below. Click Show More.

Figure 6.113: View Upcoming Fire Times
-
On click, the Show More fire times are displayed as below.
-
You may also click on Trigger Count to change the number of schedules triggered when you click 'View Upcoming fire times' or click theShow More button.
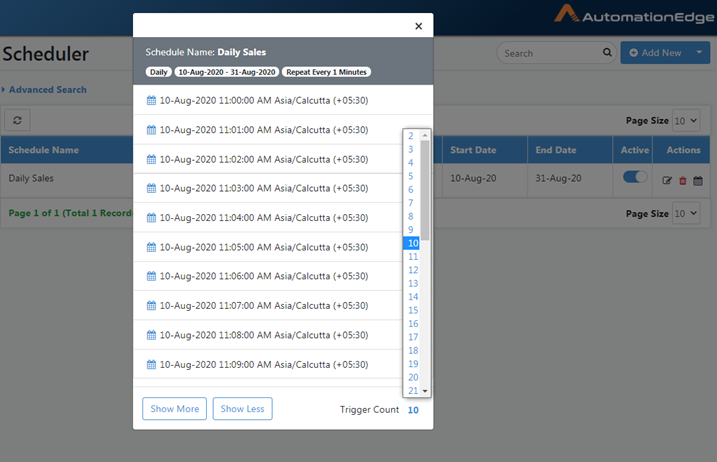
Figure 6.114: See or Trigger more schedules on Scheduler list
- The description of View upcoming fire times was discussed.
Scheduler: Transfer Schedules
This section describes how to transfer the ownership of schedules.
A user deletion could first delete all its artifacts, including schedules. However, there might be cases when the schedules are still valid, and there is a need to retain them even after user deletion. Use the Transfer Schedules feature to transfer schedules before user deletion.
Who can transfer ownership of schedules
Only Admins have access to Schedule Ownership Transfer.
Transfer ownership of any user's (including itself) schedule to any other user who has WRITE access to the scheduled workflow. Ownership transfer won't be available if the target user does not have WRITE access to the scheduled workflow.
Table 6.18: Transfer ownership of schedules Use Cases
| User Case | Conditions | UI | API |
|---|---|---|---|
| Schedule Transfer is invoked | Target User has Write access to Scheduled Workflows | Success Message will be displayed | 200 Ok will be returned |
| Schedule Transfer is invoked | Target User does not have Write access to Scheduled Workflows | Not possible through UI | API will return error and no schedules will be transferred. |
| Schedule Transfer is invoked | Any User other than Admin | Not possible through UI | API will throw Access denied error |
Steps to transfer ownership of schedules
Following are the steps to transfer ownership of schedules,
-
Navigate to the Workflow menu🡪Scheduler menu.
-
Click the Drop down Arrow next to the Transfer schedule button.
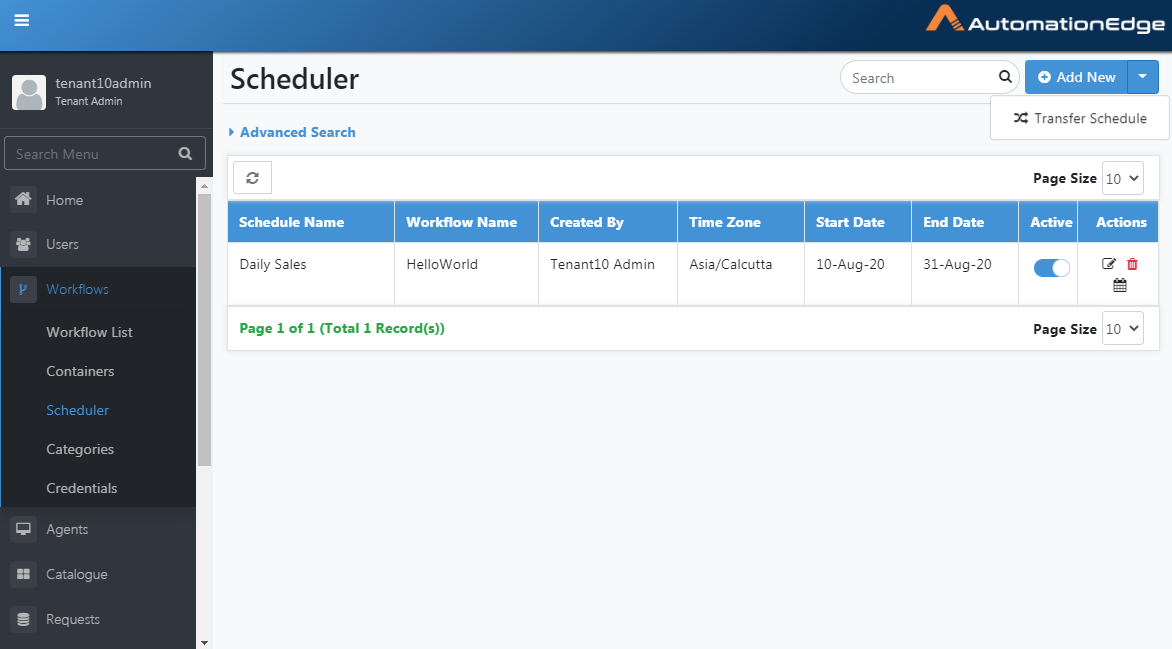
Figure 6.115: Transfer Schedule
- On the Transfer Schedule page, Select Owner to transfer its schedules.
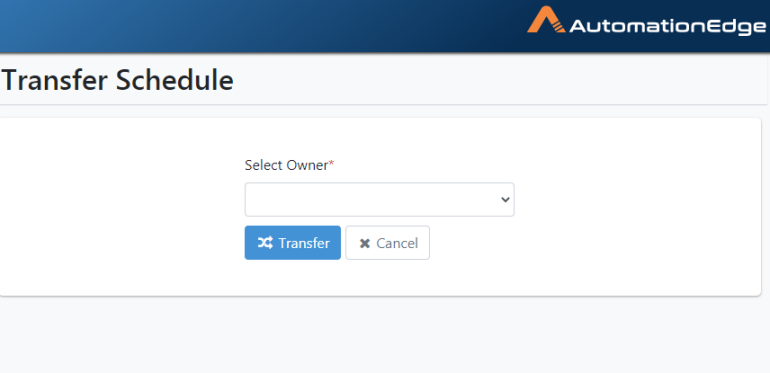
Figure 6.116: Select Schedule Owner
- Select the target user who will be the new owner of the schedules from the Transfer to drop-down list.
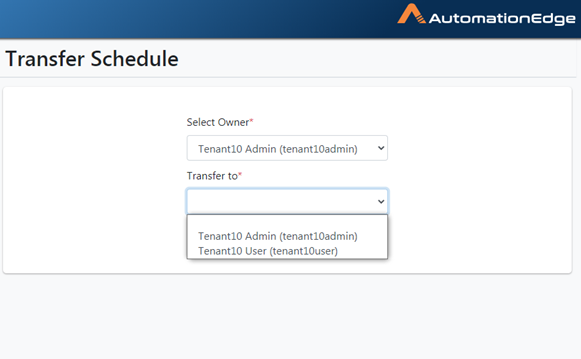
Figure 6.117: Select Target Owner
- Select the Schedules to transfer. The target user must have WRITE access to the underlying workflow of the schedule. In this case, tenant10user does not have access to the Daily Sales schedule workflow, so the Transfer schedule feature does not enable it for transfer.

Figure 6.118: Schedule List
- If the user does not have permissions to the underlying workflow of the Schedule is not highlighted. If you Search the Schedules box, you get a message in red still asking you to Select Schedules to Transfer.
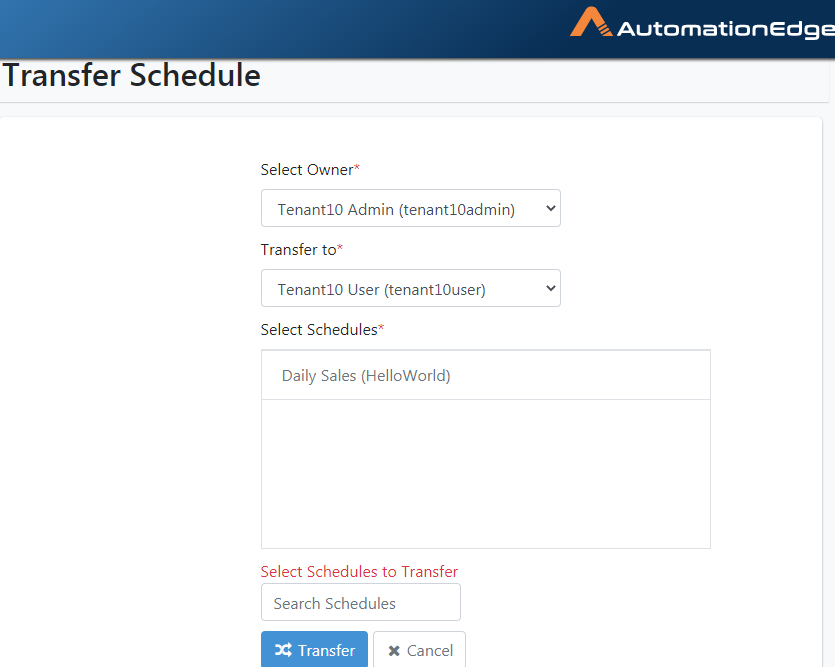
Figure 6.119: Target user does not have permission to underlying Workflow
- Once the target user has the write permissions to the Schedule's underlying workflow, the schedule is enabled and ready for transfer. Click Transfer.
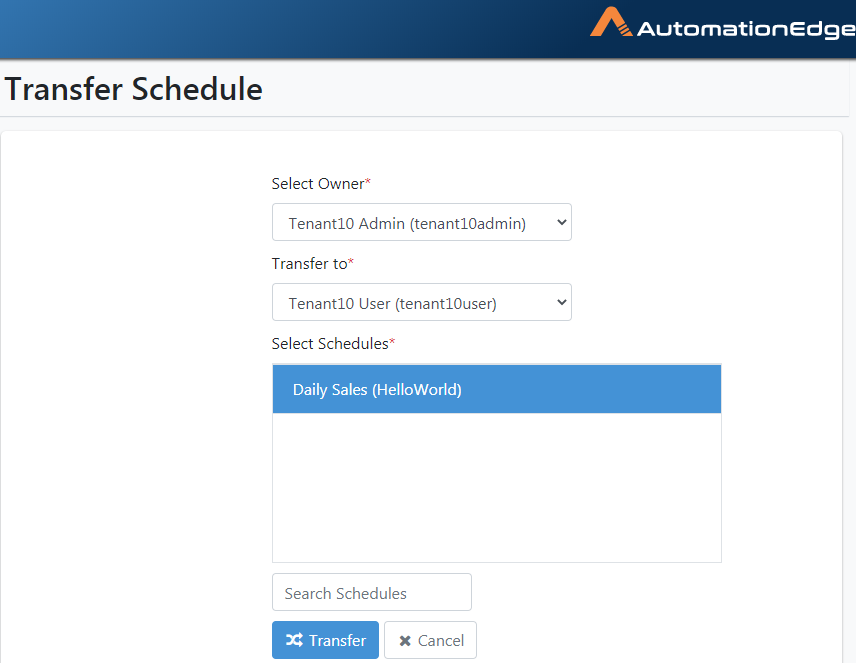
Figure 6.120: Select Schedule for which Target Owner has permissions
- On successful Transfer of the Schedules, it displays a success message.
Scheduler: Bulk Action
You can enable or disable schedules in bulk, if required.
Following are the steps to perform bulk action on the schedule:
-
Navigate to Workflows🡪Scheduler menu.
-
Click the dropdown next to Add New. The menu appears.
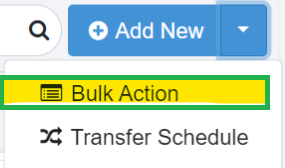
- Click Bulk Action. The Bulk Action on Schedules dialog appears.
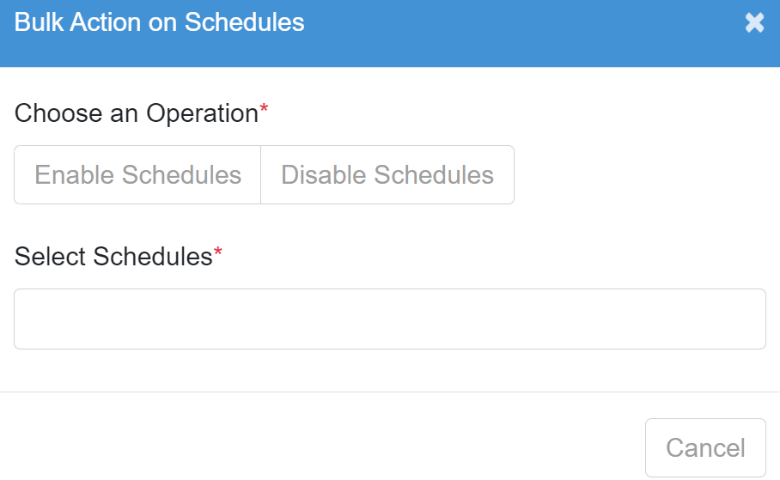
- Click Enable Schedules or Disable Schedules tab. In Select Schedules, enter the name of schedules you want to enable or disable.
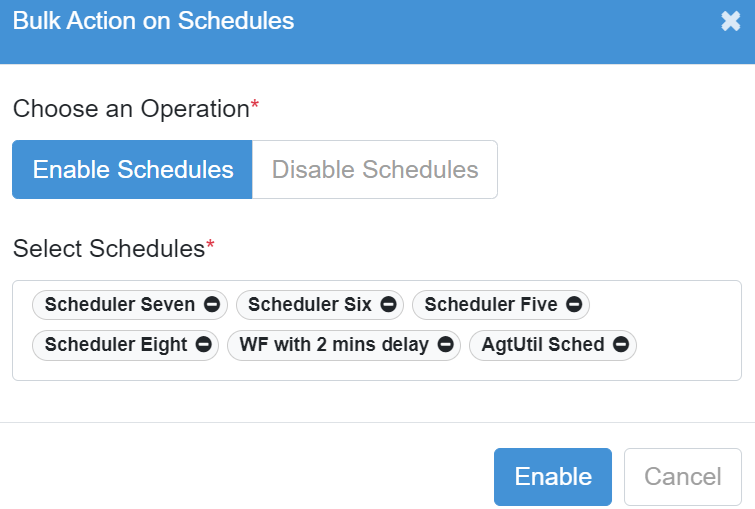
- Click Enable or Disable. The selected schedules are enabled or disabled.
Scheduler: Features/Permissions for other users
Table 6.19: Scheduler Features
| Feature/Role | Admin | Workflow Administrator | User Administrator | Tenant User | Activity Monitor |
|---|---|---|---|---|---|
| Scheduler:Add/Activate/Edit/Delete | ✔ | ✔ | - | ✔ | - |
*Tenant users can use the AutomationEdge features depending on Read, Write or Execute permissions granted to them on workflows.