Get Started
In the chapter, you will learn about logging on to AE server, modifying the default password, and understanding the user interface (UI). In addition, the chapter includes a brief overview of the AE user interface, which will help you work with AE with ease.
The chapter includes the following topics:
-
Change the password: Changing the password is mandatory.
- Reset forgotten password: Use if you forget the password.
Log on to AutomationEdge
You can log on to AutomationEdge server in any one of the following two ways:
If you are logging into AE for the first time, then you must change the default password to ensure security of the account.
Sign-in as AutomationEdge user
Log on to AutomationEdge server using your username and password.
To log on to the AutomationEdge:
-
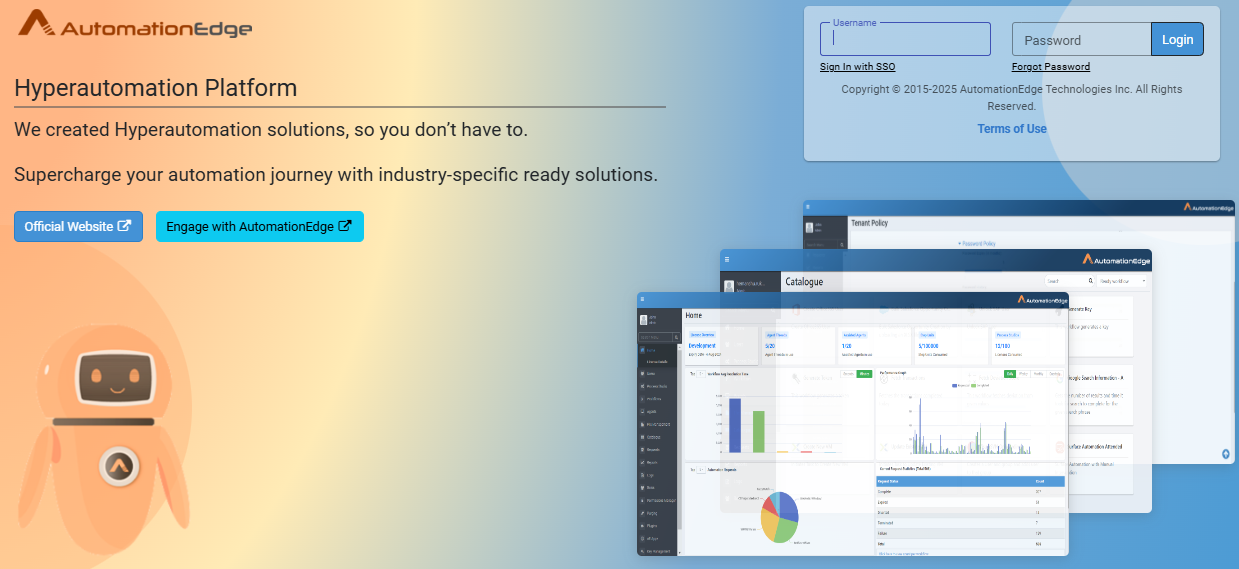
In the browser’s address bar, enter the AutomationEdge URL. For example, http://localhost:8080/aeui. The AutomationEdge login page appears.
 note
noteYou will receive the username and password on your email address, if the System Administrator has configured the email settings and selected the Send verification link over email checkbox in the Add New User page. For details about email configuration and adding new users, see the System Administrator’s guide.
-
Enter the following field details:
Field name Description Username Enter the name of the user with which you want to log on to the application. Password Enter the password to log on to the application. noteIf the captcha property is enabled, that is, set to true in the aeui-config.properties file, then the captcha text appears on the login and forgot password pages. For more details, see the AutomationEdge Installation guide.
# This key is used to enable Captcha for UI.
If Value is true then Captcha will be enabled otherwise captcha is disabled.
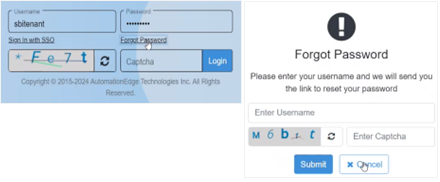
enableCaptcha = falseEnter the captcha text along with the username and password, as shown in the following screenshot:
-
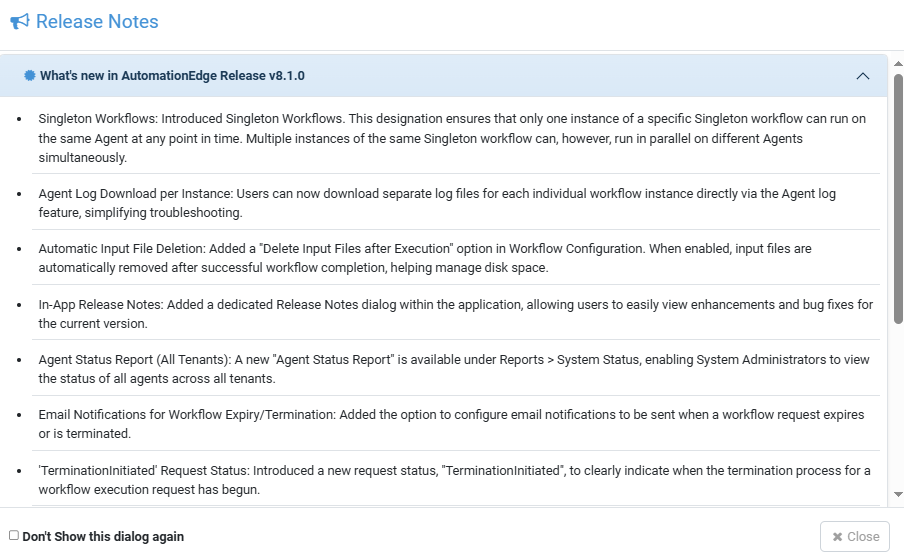
Click Login. The Release Notes dialog appears.
 note
note-
To dismiss the Release Notes dialog, click Close.
-
The dialog appears each time you log on to AE UI. However, if you select the Don't show this dialog again checkbox, then the dialog will not appear when you log on again.
After you select the checkbox, when you again log on to the AE UI you will see the Home page. -
To view the dialog again, select What's New in v<current release> in User profile.
-
Sign-in with Single Sign-On (SSO)
If SSO is configured and your username is linked to an Identity Provider user, then you can sign in to AutomationEdge using the SSO link on the login page.
To better understand the SSO login process, the details are explained using Okta as the Identity Provider.
AutomationEdge also supports SSO with other Identity Providers, such as Keycloak and ADFS. For details about Identity Provider setups, see Appendix: SSO Identity Providers.
To sign-in with SSO link:
- On the login page, click Sign In with SSO. The Organization Code dialog appears.
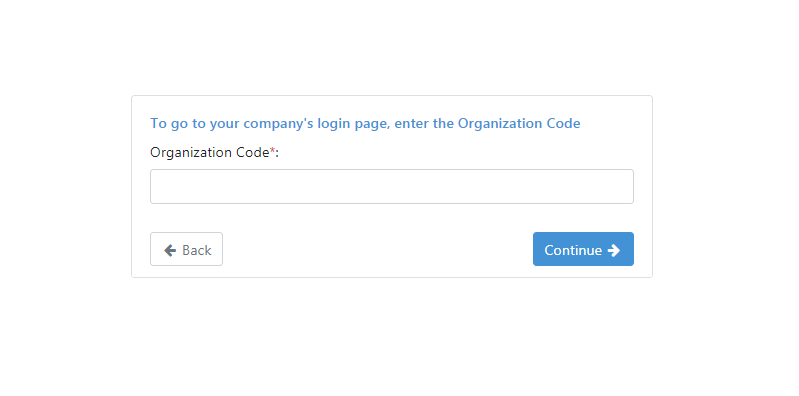
- In Organization Code, enter your organization code, and then click Continue. The Identity Provider login page appears. For example, the Okta login page.
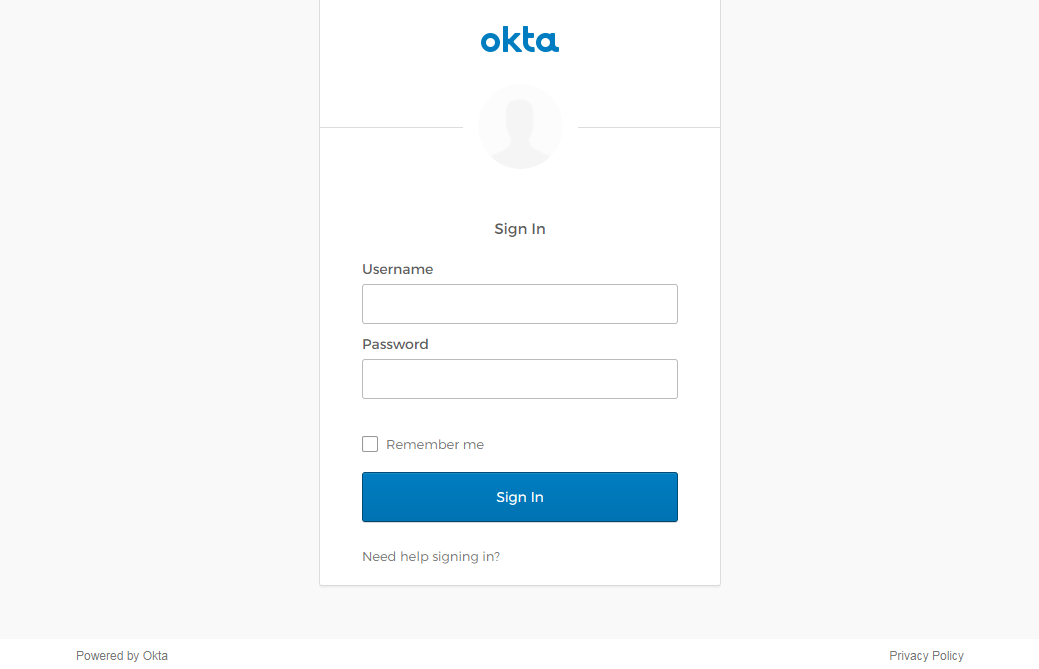
-
On the login page, enter the Identity Provider username and password linked with the AE SSO user, and then click Sign In. You will see the Release Notes dialog.
noteEach time you log on to AutomationEdge, you will see the Release Notes dialog. However, if you select the Don’t show this dialog again checkbox, then the dialog will not appear, and you will see the Home page instead.
Change the password
If you are logging on to the application for the first time, then you will be prompted to change the password. Changing password is mandatory for enhancing the security of the user account.
To change the password:
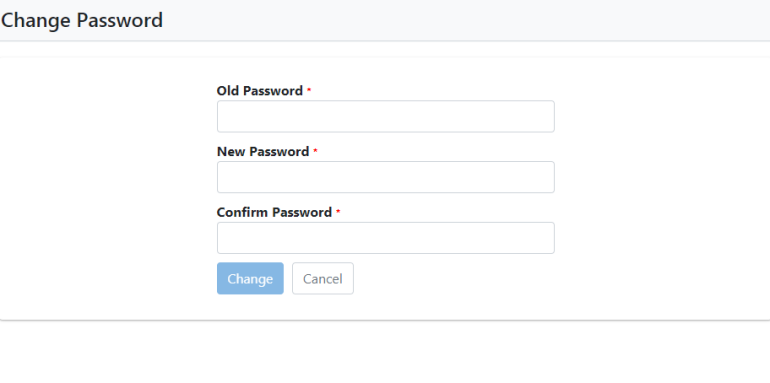
- Sign in to AE for the first time. The Change Password dialog appears.
-
Enter the following field details:
* indicates mandatory fields.Field name Description Old Password* Enter the current password. New Password* Enter a new and unique password.
NOTES: To set a strong new password ensure the following:
- Length of the password is between 6-20 characters and has at least one of each of the following:
- upper case letter
- lower case letter
- digit
- special character from @, #, _, $, !, &
You will see an error message if your new password matches the previous password.
- You can modify the password settings through Settings → Configurations → Password Policy. For details, see Password Policy section in Modify Admin policies.Confirm Password* Reenter the new password. -
Click Change. The new password is saved.
noteAfter setting the new password, you will be logged out of the application and will need to re-login. After re-logging, the Security Questions page appears.
You can set the questions or skip setting. For details, see Set Security Questions.
Reset forgotten password
You can reset the password using the Forgot Password link. However, you cannot reset the password if you have not set the security questions.
You can reset the password in the following scenarios:
- If you have forgotten the password.
Or
- If the password is breached, then for security reasons you need to reset the password.
To reset a forgotten password:
- On the login page, click the Forgot Password link. The Forgot Password dialog appears.
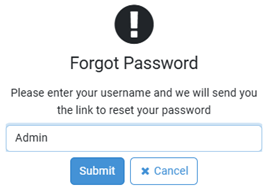
-
In the username box, provide the name of the user, and then click Submit. The user will receive a link to reset the password.
-
Click the link. The Reset your password dialog appears.
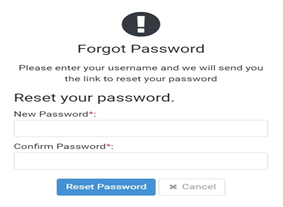
-
Enter the password in the New Password and Confirm Password box, and then click Reset Password. The new password is saved.
Understand the user interface (UI)
The topic provides an overview of the AE user interface. Understanding the UI will help you in navigating through the application.
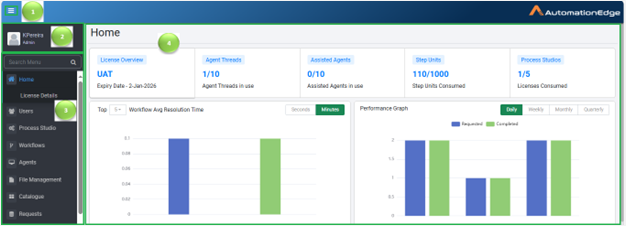
| Label | Interface | Usage |
|---|---|---|
| Toggle navigation menu | Toggle the navigation menu, that is, hide or unhide the menu. | |
| User profile menu | View login details and user profile and change user password. | |
| Navigation menu | Search for the navigation menu in the Search Menu box. Click each menu option to work with each menu. | |
| Workspace | Perform various actions depending on the selected menu. |
Toggle navigation menu
Click ![]() to hide or unhide the navigation menu.
to hide or unhide the navigation menu.
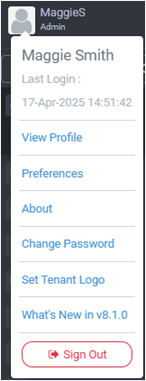
User profile
After you sign in to AE UI, click the username and view your sign in details the user profile, the application details. You can also change your password.
User sign in details: You can view the details, such as username, user role, and the last login details that includes, date and time.
View Profile
You can view the user profile.
To view the user profile:
-
Click the User Icon on the top left corner of the AE UI page. The menu appears.
-
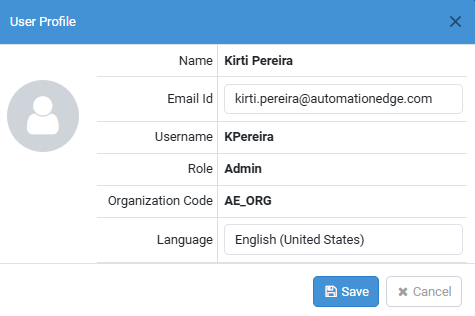
In the menu, click View Profile. The User Profile dialog appears.
-
Modify the following fields, if required:
Email Id: Enter the email address.
Language: Select the language for localization, if required. Else, the browser language settings are applied, by default.
noteOrganization Code refers to the Tenant.
Preferences
User preferences help create personalized, efficient, and user-friendly experiences with respect to select settings in AutomationEdge UI.
To set user preferences:
-
Click the User Icon on the top left corner of the AE UI page. The menu appears.
-
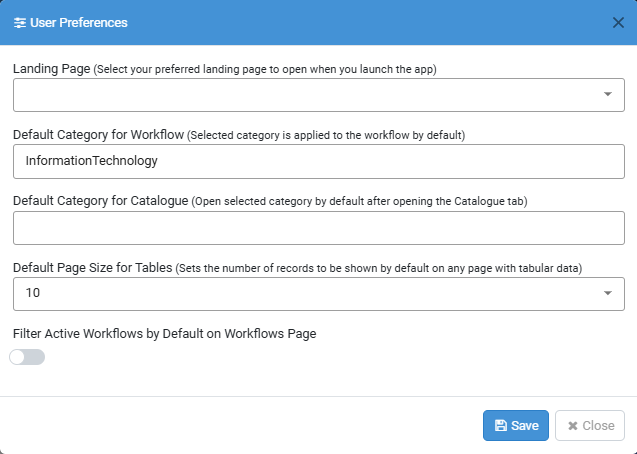
In the menu, click Preferences. The User Preferences dialog appears.
-
Select the following field details:
-
Landing Page: Select the preferred landing page that will open when you log on to AE.
-
Default Category for Workflow: Select the category that you want to apply as the default category to the workflow.
The selected category is applied to the workflows you want to publish through the Process Studio. For details, see Process Studio User’s Guide 🡪 Publish project through Create.
-
Default Category for Catalogue: Select the category that should open by default, when you click the Catalogue tab.
-
Default Page Size for Tables: Select the number of records you want to view on any page with tabular data.
-
Filter Active Workflows by Default on Workflows Page: Toggle the switch to display only active workflows on the Workflows page.
tipWhen you publish the workflow from Process Studio, it is in an inactive state. To view this workflow on the Workflows page, click
 . Both active and inactive workflows will be visible on the Workflows page.
 -
-
Click Save. The details are saved.
About
You can view the AE application details.
To view the application details:
-
Click the User Icon on the top left corner of the AE UI page. The menu appears.
-
In the menu, click About. The About dialog appears.

-
View the following details:
-
UI Version: The AE user interface version.
-
Server Version: The AE server version.
-
Supported Framework Version: The current Process Studio framework.
-
Change Password
You can modify the password using the Change Password option.
To modify the password:
-
Click the User Icon on the top left corner of the AE UI page. The menu appears.
-
In the menu, click Change Password. The Change Password dialog appears.
-
In the fields, enter the old and new password, and then click Change. The new password is saved.
Set Tenant Logo
You can have your branding by setting a logo at the Tenant level. The logo appears on the top left corner on AutomationEdge UI.
Only the Admin can set the tenant logo.
To set the tenant logo:
-
Click the User Icon on the top left corner of the AE UI page. The menu appears.
-
In the menu, click Set Tenant Logo. The Set Tenant Logo dialog appears.

-
Click Choose File, and then select the image that you want to set as the tenant logo. The Preview view appears.
-
Click Save. The selected image appears as the logo in top left side of the AE UI.
note-
Click Reset, if you want to change the logo image.
OR
-
Click Close, if you want to close the dialog without saving the changes.
-
The Remove Tenant Logo option appears only if you have set the tenant logo.
-
What's new in current version
Click to reopen the Release Notes dialog.
Sign Out
Click to log out of the application.
Navigation menu
The menu allows us to navigate to different features.
| Menu | Menu options | Description |
|---|---|---|
| Search | Search | Use to search menu and sub-menu items. |
| Home | License Details | Use to view the details of the license, such as license type, start date, expiry date, and so on. |
| Users | User List | Use to add users with various roles, such as Admin, User Admin, Workflow Admin, Agent Admin, Activity Monitor, and User. Or Use to upload new users to AE. |
| User Groups | Use to add new user groups. | |
| Process Studio | Process Studio | Use to register the Process Studio and to apply the Process Studio license to users. |
| Workflows | Workflow List | Use to add new workflow, search, edit, delete, activate, and deactivate workflow. |
| Shared | Use to share workflows with users of a tenant. Sharing workflows, allows other users of the tenant to reuse the workflows in their projects. | |
| Inspection | Use to configure rules for workflows. | |
| Scheduler | Use to add, search, edit, delete, activate, deactivate, and transfer workflow schedules. | |
| Categories | Use to create workflow categories and move workflows to different categories. | |
| Credentials | Use to create, edit, and delete credential pools and credentials. You can also move credentials to credential pools. | |
| Holiday Calendar | Use to add a new calendar, update, renew, copy, or delete the calendar. | |
| ROI Configuration | Use to provide measurement metrics at two levels, for the cost and time saved, had the task been performed manually, instead of using automation. The information is used to generate Dashboard reports. | |
| Agents | Agent List | Use to download agents. |
| Workflow Assignment | Use to assign workflows to an agent. | |
| IP Whitelisting | Use to allow agents only from certain IP address to talk to the AE Server. | |
| Agent Settings | Use to enable a setting to include JRE with agent. | |
| File Management | Files | Use to manage workflow files, centrally. |
| Allowed File Types | Use to add file types that you can upload to the AE server. | |
| Catalogue | Catalogue | Use to view and submit workflow for execution. |
| Requests | Requests | Use to view all the requests submitted by the users and the results. |
| Reports | Dashboards | Use to view multiple reports. |
| Datasource | Use to create connect to an external database to fetch data for Custom Reports. | |
| Templates | Use to define Templates by specifying a database query, the required attributes and format for generating reports. | |
| Email Reports | Use to view reports on dashboards and download as PDF or CSV. | |
| Logs | Agent Logs | Use to download and view agent logs. |
| Audit Logs | Use to download and view audit logs. | |
| Roles | Roles | Use to add new custom defined roles and view system defined roles. |
| Permissions Manager | Workflow Permissions | Use to assign workflow permissions to users or user groups. |
| Credential Permissions | Use to assign credential or credential pool permissions to users or user groups. | |
| Report Permissions | Use to assign report permissions to users and / or user groups to various dashboard and custom reports available in AE. | |
| Purging | Purging Configuration | Use to configure the purge policy and schedules. |
| Archived | Use to view the purged records that are archived. | |
| Plugins | Plugins | Use to view the plugin details. |
| AE Apps | Registry | Use to register an AE app. |
| App Catalogue | Use to view and access the AE app. | |
| Key Management | Tenant Key | Use to manage tenant specific key. |
| Settings | Email Configuration | Use to setup SMTP server or Exchange Cloud configuration for emails. |
| LDAP | Use to setup LDAP server configuration for emails. | |
| Email Notification | Use to enable email notification for users. | |
| Configurations | Use to view or set the tenant login, password, and login session control policies. | |
| Vault Connections | Use to set the vault connections and retrieve the credentials stored in the vault. | |
| Proxy Settings | Use to set proxy settings at tenant or agent or Process Studio level. | |
| Single Sign-On | Use to configure single sign-on. | |
| Tenant Message | Use to set a tenant message. |
Workspace
The area where you can work with various features.