Work with Agent List: Agent Controllers
Use the Agent Controllers feature to act as a load balancer, as a proper Agent assignment to Controllers enables you to balance the load on Agents. The assignment also provides tighter control over Agents and enhances security by restricting Agent access to the designated Controllers.
In the chapter you will learn about how to download Controllers, assign Agents, and start and stop Agent Controllers. In addition, you will learn about Agent Controller setups and configurations for starting and stopping Controlled Agents.
To view the Controller Agents tab on AE UI, set ae.feature.use-agent-controller.enabled= true in AutomationEdge\aehome\conf\ae.properties file.
Download and start Agent Controller
Download Agent Controller before assigning Agents.
To download agent controller:
-
In the menu, click Agents → Agent List. The Agents page appears.
-
On the page, click Agent Controllers tab. The Agent Controllers page appears.
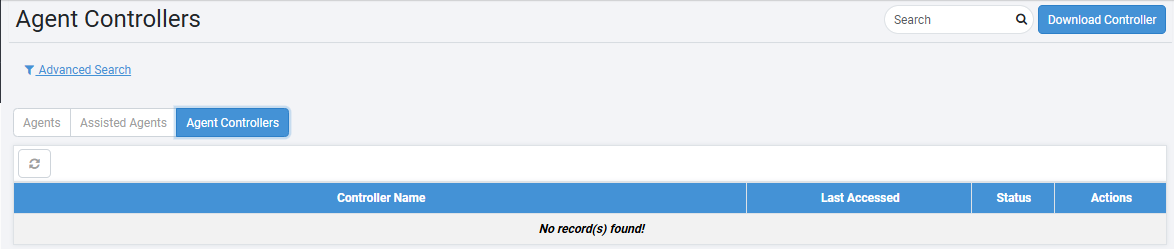
-
On the page, click Download Controller. The Download Controller dialog appears.

-
Enter the field details, as required. For details, see Work with Agent List: Agents.
To start the Agent Controller:
Run startup.bat from ae_agent/bin directory. The Agent Controller starts.
To stop the Agent Controller:
-
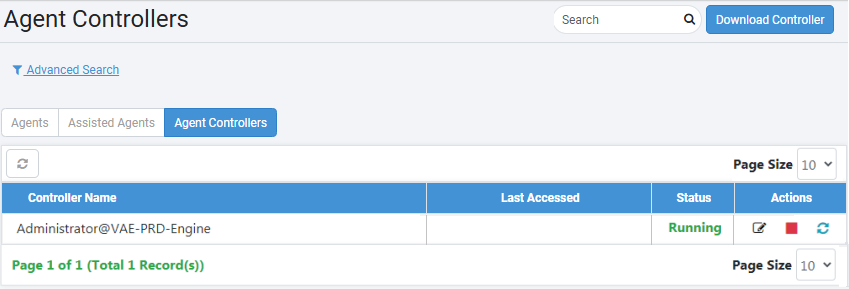
In the Actions column, click
 . The Controller Stop Agent dialog appears.
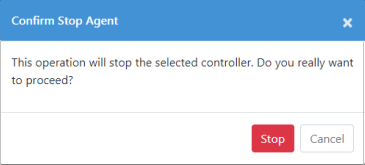
-
Click Stop. The Controller stops and the status changes to Stopped.

To delete the Controller, click ![]() , and then click Delete in the Confirm delete dialog. The Controller is deleted.
, and then click Delete in the Confirm delete dialog. The Controller is deleted.
To edit the Agent Controller details:
-
In the Actions column, click
 next to the Controller whose details you want to modify. The Edit Controller dialog appears.
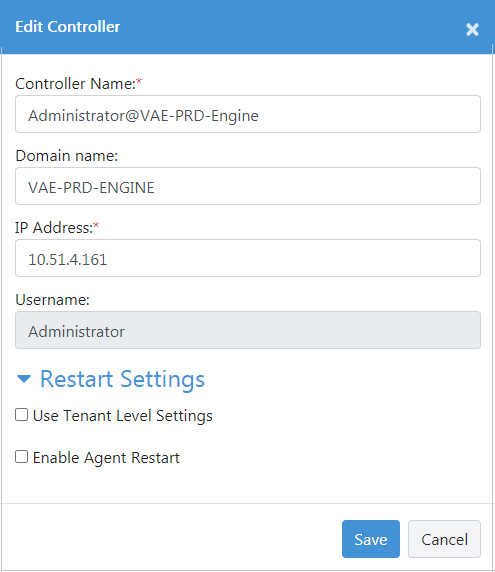
-
In the dialog, edit the Agent Controller Agent Name, Domain name, or IP Address, as required, and then click Save. The modified details are saved.
Agent Controller Setups
-
Agents are installed and registered on all agent VMs.
-
Click Start🡪All Programs🡪Startup🡪Right Click Open Startup. Copy the shortcut of the Agents bat file (remoteStartup.bat) to the startup of each Agent machine.
-
Mark at least one agent as Agent Controller. For all the other Agents, enter the Windows password using the Agent Edit dialog.
In case your Security policy does not allow the use of connection details for terminal services due to Windows policy settings, you may need additional settings. For details, see **Windows Security policies for Agent Controller.
- By default, Windows shows a Certificate confirmation dialog for every new RDP session. Make sure to suppress this dialog on the controller machine.
After the setup, click the Start button against Agent ![]() to invoke RDP on the machine and start the Agent.
to invoke RDP on the machine and start the Agent.
For Agent controllers, the time the password is stored to connect to the required Agent machine is configurable.
The <Agent_Controller_Home>/conf/>application.properties file has a property "agent.rdp.password.cleanup.duration.seconds". The default value is 15 seconds.
To save the password for a longer duration while establishing connectivity set the property to a higher value.
However, log off any previous RDP sessions before the Controller can attempt to start the Agent. Generally, manage Agent machines with the Agent Controller only. Otherwise, any manual RDP session to the Agent's machine will also start the Agent.
Click ![]() against the running Agent, the Agent stops, and the RDP session logs out.
against the running Agent, the Agent stops, and the RDP session logs out.
Assign Administrator privileges for running workflows
If a workflow running on an Agent machine needs administrator access, run the Agent as administrator.
To run agent as Administrator:
-
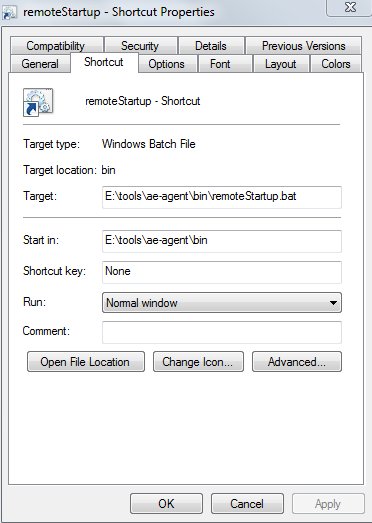
Right click on the remoteStartup.bat shortcut, and then click Properties. The remoteStartup - Shortcut Properties window appears.

-
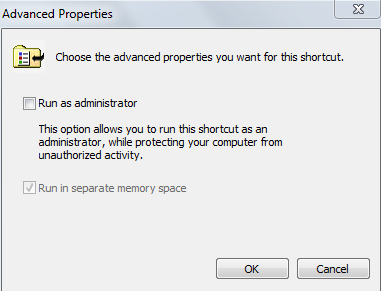
In the Shortcut tab, click Advanced. Advanced Properties details appear.
-
Select the Run as administrator checkbox. The shortcut can be run as an administrator.
Windows Security policies for Agent Controller
In case your Security policy does not allow the use of connection details for terminal services due to Windows policy settings, you may additionally need to configure the following settings:
On Controller Machine
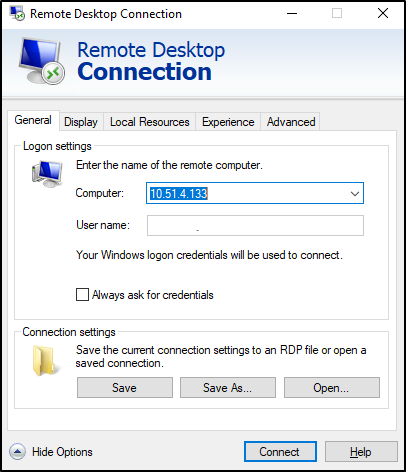
On the Remote Desktop Connection window, clear the Always ask for credentials checkbox.
We use a solution that uses Window Credential Manager to store the credentials for automatic RDP connection temporarily. To use stored passwords on the Controller VM, navigate to the following path under group policy:
Computer Configuration (gpedit.msc) -> Administrative Templates -> System -> Credential Delegation
Enable the following policies on the Controller Machine:
-
Allow delegating default credentials with NTLM-Only server authentication.
-
Allow Delegating Default credentials.
-
Allow Delegating saved credentials.
-
Allow Delegating saved credentials with NTLM-only server Authentication.
-
Run the regedit.exe tool
Find the registry key:
HKEY_CURRENT_USER\Software\Microsoft\Terminal Server Client
Create a DWORD value with the name: RemoteDesktop_SuppressWhenMinimized and set its value to 2
Find the registry key:
HKEY_CURRENT_USER\Software\Wow6432Node\Microsoft\Terminal Server Client
Create a DWORD value with the name RemoteDesktop_SuppressWhenMinimized and set its value to 2.
Find the registry key:
HKEY_LOCAL_MACHINE\Software\Microsoft\Terminal Server Client.
Create a DWORD value with the name: RemoteDesktop_SuppressWhenMinimized and set its value to 2.
Find the registry key:
HKEY_LOCAL_MACHINE\Software\Wow6432Node\Microsoft\Terminal Server Client
Create a DWORD value with the name: RemoteDesktop_SuppressWhenMinimized and set its value to 2.
-
Close the regedit.exe tool.
On Agent machine
Disable the Always prompt for password upon connection policy on the Agent Machine so that the Controller can automatically connect to agent Machine.
To disable the policy, go to the following path under the group policy:
Computer Configuration (gpedit.msc) -> Administrative Templates -> Windows Components -> Remote Desktop Services -> Remote Desktop Session Host -> Security
On the Agent VMs disable the policy: Always prompt for password upon connection
If you are still unable to create an RDP connection automatically, additionally, set the following registry entry:
**HKEY_LOCAL_MACHINE\SOFTWARE\Policies\Microsoft\WindowsNT\Terminal Services\DisablePasswordSaving = 0 **
Windows Remote Desktop policies for RDP enabled workflows
In the case of Is RDP enabled workflows, you may need to configure the following settings:
On Agent machine
- Idle timeout and Active Timeout
If enabled, idle timeout value has to match the max workflow execution time, found under group policy at:
Computer Configuration -> Administrative Templates -> Windows Components -< Remote Desktop Services -> Remote Desktop Session Host -> Session Time Limits
i. Set Time Limit for Active but idle Remote Desktop Service sessions.
ii. Set Time Limit for Active Remote Desktop Service sessions.
UI Configuration for starting or stopping Controlled Agents
Start AutomationEdge Agents from the respective Controller Agents to which they are assigned. For details, see Work with Controller assignments.
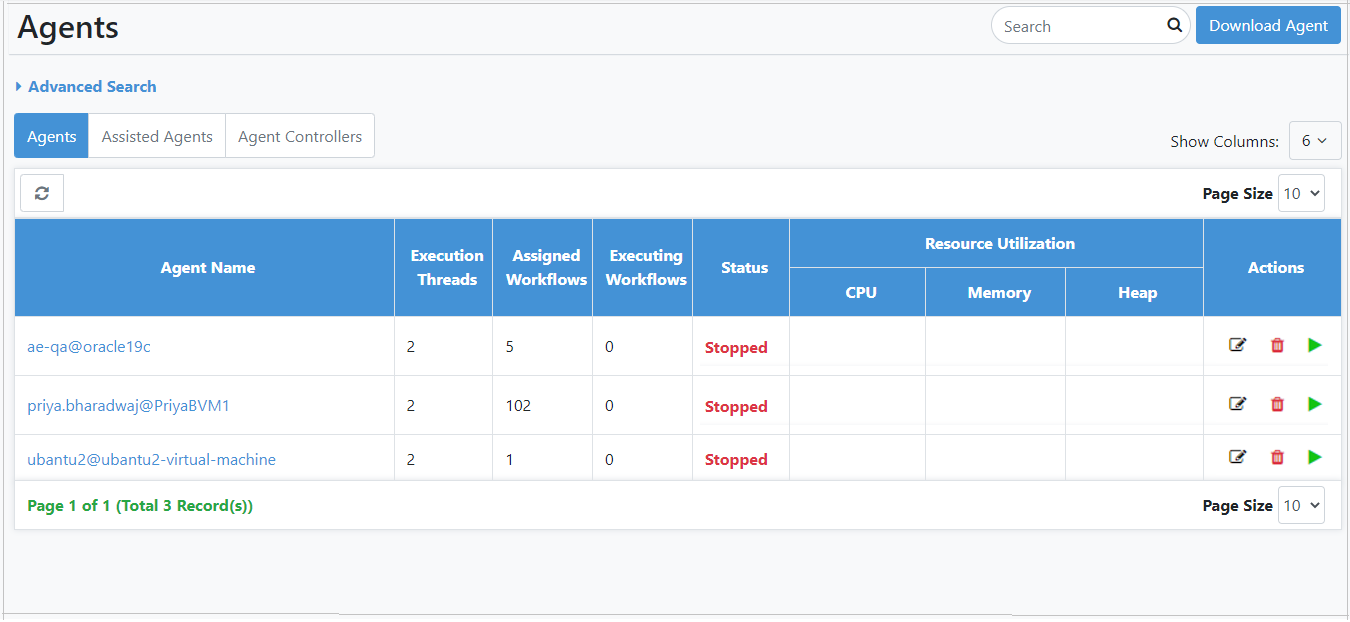
The Actions column on the Agents page has an icon to Start Agents, disabled by default. Assign Agents to one or more Controllers to enable the Start icon. Controllers can start Agents assigned to them.
For Agents assigned to more than one Controller, any idle Controller can start the Agent. Deleting an Agent Controller deletes all its Agent assignments.
To start Controlled Agents:
-
In the menu, click Agents 🡪 Agent List. The Agents page appears.
-
On the page, click Download Agent to download the agent. For details on how to download agents, see Download and start an agent.
-
Start the agent on your machine or Virtual Machine. The agent appears with the status Running in the agent list on the Agents page.
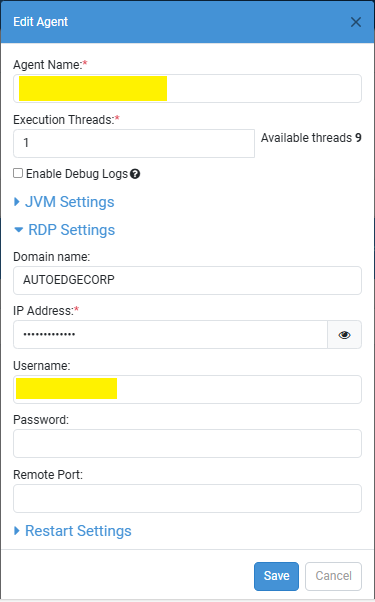
Note:For taking RDP and starting the Agent on the Controller machine, you need to edit the Agent and provide Agent machine credentials.
-
In the Actions column, click
. The Edit Agent dialog appears. -
In the RDP Settings section, enter the remote machine password for the user, and then click Save. The details are saved.
 Note:
Note:After the Agent machine details are saved and agent's state in Status column is Stopped:
- The options to Edit, Delete, and Start are available in the Actions column.
- The option to start is enabled (
 ).
).
-
Click
. The RDP of the Agent machine or VM is taken and the agent starts.Notes:-
When you start the agent, a message confirming that the start command is initiated for the agent appears.
-
While the agent is starting, the Start option is disabled (
 ).
).
-
-
When you start the agent for the first time, a Remote Desktop Connection dialog may appear requesting you to confirm the authenticity of the remote machine.
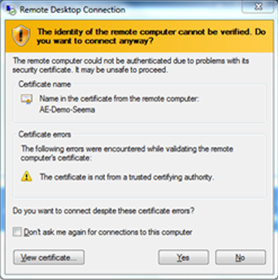
Select the Don't ask me again for connection to the computer checkbox, and then click Yes. The Controller Agent establishes Remote Desktop connection and RDP starts the remote machine. The Controlled Agent also starts on the machine.
Note:The
option is no longer available when the status of the agent is Running.
To stop Controlled Agents:
-
In the Actions column, click
. The Confirm Stop Agent dialog appears. -
Enter the reason for stopping the Agent, and then click Stop. The agent is stopped and status changes to Stopped.
- Though providing a reason for stopping an agent is Optional, to allow users to understand why an Agent was stopped, we recommend providing the reason before stopping the agent.
- To view the reason why an Agent was stopped, on the Agents page hover the mouse over the status of the selected Agent.
- When the running agent is stopped, the RDP session also logs out.
For details on how to assign controllers to agent OR agent to controllers, see Work with Controller Assignment.