Intune: Generate Credentials
This appendix walks you through Azure AD app registration, API permission setup, and client credential generation for the Intune plugin.
In this Appendix we will see how to generate client credentials and provide necessary permissions.
-
Login to https://portal.azure.com with email address and password (else register for a new account).
-
Click on Azure Active Directory from a column on the left side as below.

-
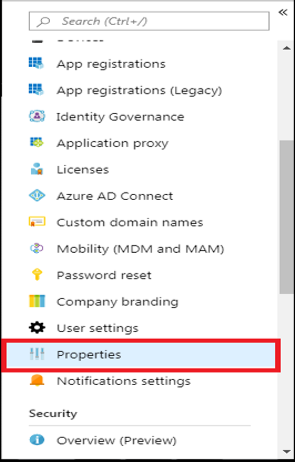
Search for properties.
-
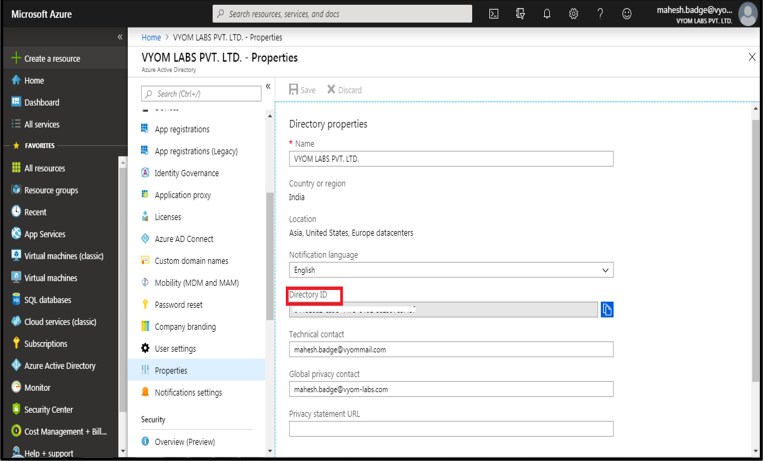
The Tenant ID required in the plugin is the ID mentioned under Directory ID. In case the ID is not available you may get Tenant ID as mentioned in step 8 below.
-
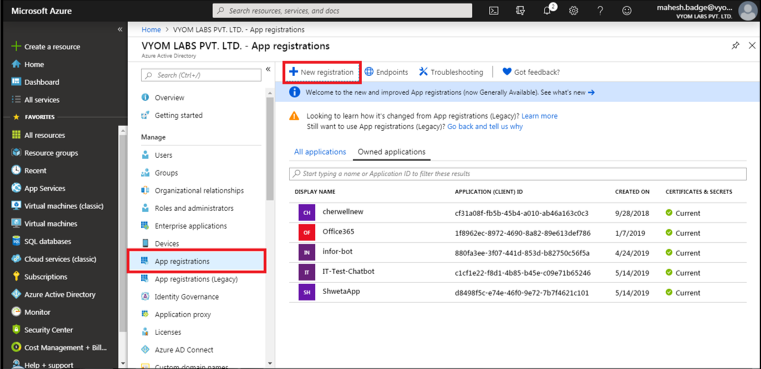
To get the Client ID, click on App registrations under Azure Active Directory.
-
Create a new App by clicking on New Registration.
-
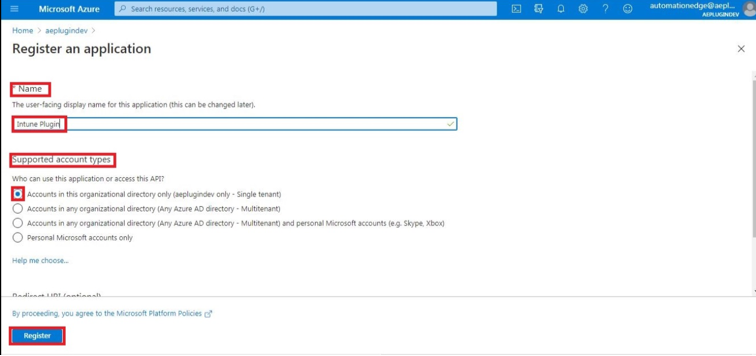
Enter the application name select account types and click on Register.
-
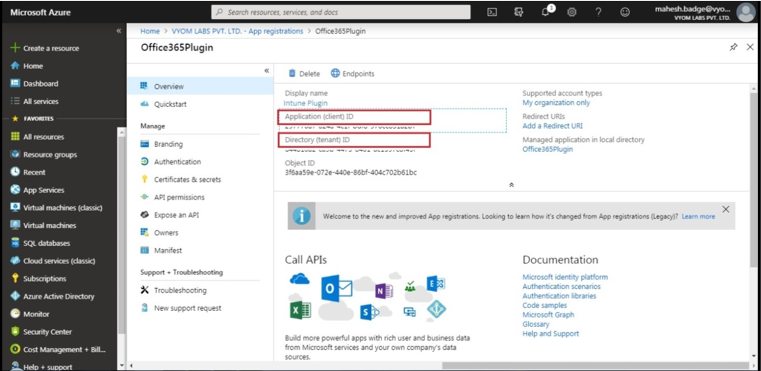
After clicking on Register, under Overview of the newly generated Application you can find the Application (client) ID/ Client ID. Also, you can find Directory (tenant) ID/Tenant ID below Client ID.
-
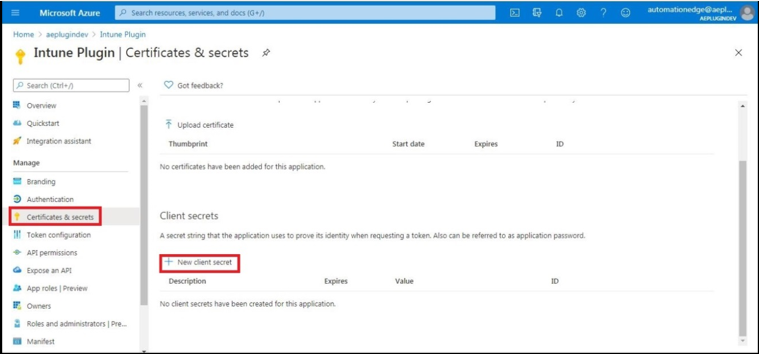
To generate client secret, click on the Certificates & Secrets and then click on + New Client Secret.
-
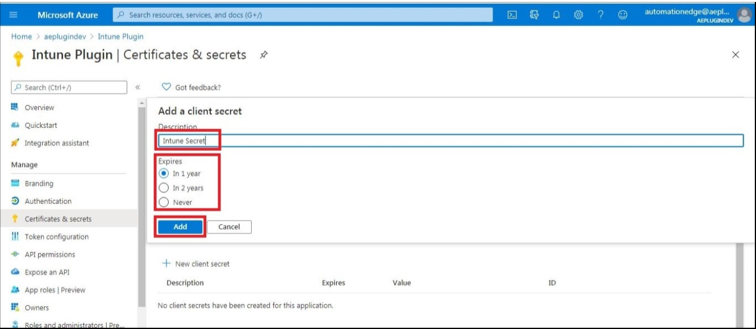
Now enter the Description, Expiry, and click on Add.
-
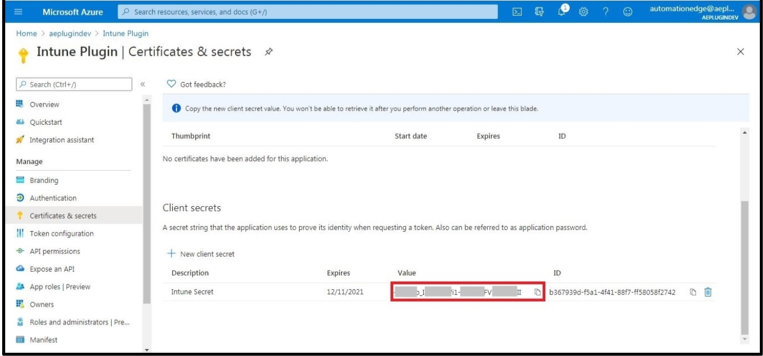
Copy the value of the client secret as it will be not visible the second time.
-
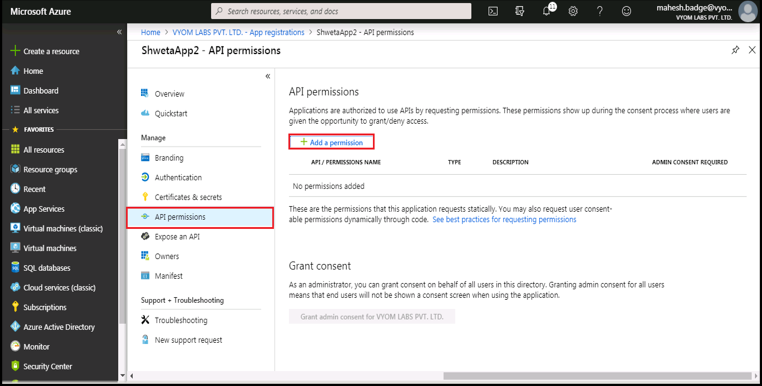
Click on API Permission and then click on Add Permission.
-
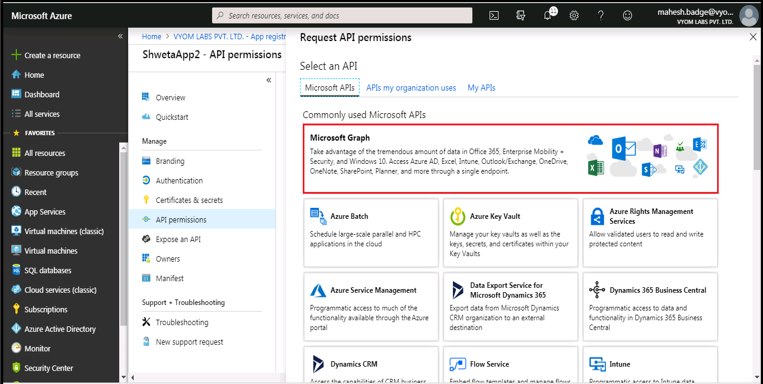
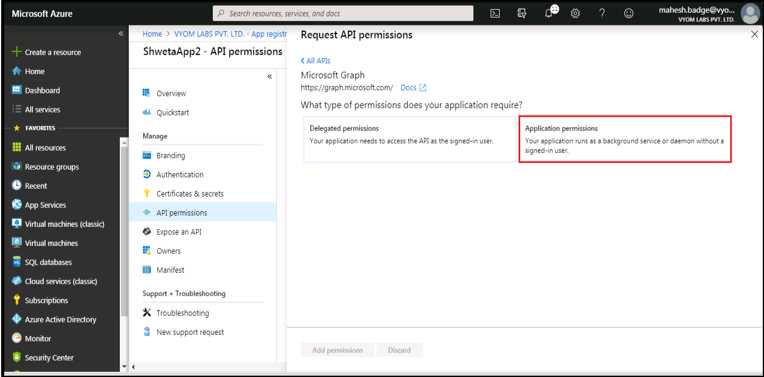
Click on Microsoft Graph, and then click on Application permissions.
-
Select Application permission.
-
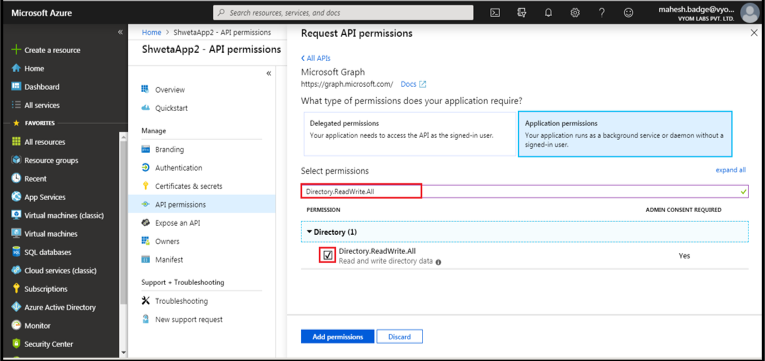
Search and select the required permission. Click on Add Permission.
-
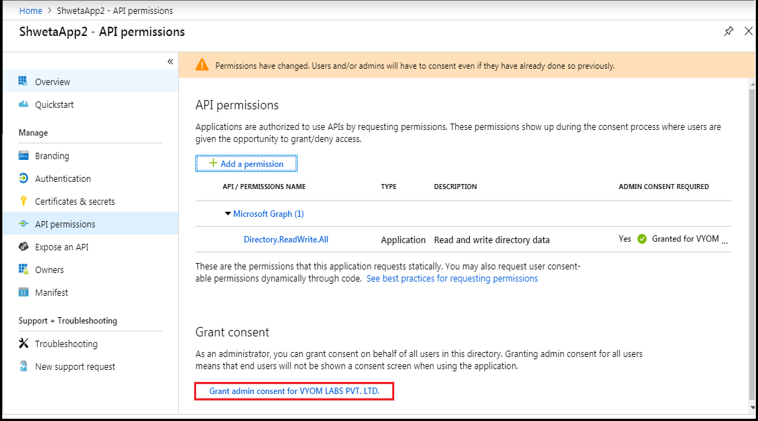
This will redirect back to API Permission. In the Grant Consent section, click "Grant admin consent for….".
-
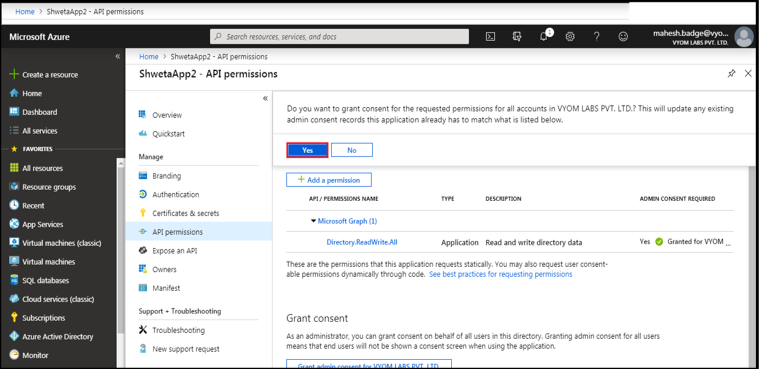
It will prompt for confirmation, click on Yes.
-
Similarly, we can assign the permissions required by Intune Plugins mentioned below:
- DeviceManagementManagedDevices.PrivilegedOperations.All
- DeviceManagementManagedDevices.ReadWrite.All