Okta(IDP) initiated SSO to AE using OpenID Connect
In the topic, we demonstrate setups in Okta and AutomationEdge for IDP initiated SSO for OpenID Connect.
Setups in Okta
In the section, you will learn about the setups in Okta.
To configure setups in Okta for IDP initiated SSO for OpenID Connect:
-
Log on to Okta. The Getting Started page appears.
-
Click the Applications tab -> Applications option. The Applications page appears.
-
On the page, click Add Application. Choose the Web tile and create a Web application, for example, My Web App.
-
Click Next. The Application Settings page appears.
-
On the page, configure the application settings. Add the following details:
- Application Name: for example, My Web App
- Login redirect URI: for example, the base URL for aeui in the form
https://{host}:{port}/aeui - Logout redirect URI: for example, the base URL for aeui in the form
https://{host}:{port}/aeui
Note:Login redirect URI and Logout redirect URI should be the same for AE.
-
Click Done. The Web application, My Web App appears.
-
Scroll down to the General Settings tab, and then click Edit next to the tab. Select all the checkboxes, as required.
Initiate login URI is important here; it is the Login redirect URI + /#/sso-login?orgCode=(Your TENANT orgCode).
For example,
https://127.0.0.1:8443/aeui/#/sso-login?orgCode=TENANTCLOUDImportantFor OIDC, you must register an additional redirect_uri:
http://localhost:2611/callback. -
Click Save. The changes are saved.
Note:At the end of the configuration, you will see an App Embed link. If you copy and paste this link in the browser, it will invoke IDP initiated SSO flow.
To add claim:
-
On My Web App, go to the Assignments tab. Search for users you want to assign to the application.
-
Assign the users and then click Save. The details are saved.
-
Click Go Back and on the page, click API -> Authorization Servers. The default link appears.
-
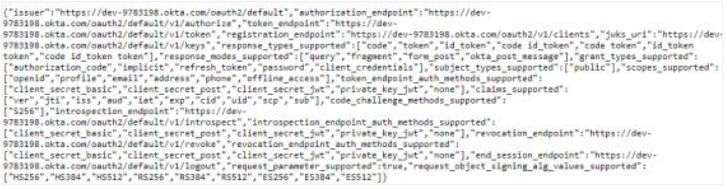
Click the default link and open the Settings page. Click the Metadata URI link. The Metadata opens in XML format.
-
Click on the Claims tab. Click Add Claim, enter a Name for the claim and configure the claim details.
The values expression for the list of claims used in AutomationEdge may change for different Identity Providers (IDP). The following table shows the claims for Okta IDP:
Name Values (case sensitive) uniqueId user.username firstName user.firstName lastName user.lastName emailAddress user.email orgCode {{OrgCode}}
uniqueId and orgCode are mandatory attributes. Therefore, you must enter a value for the attributes. You can also enter the firstName, lastName, and emailAddress for a complete profile view.
This is Okta Expression Language syntax to generate values derived from attributes in Universal Directory and app profiles. To validate an expression, use the Token Preview tab.
Setups on AutomationEdge and Single Sign-On
In the section you will learn about the AutomationEdge setups.
To configure setups in Okta for IDP initiated SSO for OpenID Connect:
-
You may import the contents of Metadata URI to set up Single Sign-On in AutomationEdge.
-
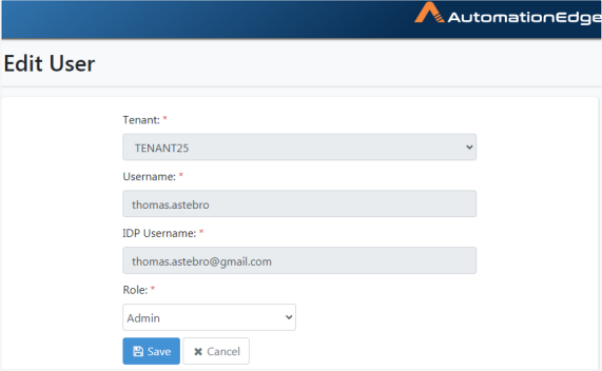
Create an SSO user in AutomationEdge mapping it to an IDP user with permissions on the IDP application.
-
In the Applications General tab, locate App Embed Link URL. Copy the URL.
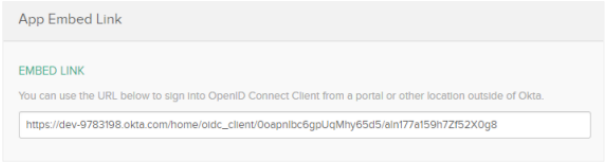
-
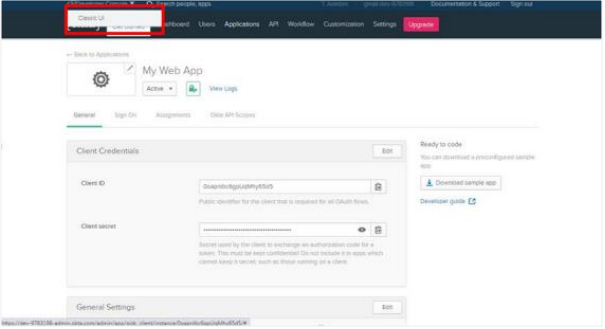
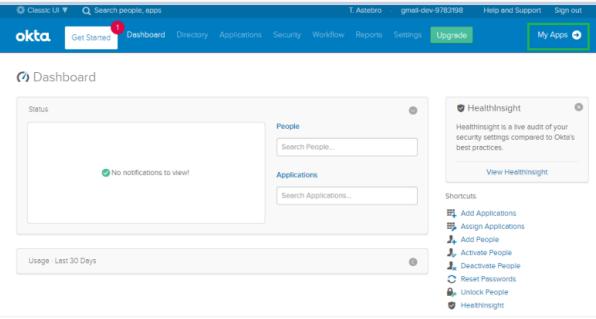
Type the App Embed URL* in the browser. You are redirected to AutomationEdge with IDP initiated SSO. Or Switch to Okta Classic UI view.
-
In the Okta Class UI view, click My Apps. Your app appears on the page.
-
Click on your application, for example, My Web App.

-
Click on the app. You will be taken to the AutomationEdge with IDP initiated SSO.