AE initiated SSO with Okta using SAML
Okta Identity Provider supports OpenID Connect and SAML protocols.
In the topic, we demonstrate configurations to set up AutomationEdge SSO with Okta using the SAML protocol. We will also showcase how to get the required parameters for AutomationEdge – Keycloak Single Sign-On Settings.
Get the following parameters from IDP configuration:
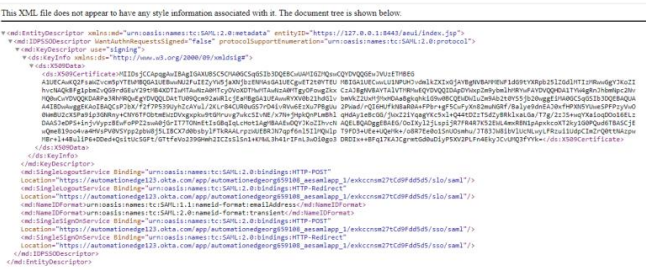
- Identity Provider Metadata (store in descriptor.xml).
- Client ID
- Redirect URIs
For AE SSO configurations we need: Keystore file, Keystore Alias, Keystore Password. For IDP SSO configurations we need: Certificate file (.crt)
To generate Self Signed or CA Certificate, see Keystore and Certificate Generation
To configure Identity Provider – Okta SAML application:
-
Access the Okta login page, enter the sign-in details, and then click Sign in. A list of available applications appears.
-
On the top, right-corner, click Admin, and then enter the code from Okta Verify App that you received on your mobile. The Get Started with Okta page appears.
-
Click the Applications tab and select Applications from the list. The Get Started - Applications page appears.
-
Click Add Application. The Add Application page appears.
-
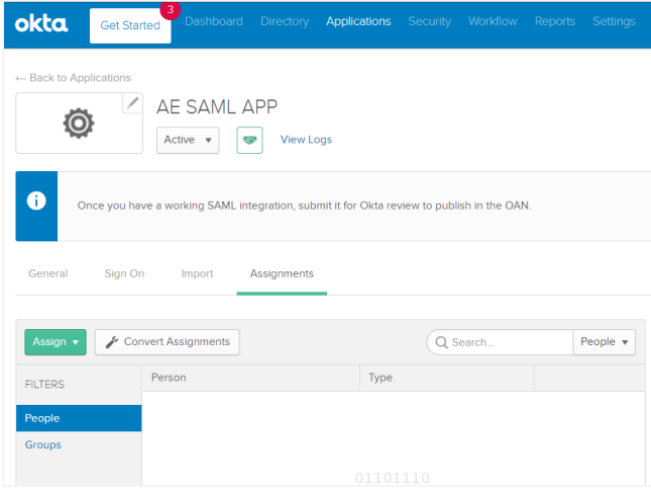
On the page, click Create New App. Enter a name for the application, for example, AE SAML APP.
Note:We are creating a Web application with Sign on method SAML.
-
Click Next, and then enter the following SAML field details:
- Specify the Redirect URL for Single sign on URL.
- Specify Audience URI. Make sure that Audience URI same as the sign on URL.
- Set Name Id format to Transient and the application username to Okta Username.
-
Click Show Advanced Settings. Enter additional Okta configurations in the Advanced Settings, as required:
- Set the Response to Signed as it will sign the response after successful login.
- Assertion Signature needs to be Signed.
- The signature algorithm is RSA-SHA256; even in the backend, we are using this algorithm to sign the login request.
- Set the digest algorithm to SHA1.
- Set Assertion encryption to Unencrypted.
- Check the Enable single logout as we are supporting logout as well. In the Single logout URL specify the logout URL.
- Set the SP issuer the same as the Single sign-on URL. As we are signing the xml we need a certificate for it.
- You can browse and upload the certificate.
- Even in the SAML Issuer id should be the same as the single sign on URL.
- Provide the same values in the following fields:
- Single Sign on URL
- Audience URL
- SP issuer
- SAML issuer ID
- Browse for a Signature Certificate and click Upload.
Note:To generate Self Signed or CA Certificate, see Keystore and Certificate Generation.
AutomationEdge claims:
AutomationEdge supports the following claims:
| Name | Values (case sensitive) |
|---|---|
| firstName | user.firstName |
| lastName | User.lastName |
| emailAddress | User.email |
| Username | User.login |
There is no change in the GROUP ATTRIBUTE STATEMENTS.
-
Click Next, and then click Finish. The configuration is complete.
-
To fetch the Client ID for SAML Okta: i. Click the General tab and scroll to the App Embed Link section. ii. Copy the Client ID from the Embed Link URL.
-
To create the descriptior.xml: i. Click Application -> Your Application Name -> Sign On. ii. Click the highlighted link to get the descriptor details. iii. Save the descriptor details into an xml file called descriptor.xml.
-
To assign the web SAML application to users:
i. Click Assignments -> Assign.
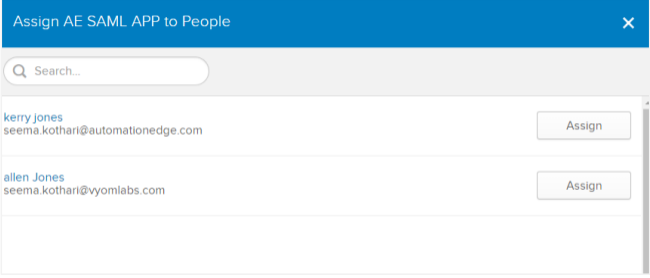
ii. Search for the people to whom you want to assign the application to and click Assign. The application is assigned to the selected user.
-
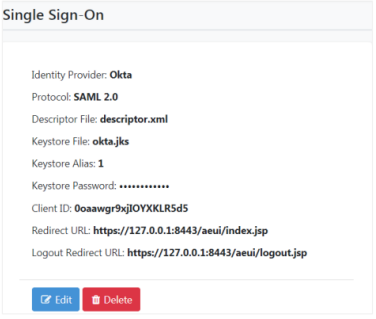
To configure Single Sign-On in AutomationEdge UI:
i. Sign on to AE UI and click Settings -> Single Sign-On. The Single Sign-On page appears.
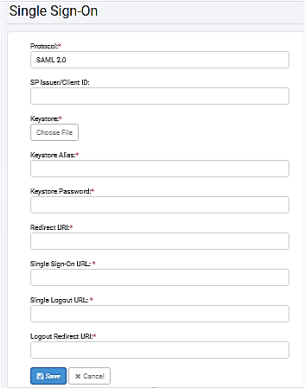
ii. Fetch and enter the field details, and then click Save. The details are saved.
-
To generate Keystore, see Keystore and Certificate Generation.
-
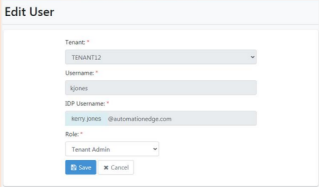
AutomationEdge username Kerry is mapped to Okta username kerry.jones@automationedge.com.
-
You can now sign-in to AE UI through the SSO link on the log on page.