AE initiated SSO with Keycloak using OpenID Connect
Keycloak Identity Provider supports OpenID Connect protocols.
In the topic, you will learn about the required parameters and some key configurations to set up AutomationEdge SSO with Keycloak.
Following are the required parameters for Keycloak IDP SSO configuration in AutomationEdge:
- Identity Provider Issuer
- Identity Provider Endpoints (Authorization, Token & End Session Endpoints)
- Login redirect URIs
- Client ID
To setup Keycloak IDP SSO configuration in AutomationEdge:
-
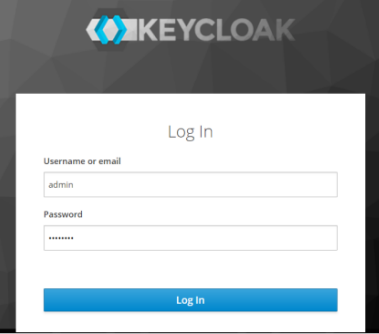
Access the Keycloak portal. The Login page appears.
-
Enter the login credentials and click Log In. The landing page appears.
-
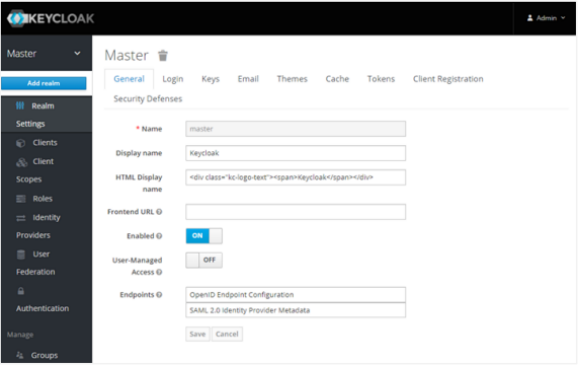
In the left navigation pane, click Realm Settings -> Add realm. Enter the details and add a realm, if not added.
-
In the left navigation pane:
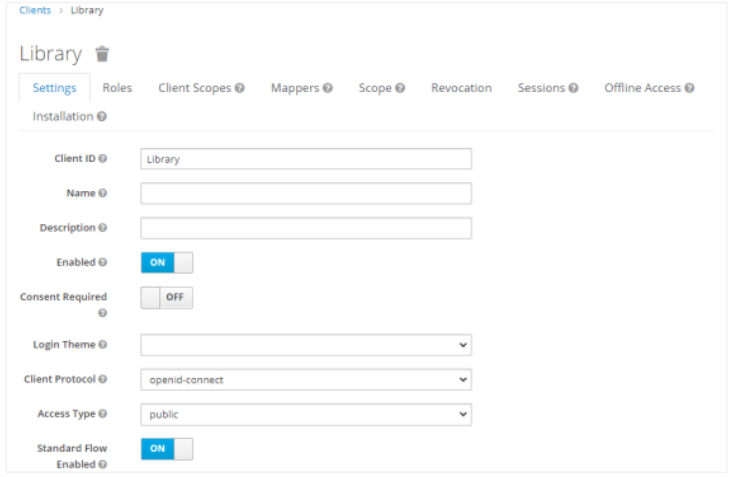
Click Clients -> Clients page -> click Create. The Add Client page appears.
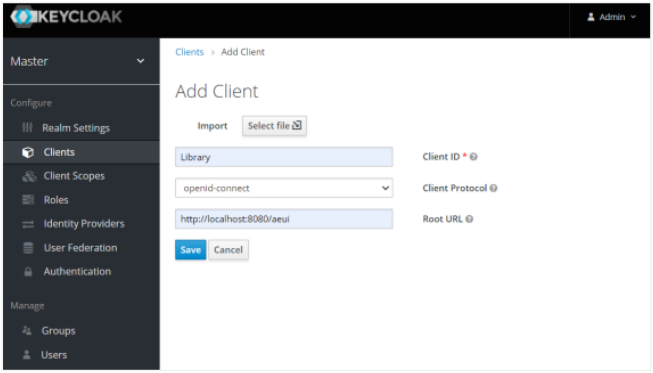
Enter the following field details:
Field name Description Client ID* Enter a unique client ID. For example, Library. Client Protocol Select appropriate protocol and access type as public. Root URL Specify a valid redirect URL. For example, https://Automationedge:{Port}/aeui.*indicates mandatory field.Click Save. The details are saved.
In the Settings tab, you may keep the default values or change, as required.
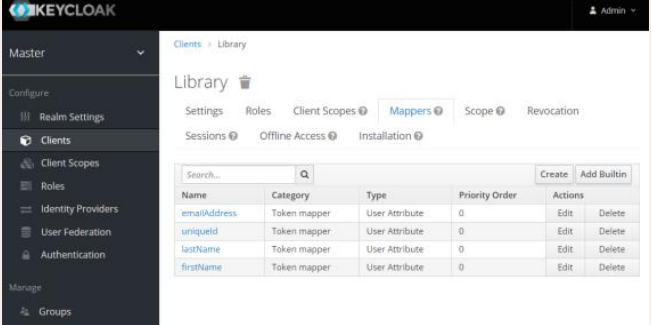
Click the Mappers tab. The details page appears.
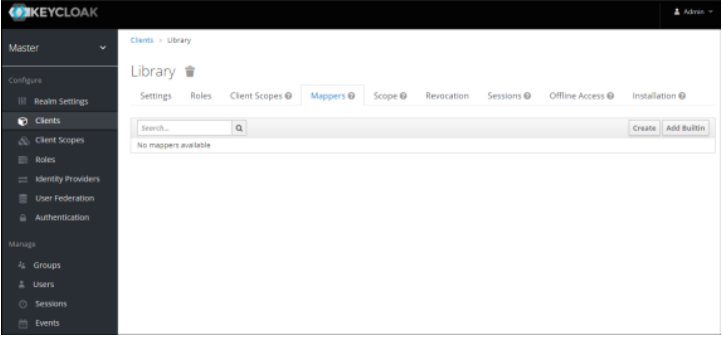
Click Create. The Create Protocol Mapper page appears.
Enter the following details to create claims:
Field name Description Protocol Displays the protocol you are using. For example, openid-connect. Name Enter a name of the claim. For example, uniqueId. Mapper Type Select the type of mapper from the list. For example, User Attribute. User Attribute Enter a name for the user attribute. For example, uniqueId. Token Claim Name Enter a token claim name. For example, uniqueId. Click Save. The mapper details are saved.
Complete creating the following Mappers (Claims) for JWT (Access) token; to be used by Service Provider (in this case AutomationEdge).
Name User Attribute Token Claim Name uniqueId uniqueId uniqueId firstName firstName firstName lastName lastName lastName emailAddress emailAddress emailAddress Username Username Username orgCode orgCode orgCode
Note:Create four mappers in the Client.
-
In the left navigation pane:
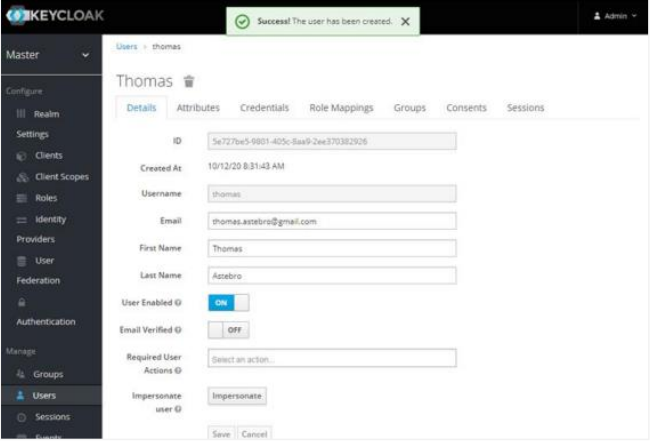
Click Users -> Users page -> Lookup tab. The details page appears.
Click Add user and enter the following details:
- First Name
- Last Name
Note:To set user credentials, go to the Credentials tab and choose a password; we have used password for the rest of the article. Turn off the Temporary flag unless you want the user to change the password on the first login.
Click Save. The user is created successfully.
Click the Attributes tab. The details page appears.
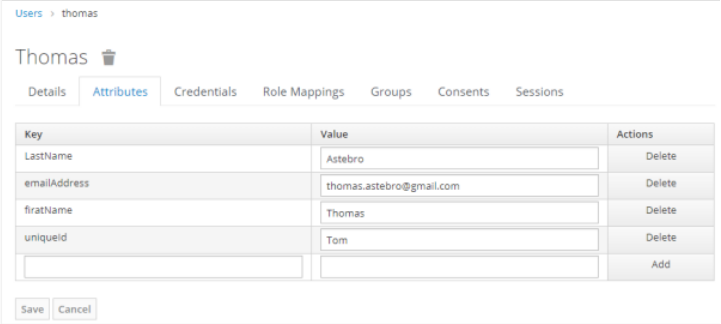
Enter the following details:
Key Value uniqueId {username}firstName {first-name}lastName {last name}emailAddress {email}username {username}orgCode {AE tenant org code}Note:It is mandatory to specify actual values for the first three attributes: uniqueId, firstName, and lastName.
-
In the left navigation pane:
i. Click Clients, and then click on the Library link. The Clients page appears.
ii. Fetch the Client ID and Valid Redirect URI and then go back to the Realm Settings menu.
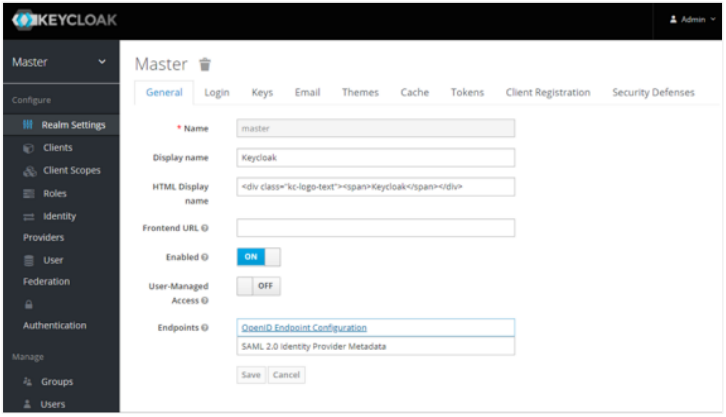
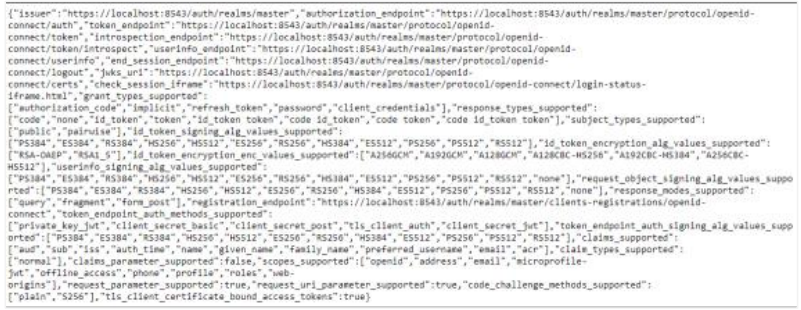
iii. Fetch the Client ID and Valid Redirect URI and then go back to the Realm Settings menu. In the Endpoints field, click OpenID Connect Endpoint Configuration. You can fetch the authorization_endpoint key value and other Endpoints from the Endpoints JSON.
On AutomationEdge UI, you can now complete configurations under Settings → Single Sign-On; by entering the values or importing the endpoints authorization file.
Create an SSO user in AutomationEdge UI. The username should be the same as the uniqueId of an IDP user.
Logon to AE through the SSO link and you’ll be redirected to sign in through the Keycloak login page.
The user logged in is the same as the uniqueId of the IDP (Keycloak) user.