Credentials
Use the Credentials feature to create individual credentials or credential pools.
-
Credential: AutomationEdge may connect to external systems for getting automation work done. Enter the Credentials of the external systems in the workflow definitions. However, many organizations want separation of responsibilities between the process owners and credential managers. Credentials can change over time, for example, password expiry. In such cases, alter the workflow configuration parameters. The feature makes it easy to manage the credentials of external systems. Credentials are created and managed separately by a relevant authority. Workflow owners cannot see or alter user credentials; they can use them in workflow or process parameters. Process Studio process or workflow parameters have Credential as a data type. The parameters are then available as AutomationEdge workflow configuration or runtime parameters.
-
Credential Pool: A Credential Pool is a collection of credentials. Some external systems (target) allow only one active session per user at a time. Create a Credential Pool for such external systems, which would hold all the available credentials for that external system. Each workflow instance acquires a single credential from a pool at any given time. Hence, if a user wants to run multiple Workflow instances, the user can acquire multiple credentials from a credential pool.
- If a credential belongs to a Credential Pool, use it in a workflow through pool only.
- The Admin can use the assigned security vaults to set the vault connections and retrieve the credentials stored in the vault. You can use the vault credentials to work with the workflows. For details, see Configure Vault Connections.
The topic contains the following sections:
Create a credential
In the section, you’ll learn how to create and use a credential.
To create a credential:
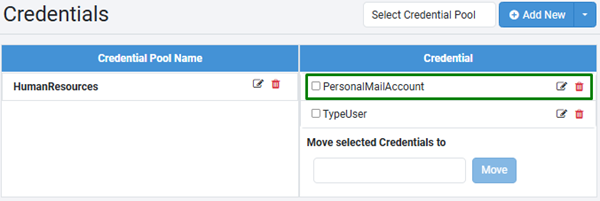
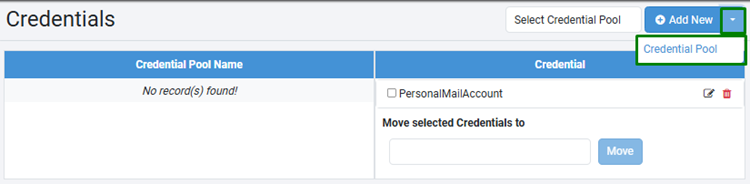
- In the menu, click Workflows -> Credentials. The Credentials page appears.

Figure: Credentials page
- Click Add New. The Create New Credential page appears.
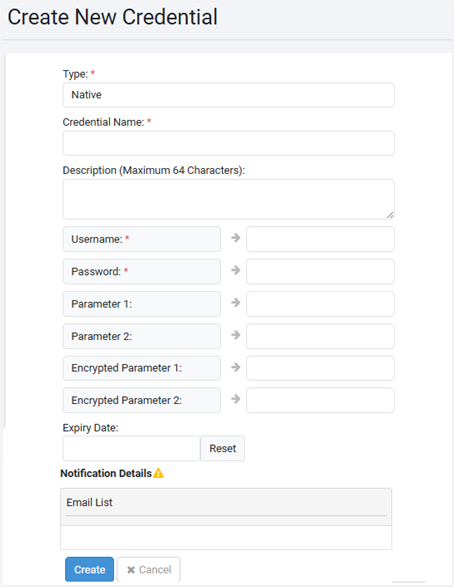
- Enter the following field details:
| Field Name | Description |
|---|---|
| Type* | Select the type of credential you want to create. You can select Native or BeyondTrust. Native is the default option. Note:- If your Tenant has a Security Vault assigned and as an Admin you have set the vault connection, then you will also see the name of the security vault, BeyondTrust, in the list. That is, BeyondTrust is available only if you have set the vault connection. For details, see Configure Vault Connections. |
| Credential Name* | Enter a name for the credential you want to create. |
| Description | Enter a description of the credential name. |
- Indicates mandatory field.
If you select Type as Native, then you will see the following fields:
| Field Name | Description |
|---|---|
| Username* | Enter a username for the credential. |
| Password* | Enter a password for the username. |
| Parameter 1 | Enter a parameter that you want to use in your workflows. |
| Parameter 2 | Enter a parameter that you want to use in your workflows. |
| Encrypted Parameter 1 | Enter an optional encrypted parameter. You may use encrypted parameters to store sensitive fields, for example, Access Token, Security Key, or similar values that you do not want to expose to users. AutomationEdge stores the password in an encrypted format. The maximum allowed character length is 4,096. |
| Encrypted Parameter 2 | Enter an optional encrypted parameter. The maximum allowed character length is 4,096. |
| Expiry Date | Select the date when the credential will expire. Note: To clear the current selection and reselect the expiry date, click Reset. |
| Notification Details | Ensure that the Workflow Create and Update, Credential Create, Update and Expiry option is enabled in Email Notification. For details, see Configure email notification. |
| Email List | Enter the list of email IDs to which you want to send notifications about the credentials. Note: - A maximum of five email IDs can be provided. - The total character count of the five email IDs must not exceed 1000 characters. |
OR
If you select Type as BeyondTrust, then you will see the following fields:
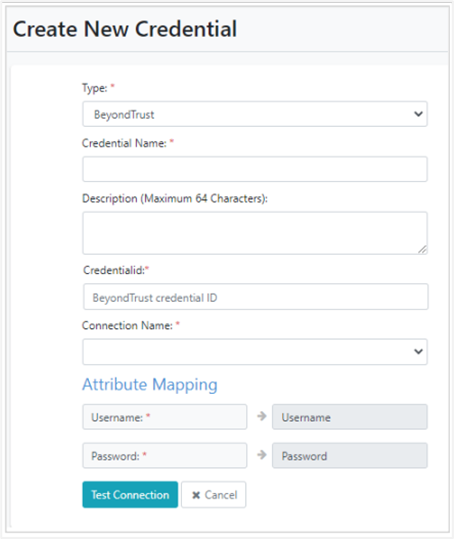
Figure: Create New Credential (Type: BeyondTrust)
| Field Name | Description |
|---|---|
| Credentialid* | Enter a BeyondTrust credential ID. |
| Connection Name* | Select the vault connection. Note: The vault connection is set under Settings → Vault Connections. |
| Attribute Mapping | |
| Username* | Enter the name of the user. BeyondTrust username maps to your AE username. |
| Password* | Enter the password. BeyondTrust password maps to your AE password. |
| Test Connection | Click to validate the vault connection. |
- Click Create. The credential is created and appears on the page.
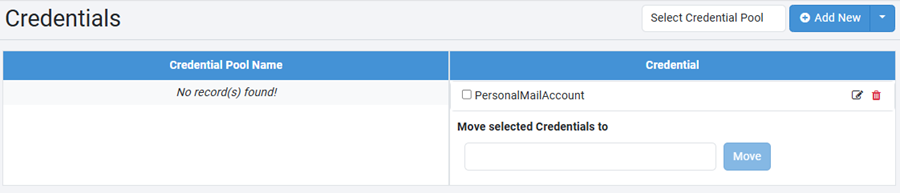
Figure: Credentials page
To modify the credential details
- On the Credentials page, select the credential in the Credential section, and then click
 . The Edit Credential page appears.
 - Modify the required details, and then click Update. The changes are saved.
To delete the credential, click ![]() and then click Delete in the Confirm delete dialog that appears.
and then click Delete in the Confirm delete dialog that appears.
Create Credential Pool
You can create a credential pool to which you can add the credentials, as required. In the section you will learn to:
To create a credential pool:
- In the menu, click Workflows -> Credentials. The Credentials page appears.
- On the page, click
 , and then click Credential Pool. The Create New Credential page appears.
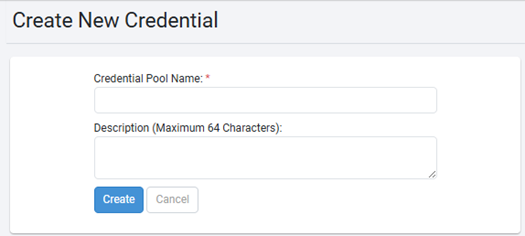
- Enter the following field details:
| Field name | Description |
|---|---|
| Credential Pool Name* | Enter a unique name for the credential pool. |
| Description | Enter a description of the credential pool. |
- Click Create. The credential pool name is created.
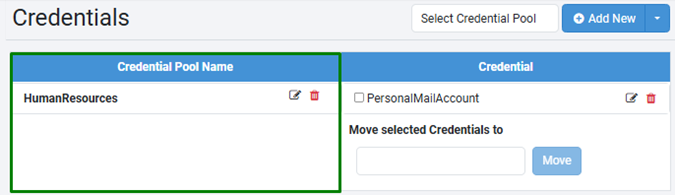
Figure: Credential Pool Name column view
To modify the credential pool details, in the Credential Pool Name column, click ![]() next to the credential pool. The Edit Credential page appears.
Modify the details, as required and then click Update. The details are saved.
To delete the credential pool, click
next to the credential pool. The Edit Credential page appears.
Modify the details, as required and then click Update. The details are saved.
To delete the credential pool, click ![]() and then click Delete in the Confirm delete dialog that appears. The credential pool is deleted.
and then click Delete in the Confirm delete dialog that appears. The credential pool is deleted.
To move credentials to a credential pool:
-
In the Credential column, select the respective credential checkbox, and then click in the Move selected Credentials to list. The credential pool list appears.
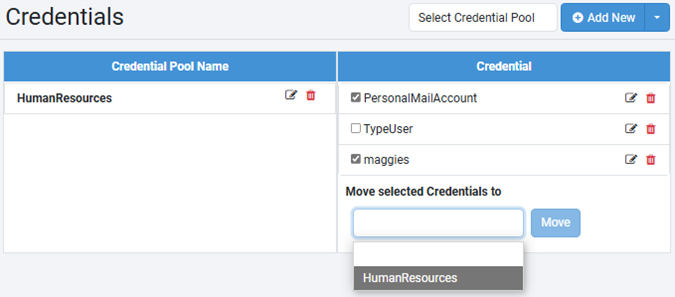
Figure: Credential Pool Name -
Select the credential pool, and then click Move. The credential is moved to the selected credential pool.
The selected credentials are removed from the Credential list and added to the credential pool.
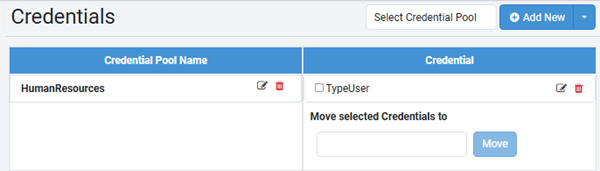
Figure: View after moving the credentials
To view the credential pool details
-
On the Credentials page, click on Select Credential Pool. The list of credential pool names appears.
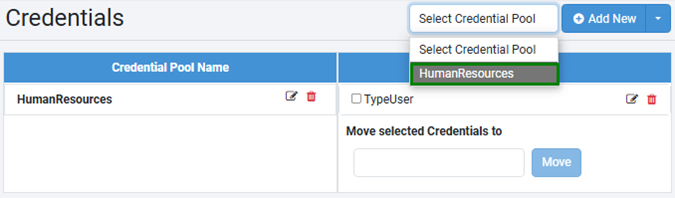
-
In the list, select any credential pool name. The credential pool name appears in the Credential Pool Name column and all the credentials in the pool appear in the Credential column.

Figure: Selected Credential Pool – Credential list view
To modify the credential details, select the checkbox next to the credential and then click ![]() .
• To remove a credential from the list, select the checkbox next to the credential and then click
.
• To remove a credential from the list, select the checkbox next to the credential and then click ![]() . The credential is removed from the list and is added back to the Credential list.
For example, if you remove credential PersonalMailAccount from the HumanResources credential pool, then the credential appears in the Credential list.
. The credential is removed from the list and is added back to the Credential list.
For example, if you remove credential PersonalMailAccount from the HumanResources credential pool, then the credential appears in the Credential list.