Categories
Use the Categories feature to create groups in which workflows can be moved. Moving workflow in specific group makes them easier to access. In the topic you will learn how to create and work with the categories.
The topic consists of the following sections:
Add a new category
Add a new category and group workflows into workflow categories. You can add a workflow to one category only, that is, you cannot add a single workflow to multiple categories.
A category named Default is already available.
To add a new category:
-
In the menu, click Workflows -> Categories. The Categories page appears.
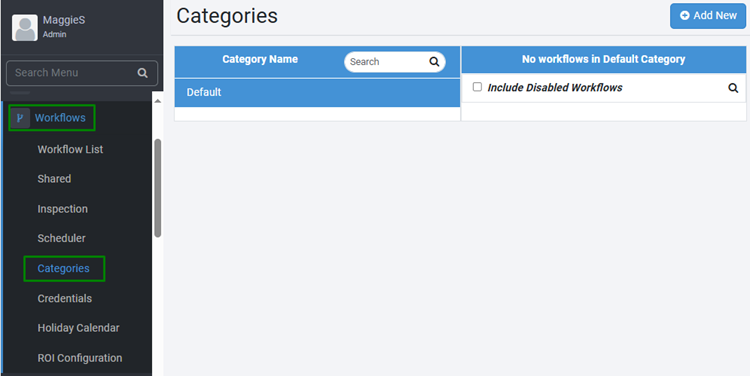
Figure: Workflows -> Categories -> Categories page -
Click Add New. The Create New Category dialog appears.
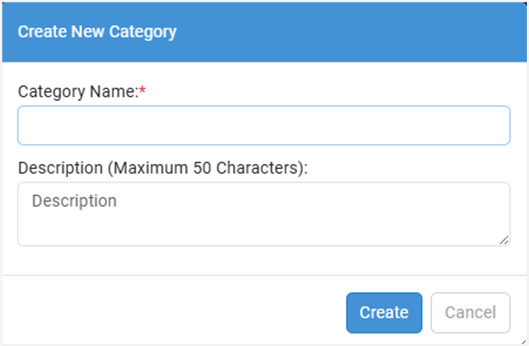
Figure: Create New Category dialog -
Enter the following field details:
| Field name | Description |
|---|---|
| Category Name* | Enter a name for the workflow category you want to create.. |
| Description | Enter a description of the workflow category you want to create. |
* Indicates mandatory field
-
Click Create. The category is created and appears in the Category Name column.
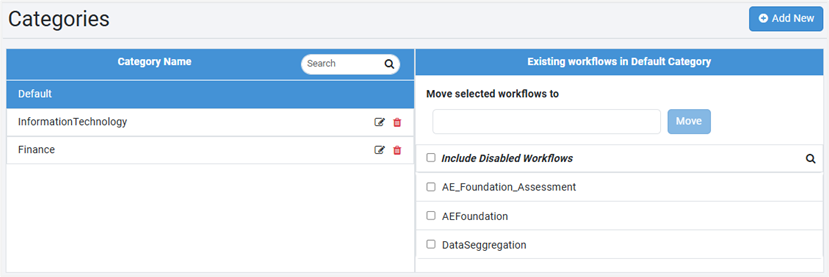
Figure 126: Category Name column view
- To search for a category name, enter the name in the Search box.
- In the Existing workflows in Default Category column, you will see all the active workflows in the Default category.
- To view disabled workflows along with the active workflows, select the Include Disabled Workflows checkbox.
- To modify the category details, click
 . In the Edit Category dialog, make the changes and then click Save.
 - To delete the category, click
 and then click Delete in the Confirm delete dialog that appears. All the workflows in the deleted category will move to the Default category.
Move workflow into a category
You can move the workflow into a category, as required.
To move the workflow into a category:
-
In the menu, click Workflows -> Categories. The Categories page appears.
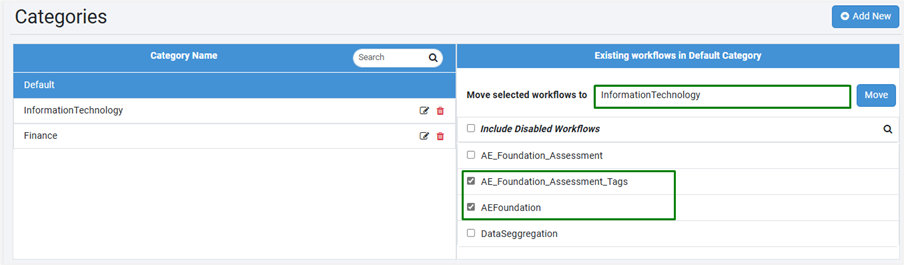
Figure: Selection of category and workflow -
In the Existing workflows in Default Category column:
-
Click and select the category from the Move selected workflows to list. The selected category appears.
-
Select the checkbox next to the workflows you want to move, and then click Move. The selected workflows are moved to the required category.
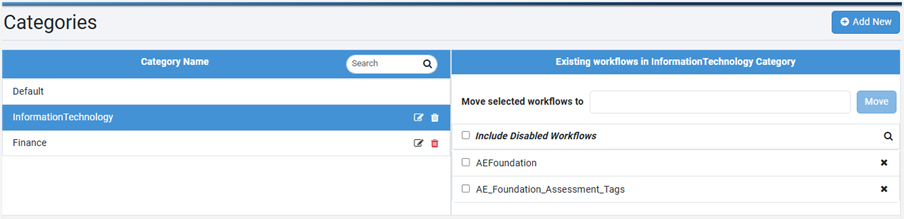
Figure: Moved workflows view -
- To search for a workflow, click
 , and then enter the name of the workflow you want to search in
  . The list of workflows matching the search appears.
You can search for workflows in the currently selected category only.
. The list of workflows matching the search appears.
You can search for workflows in the currently selected category only. - To remove the workflow from a category, click
 . The workflow is removed from the list and re-added to the Default category.
You cannot remove the workflow from the Default category.