Publish to Development Instance
Process Studio projects can be published to AutomationEdge using the following options:
Process Studio Publish -> Create
OR
Process Studio Publish -> Update
The following sections discuss Process Studio Publish (Create & Update) options to publish AutomationEdge workflow on a Development instance.
Publish workflow through Create option
In the exercise, we will publish a project (Sales Revenue) using the Process Studio Publish -> Create option.
To publish an AutomationEdge workflow using Process Studio Publish option:
-
In the Process Studio complete the following steps:
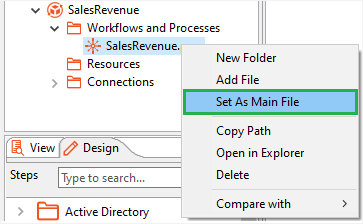
Select and right-click on the workflow you want to publish and in the contextual menu, select Set As Main File. The selected workflow or process is set as the main file of the project.
OR
Through /Project Name/ -> Edit Project option, open the Edit Project dialog. Set main workflow or process.
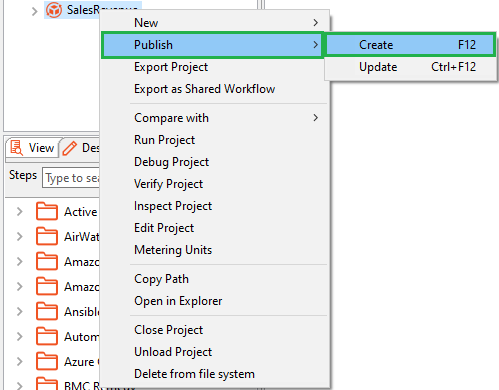
In the Project Explorer, select and right-click on the Sales Revenue project. In the contextual menu, select Publish -> Create.
In the Publish confirmation (psp/psw) dialog, select the Add resource file(s) to ZIP archive checkbox if there are any supporting .xls, .txt, .csv, or so on, and then click Yes. If there are no supporting files for the project, then keep the checkbox clear.
In the Workflow Details dialog:
-
Enable Assisted for Attended workflows.
-
Enable RDP enabled if working on Controller Agent machine.
-
If you wish to Set default values as Configuration parameter values, enable the check box.
Note:It automatically detects workflows that should execute sequentially else if one of the sequential automation workflows is running as non-sequential, and the workflow terminates, then all the subsequent requests remain in New state.
The workflow is not sequential.

-
Click Create. The workflow is published to the AE UI.
-
Sign in to the AE UI instance to which you have uploaded the workflow. The workflow appears in the Workflows page.
-
In the Actions column, click
 .
For details about workflow configurations, see Edit workflow configuration.
.
For details about workflow configurations, see Edit workflow configuration. -
After all the updates are completed, toggle the switch to activate the workflow.
-
Assign workflows to Agents. For details, see Assign and edit workflow assignments to Agents.
-
After assigning the Agents, you can execute the workflows through the Catalogue. For details, see Work with Catalogue.
-
You can monitor the requests. For details, see Work with Requests.