Integration
Enable Integration Service for Tenant for Admins to view the Integration menu and its sub-menus
-
Locate and navigate to the Integration menu.
-
The integration menu expands, as seen below.
-
The Services and Types menu are the same as those of the System Administrator. The Type Configuration menu is only available to Admins.
-
The following sections discuss each of the Integration sub-menus.
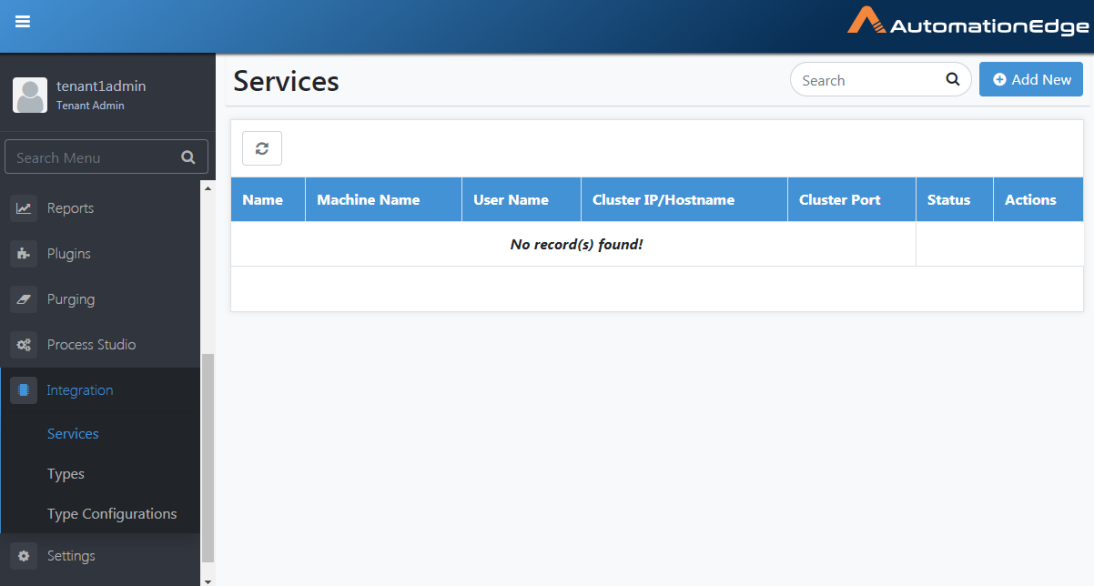
Figure 19.1: Integration menu
Integration: Services
The steps to Add Integration Service, Download Integration Configuration file, edit and delete Integration Service are the same as System Administrator. A Admin can use Integration Services added by a System Administrator. However, it can also create only one Integration Service.
Refer to AutomationEdge_R7.7.2_System_Administrator_Guide for details on how to use this menu option to configure an Integration Service.
Integration: Types
Integration type is a component (JAR file) that connects to a third-party system and polls for Automation Requests.
The steps to Add, Edit and Delete Integration Types are the same as System Administrator. A Admin can also use the Types configured by a System Administrator. Refer AutomationEdge_R7.7.2_System_Administrator_Guide for details on how to use this menu option to configure Integration Types.
AE R7.7.2 also releases the Integration type Remedyforce (remedyforce-rest.jar)
Refer Appendix 1: Integration with Type Remedyforce- for steps to use Integration Services to integrate with Remedyforce.
Integration: Type Configuration
Integration Type configuration is an instance of integration type configured for a tenant to communicate with one third-party service. Integration Type menu option is only available to Admins.
The following sections discuss the operations for Integration Type configuration.
Integration Type Configuration: Add
- Navigate to Integration🡪Type Configuration.
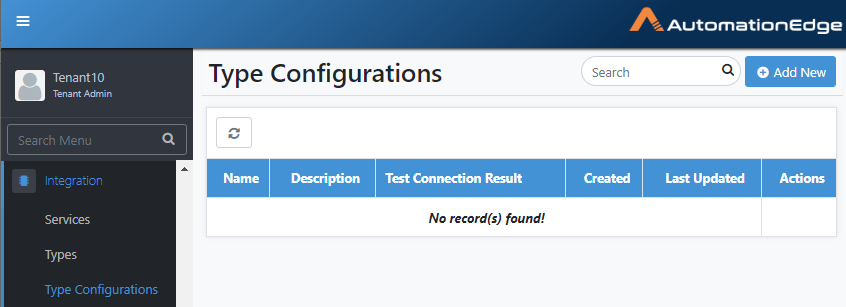
Figure 19.2: Add New Integration Type Configuration
-
Click Add New. Provide required configuration details in the New Configuration page.
-
Expand Polling Schedule.
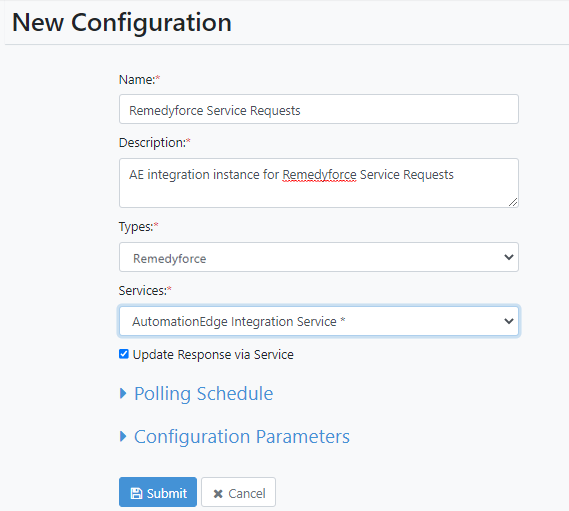 Figure 19.3: Configuration Details
Table 19.1: Integration Type Configuration
| Field Name | Description |
|---|---|
| Name | Specify a name for the Integration Type Configuration |
| Description | Specify a description for the Integration Type Configuration |
| Types | Select an Integration type from the drop-down list |
| Services | Select an Integration Service from the drop-down list |
| Update Response via Service | Enable checkbox to update response via Integration Service |
- Provide desired Polling Schedule as seen below.
Note: Polling schedule is saved and runs in the default time zone of the machine on which Integration service is deployed and running.
Repeat interval values can be from the following,
-
Hours: 1 to 23
-
Minutes: 1, 2, 3, 4, 5, 10, 15, 20, 30, 45
-
Seconds: 30
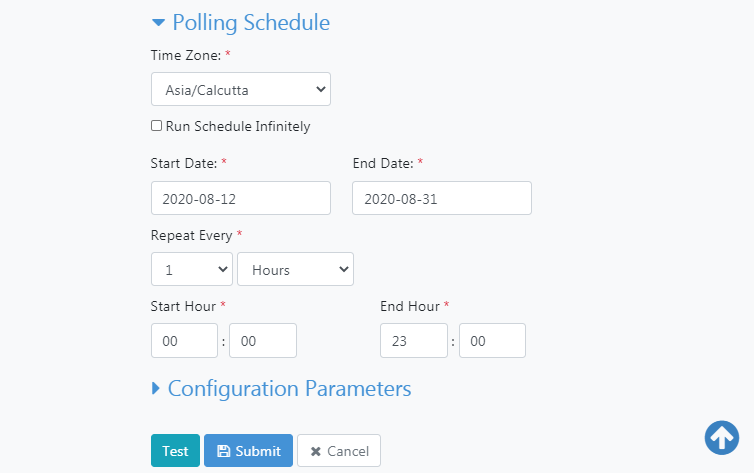
Figure 19.4: Polling Schedule details
- In Configuration Parameters, click Add Parameter. The parameter fields appear.

Figure 19.5: Configuration Parameters
-
Enter the required parameter values, and click Submit. The details of the configuration along with the result status of the connection appears on the Type Configurations page. Following are the connection status':
a. Successful: indicates the integration service connection test completed as required.
b. Failed: indicates the integration service connection test did not complete as expected
c. Unknown: indicates the test status of the integration service connection is not known. For example, the testing may still be in-progress or the integration service is not up, hence the testing has not happened.
Refer Appendix 1: Integration with Type Remedyforce for Configuration Parameters required by Remedyforce.
To view the integration configuration time details and error message, click ![]()
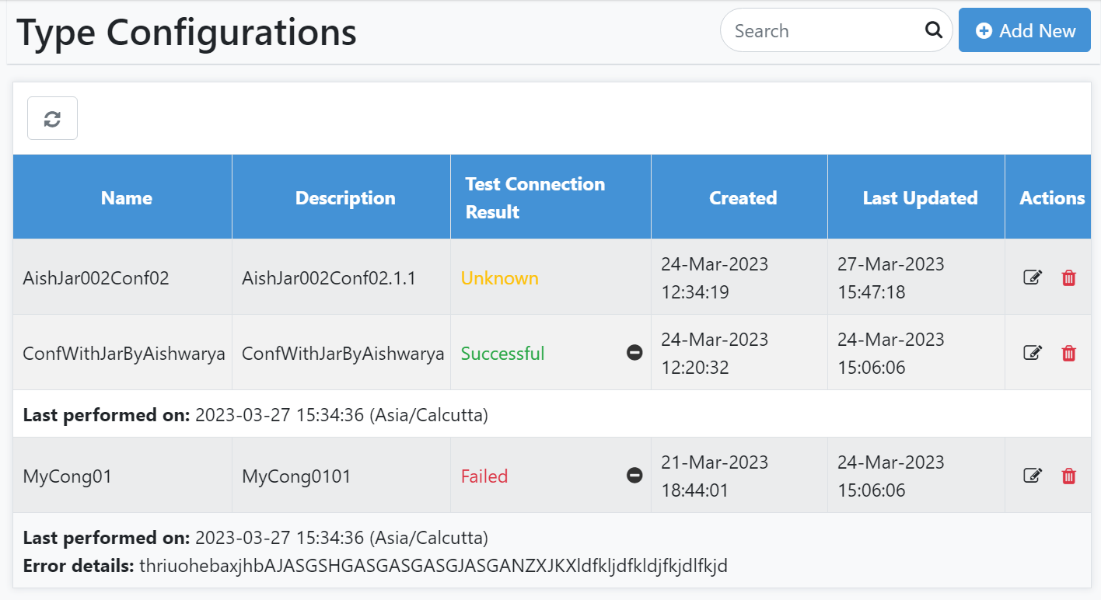
Figure 19.6: Integration Type status
Note: In case of a duplicate Service name, an error message appears.
Integration Type Configuration: Edit
-
Navigate to Integration🡪Type Configuration
-
Click Edit icon in the Actions column for the Type Configuration.
-
You can make changes in the Polling Schedule or Configuration parameters.
-
Click Submit. A message confirming the change is successful appears.
Integration Type Configuration: Delete
-
Navigate to Integration🡪Type Configuration
-
Click the Delete icon in the Actions column for the Type Configuration.
-
A warning pop-up to confirm deletion appears. Click the Delete button.

Figure 19.7: Confirm Type Configuration deletion
- Integration Type configuration deleted message appears.
Integration Services: Features/Permissions for other users
Table 19.2: Integration Services Permissions
| Feature/Role | Admin | Workflow Administrator | User Administrator | Agent Administrator | Tenant User | Activity monitor |
|---|---|---|---|---|---|---|
| Services Enable/ Add/Edit/Download/Delete | *✔ | - | - | - | - | - |
| Types | ✔ | - | - | - | - | - |
| Type Configurations | ✔ | - | - | - | - | - |
*Admins do not have Enable permission. They can use Integration options once enabled by System Administrator