File Management
File Management feature with menu option is for ease of uploading and centrally managing related files for AutomationEdge artifacts viz., Plugin, Agent and Workflows. Significantly, this feature is for uploading configurable or constantly changing supporting files, from AutomationEdge UI seamlessly providing the files to its components.
File Management artifacts and menu permissions are listed in the table below,
Table 20.1: File Management Permissions
| Artifact | File Management menu option available to - |
|---|---|
| i. Agent | Admin |
| ii. Workflows | Admin |
| iii. Plugins | System Administrator |
Plugins are uploaded and managed by sysadmin; hence File Management menu for Plugins is accessible to System Administrator. For File Management for Plugins, refer to AutomationEdge_R7.7.2_System_Administrator_Guide.
File Management menu tabs - Workflow and Agent, manage supporting files for workflows and Agents, respectively. When a file is uploaded or updated,
-
The file automatically downloads onto an Agent.
-
Workflow/Agent files can also be downloaded to a preferred target location during workflow execution by an Agent, using the Get Files from Server step.
The following sections discuss File Management for Workflows and Agents.
Workflows Files
File Management menu for Workflow Files manages supporting files for workflows centrally. When a file is uploaded or updated,
-
The file automatically downloads onto the Agent.
-
Workflow files can also be downloaded to a preferred target location during workflow execution by an Agent, using the Get Files from Server step.
To upload supporting files for a workflow,
- Navigate to the File Management → Workflow Files menu. The Workflow Files page appears.
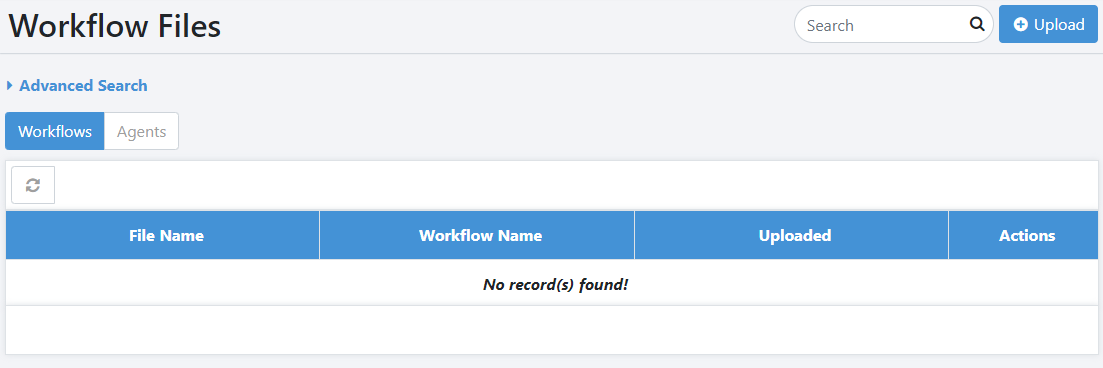
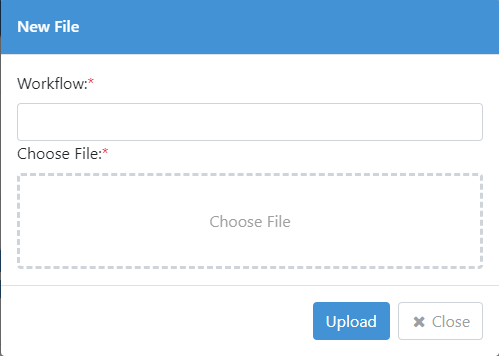
- Click Upload. The New File dialog appears.
-
Click in the Workflow field. The list of workflows appears.
Note: To select multiple workflows, select the respective workflow checkbox. -
Select the workflow and then click Choose File. Select the file you want to upload.
-
Click Upload. The selected workflow is uploaded and appears in the list on the Workflow Files page.
To update an existing workflow file, in the Workflow Files page click ![]() . In the Update File dialog, select the updated file and then click Update.
. In the Update File dialog, select the updated file and then click Update.
- To remove the workflow from the AE server, click

- You can perform a simple or advanced search to fetch specific details using, Search or Advanced Search.
Agents
File Management menu for Agent Files manages supporting files for Agents centrally. When a file is uploaded or updated,
-
The file automatically downloads onto the Agent.
-
Agent files can also be downloaded to a preferred target location during workflow execution by an Agent, using the Get Files from Server step.
Upload supporting File for an Agent
To upload supporting files for an Agent,
- On the File Management menu on the Agents tab, click the Upload button.
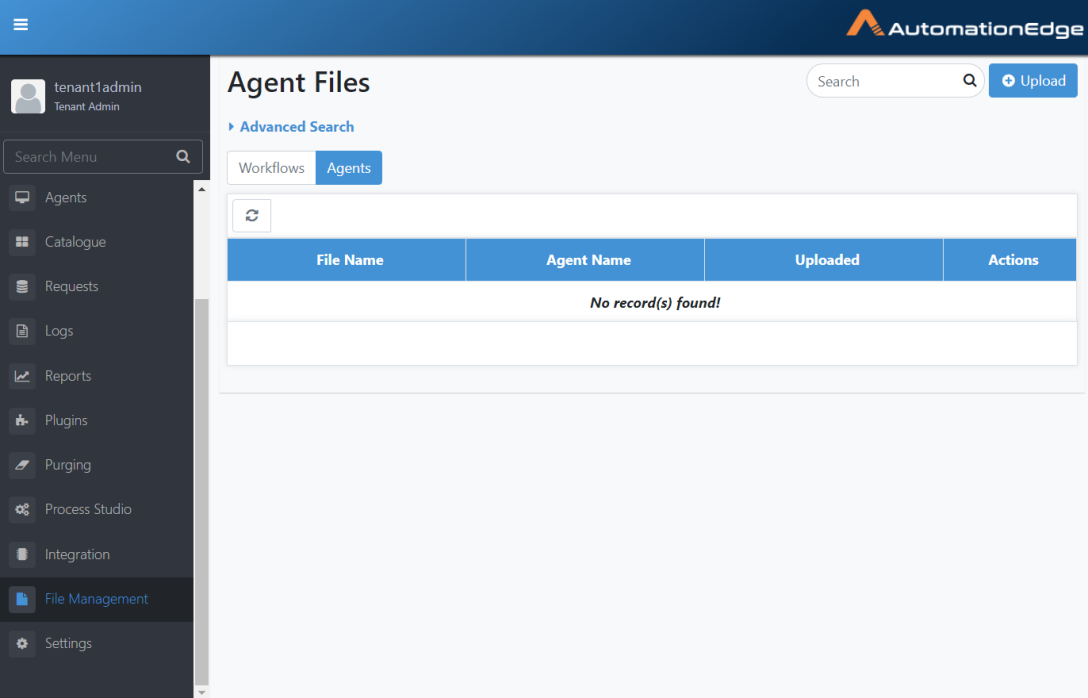
Figure 20.1: File Management for Agents
-
The New File popup appears. Click the drop-down arrow on the Agent field to see the list of Agents. Select an Agent to upload supporting files by enabling the check box next to the Agent, or type a search string to filter Agent names and enable the checkbox.
-
Click on Choose File box and browse for the file upload. Click Submit.
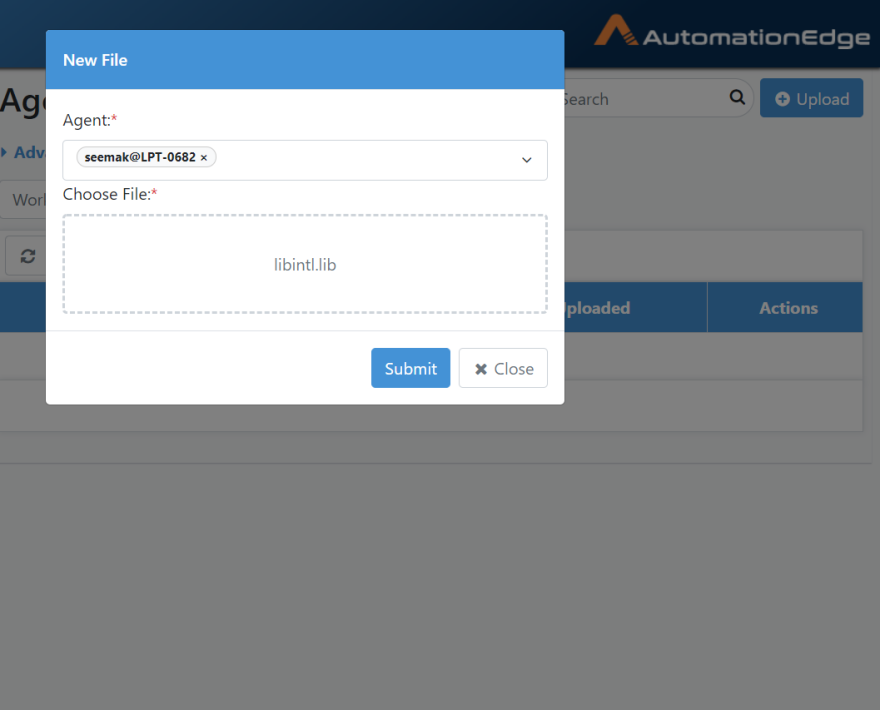
Figure 20.2: Choose File
- A 'File Uploaded Successfully' message appears, and the uploaded file is visible in the Agent Files list.
View and Actions on supporting Files for an Agent
In the File Management menu, the Agents tab lists all the uploaded supporting files for Agents.
- The File Management menu on the Agents tab shows the list of supporting files uploaded for Agents.
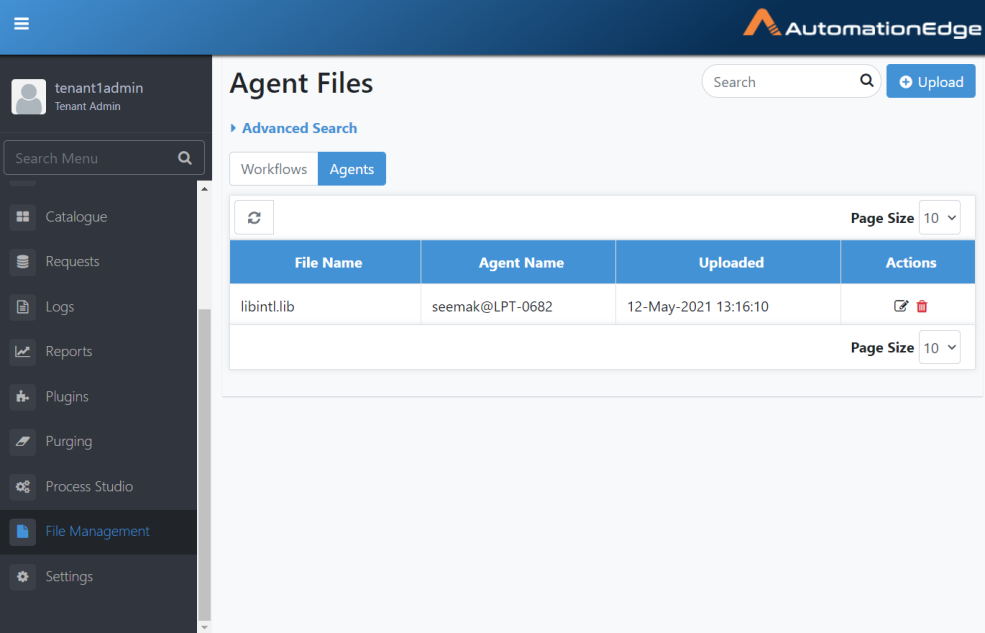
Figure 20.3: Search and Advance Search for Agents File Management
The table below describes the page components.
Table 20.2: Agent Files View
| Column | Description |
|---|---|
| Search | Enter the Search string to filter the list. |
| Advanced Search | Expand to enter the advanced search criteria |
| File Name | The name of the file uploaded |
| Agent Name | The Agent name for which the file is uploaded |
| Uploaded | The timestamp for the file upload |
| Actions | i. Click the Edit icon ( |
| ii. Click the Delete icon ( |
Allowed File Types
You can add the type of files that can be uploaded to the AE server. For example, .zip, .html, .png, and so on.
If you create the list of file types, then all uploaded files are checked against the list of accepted file extensions and validated for the correct file format using MIME type. Creating the list allows you to detect and block potentially harmful files, such as executables or scripts.
If you use the Allowed File Types functionality for any file extension, then add all previously used file extensions to the list, as before introduction of the functionality as all extensions except banned files were allowed. You can provide the list of banned extensions in the ae.banned.file.extension property available in the ae.properties file. For details, see the Installation guide → Configure application settings. The banned file settings in the ae.properties will override the file types selected through AE.
The allowed file types configuration, does not restrict you from uploading or upgrading .zip or .jar files through the following:
- File Management
- Plugins
- Workflow List / Shared
Following are the steps to add the file types:
- Navigate to the File Management → Allowed File Types menu. The Allowed File Types page appears.
- Click Add. The Add File Types page appears.
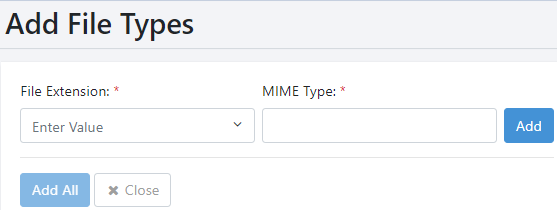
- Enter the following field details: | Field name | Description | |------------------------|---------------------------------------------| | File Extension***** | Enter the file type you want to add to the list. | | | Note: You select a file extension You can select multiple file types. | | MIME Type***** | Enter the type of MIME you want for the file extension. |
*: indicates the fields are mandatory.
-
Click Add. The extension list is created.
-
Click Add All. The extensions appear in the list on Allowed File Types page.