Intune: Generate Credentials
In this Appendix we will see how to generate client credentials and provide necessary permissions.
-
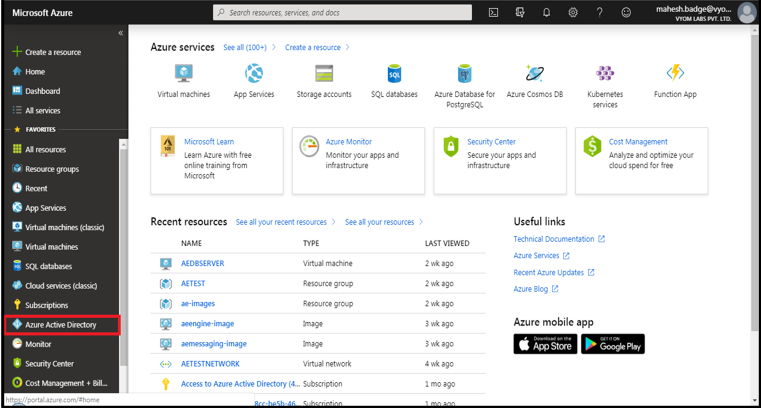
Login to https://portal.azure.com with email address and password (else register for a new account).
-
Click on Azure Active Directory from a column on the left side as below.
-
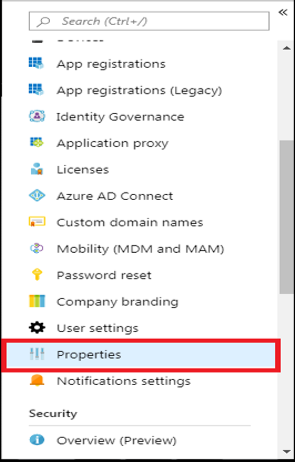
Search for properties.
-
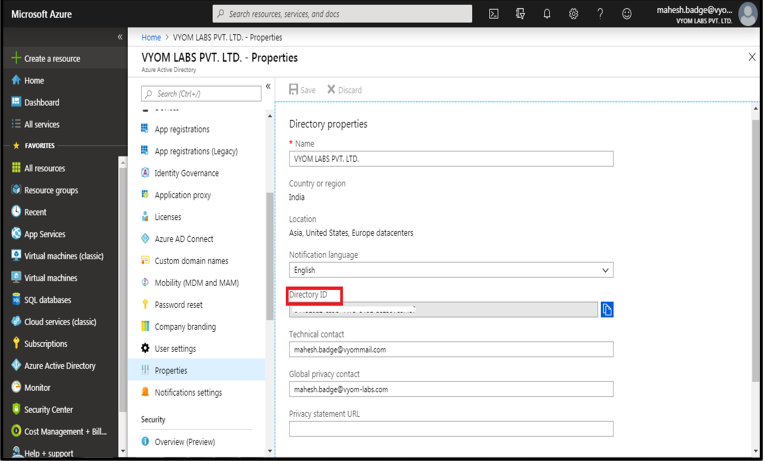
The Tenant ID required in the plugin is the ID mentioned under Directory ID. In case the ID is not available you may get Tenant ID as mentioned in step 8 below.
-
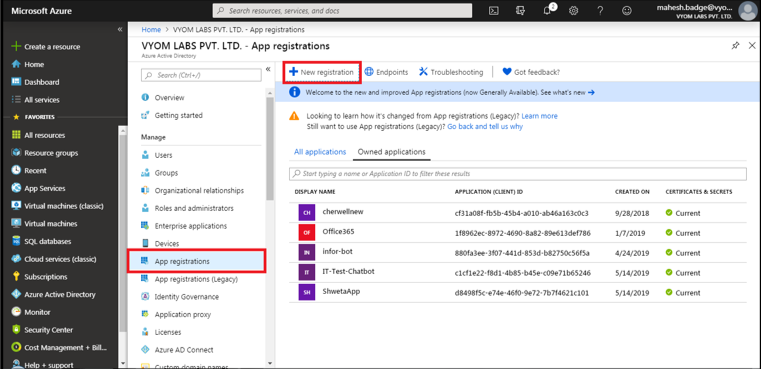
To get the Client ID, click on App registrations under Azure Active Directory.
-
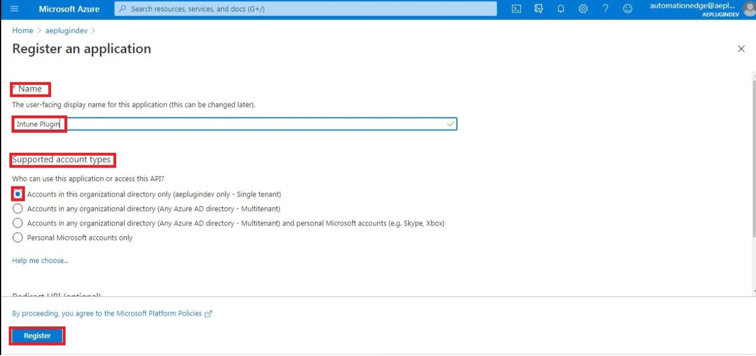
Create a new App by clicking on New Registration.
-
Enter the application name select account types and click on Register.
-
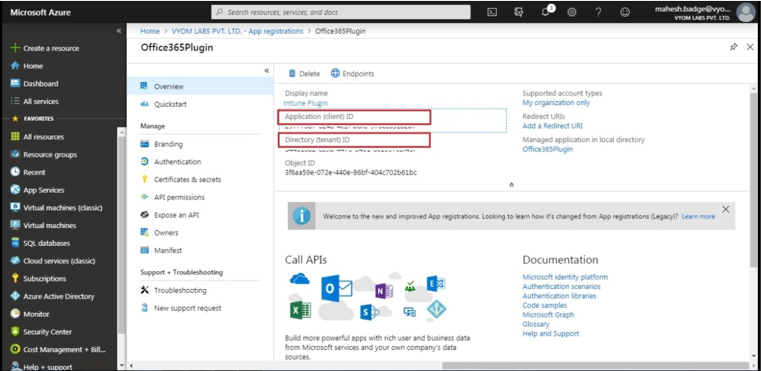
After clicking on Register, under Overview of the newly generated Application you can find the Application (client) ID/ Client ID. Also, you can find Directory (tenant) ID/Tenant ID below Client ID.
-
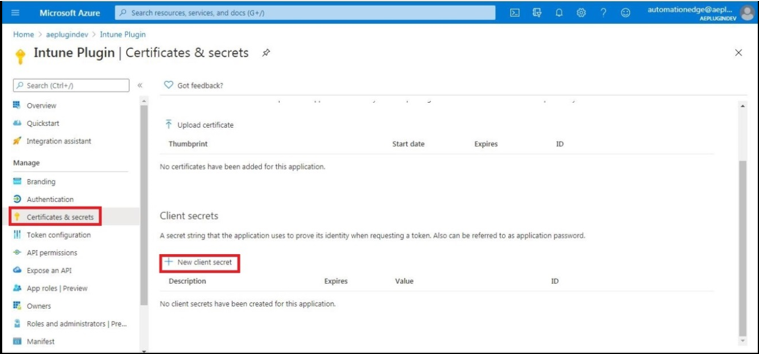
To generate client secret, click on the Certificates & Secrets and then click on + New Client Secret.
-
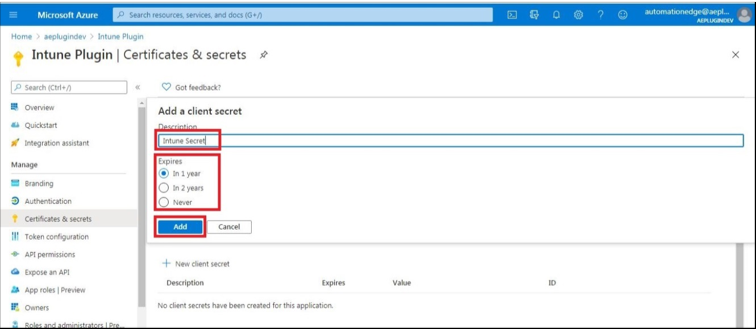
Now enter the Description, Expiry, and click on Add.
-
Copy the value of the client secret as it will be not visible the second time.

-
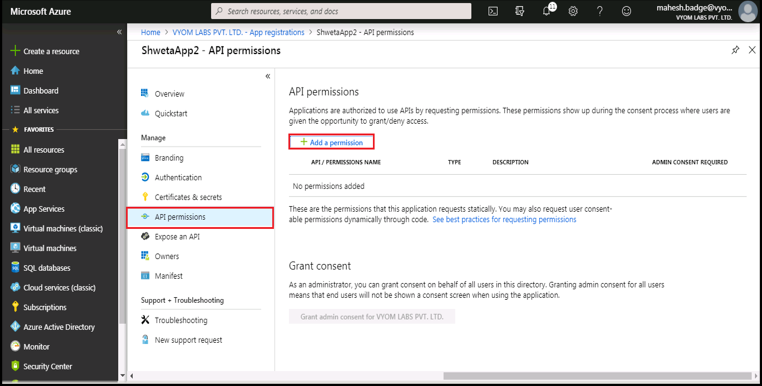
Click on API Permission and then click on Add Permission.
-
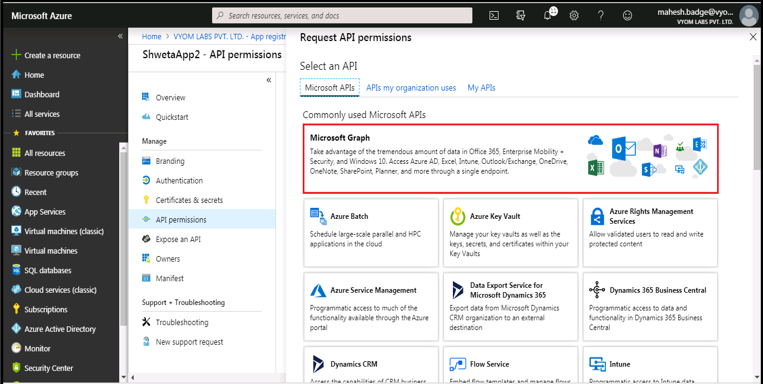
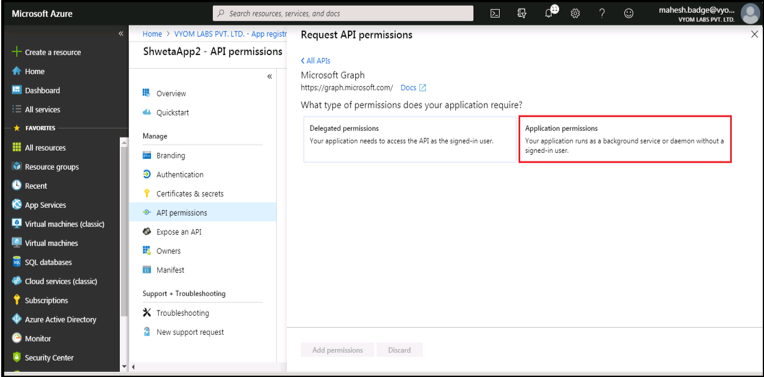
Click on Microsoft Graph, and then click on Application permissions.
-
Select Application permission.
-
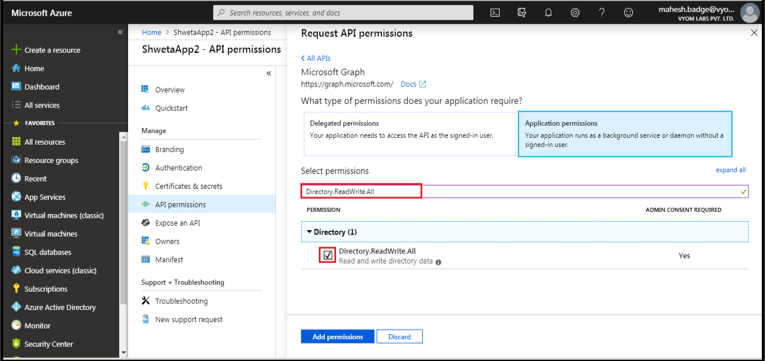
Search and select the required permission. Click on Add Permission.
-
This will redirect back to API Permission. In the Grant Consent section, click "Grant admin consent for….".
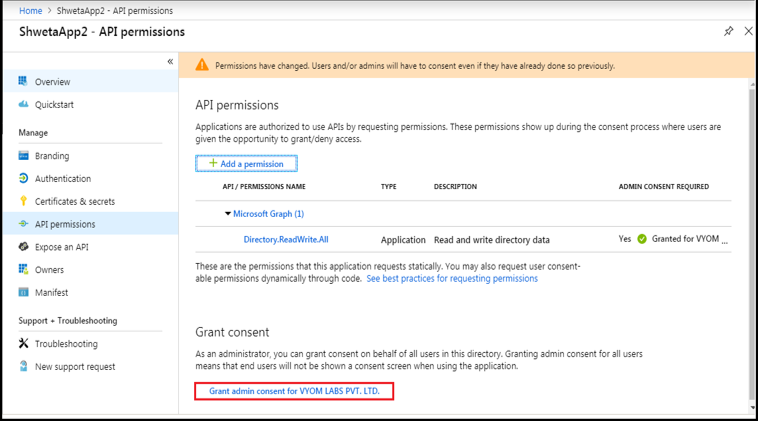
-
It will prompt for confirmation, click on Yes.

-
Similarly, we can assign the permissions required by Intune Plugins mentioned below:
- DeviceManagementManagedDevices.PrivilegedOperations.All
- DeviceManagementManagedDevices.ReadWrite.All