Zendesk: Generate Token
The appendix explains the steps to generate the Zendesk token. References:
- Create and manage OAuth tokens
- Register the application with Zendesk
Create OAuth clients
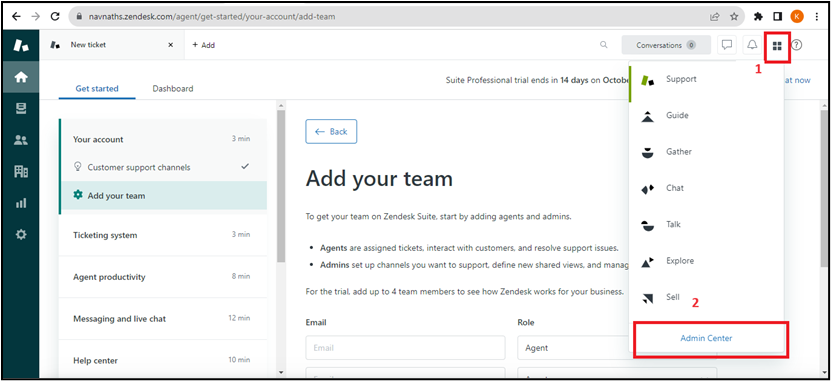
- Log on to your Zendesk account. On the home page, in the right-hand side corner, click the Admin Center icon, and then click Admin Center in the menu that appears.
- After clicking Admin Center, the Zendesk sidebar menu appears.
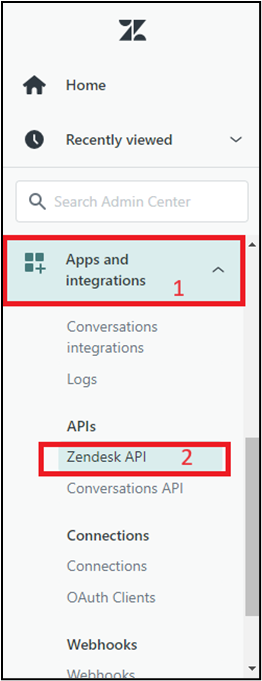
- In the menu, click Apps and integrations, and then select APIs Zendesk API. The Zendesk page appears.

- On the page, select the Terms and Conditions checkbox, and then click Get Started. The Zendesk API page appears.
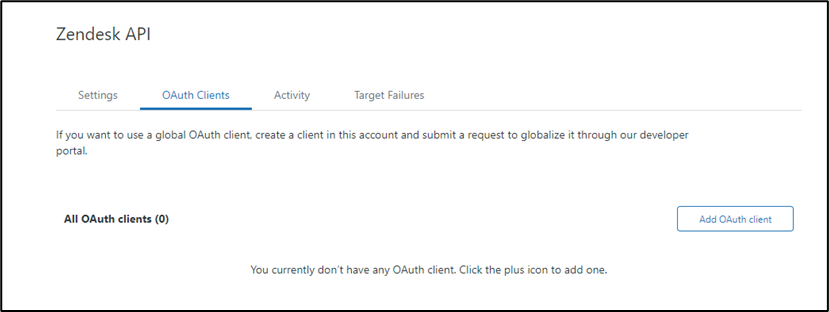
- On the page, click the OAuth Clients tab, and then click Add OAuth client. The Zendesk API page is refreshed.
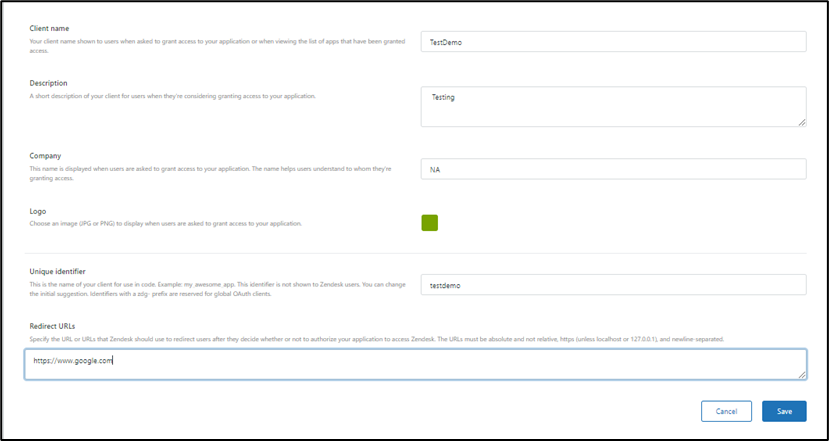
- Enter the following field details: Client name, Description, Unique Identifier, and Redirect URLs. Following is an example of values that you can enter in the fields.
- Client name: TestDemo
- Description: Testing
- Unique Identifier: testdemo
- Redirect URLs: https://www.google.com
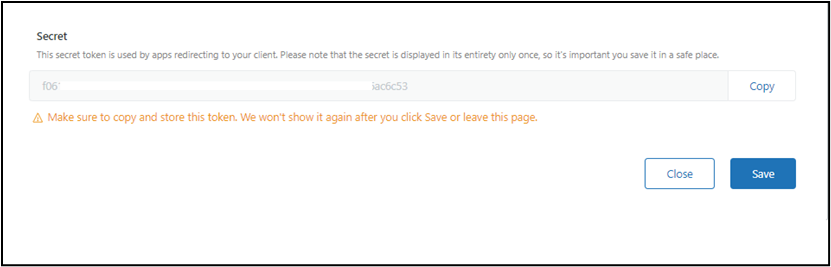
- Click Save. After the page refreshes, a new pre-populated Secret field appears., which holds the client_secret value.
Copy the Secret value to your clipboard and save it, as it is displayed only once.
- Click Save. The OAuth Client is created.
Generate authorization code
To generate an Authorization code, use the following URL:
Syntax: https://<<subdomain>>.zendesk.com/oauth/authorizations/new?response_type=code&redirect_uri=<<RedirectURI>>&client_id=<<Unique_Identifier>>&scope=read%20write
where,
- subdomain - is your Zendesk subdomain.
- RedirectURI - is the URL that you provided in the Create OAuth clients section.
- ClientID - is the unique identifier that you provided in the Create OAuth clients section.
After entering the URL in the browser you may need to verify yourself. On the Zendesk landing page, click Allow. The Authorization Code is generated.
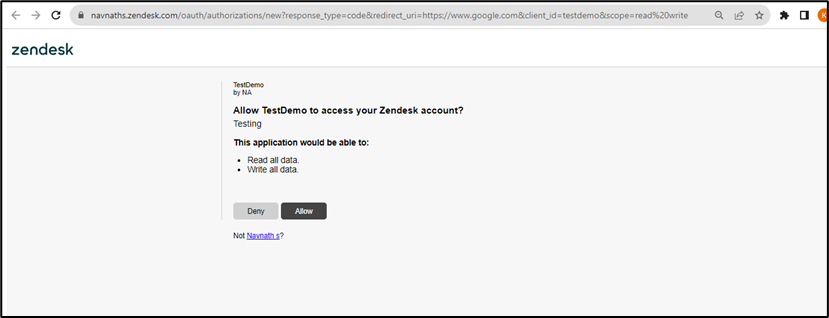
Copy the code to the clipboard, as you will need the details to generate the access token.
Generate access token
To generate an access token, make the following request:
POST:
Syntax: https://{subdomain}.zendesk.com/oauth/tokens
Headers:
Content-Type: application/json
Body:
Raw >> JSON
{
    "grant_type": "authorization_code",
    "code":”<authorizationCode>”,
    "client_id": "<uniqueIdentifer>",
    "client_secret": "<secret>",
    "redirect_uri": "<redirectURI>",
    "scope": "read write"
}
where,
- grant_type: It is the response type, specify the authorization_code.
- code: It is the authorization code value derived in the Generate authorization code section.
- uniqueIdentifer: It is unique identifier that you provided in the Create OAuth clients section.
- secret: It is the value derived in the Create OAuth clients section.
- redirectURI: It is the URL that you provided in the Create OAuth clients section.
For reference, see the following screenshot:
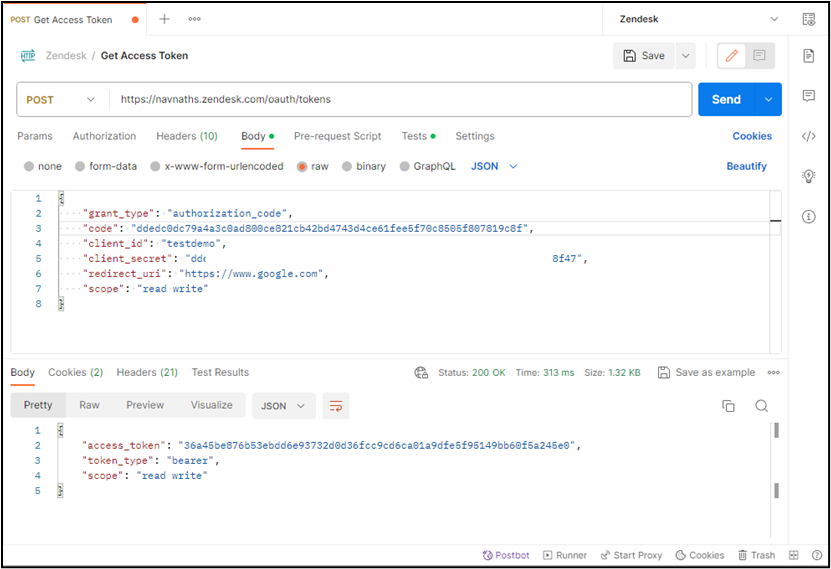
You will get an Access Token under the tag ‘access_token’ in the JSON response.