PowerShell: Setup Office 365
Pre-requisites for Microsoft Office365 use cases:
What do you need to know before you begin?
- Estimated time to complete: 5 minutes
- You can use the following versions of Windows:
- Windows 10, Windows 8.1, Windows 8 or Windows 7 Service Pack 1 (SP1)
- Windows Server 2016, Windows Server 2012 R2, Windows Server 2012, or Windows Server 2008 R2 SP1
- Note: Use a 64-bit version of Windows. Support for the 32-bit version the Microsoft Azure Active Directory Module for Windows PowerShell was discontinued in October, 2014.
- The Office 365 work or school account that you use for these procedures needs to be a member of an Office 365 admin role. For more information, see About Office 365 admin roles.
Step 1: Check if required module is installed
tip
Open PowerShell from start menu and use below commands for further process.
- Check if “MSOnline” module is installed by using below command :
- Command:
Get-Module -ListAvailable -Name MSOnline - Expected output:
Directory: C:\Windows\system32\WindowsPowerShell\v1.0\Modules

ModuleType Version   Name        ExportedCommands
---------- -------   ----        ----------------
Manifest  1.1.166.0  MSOnline    {Get-MsolDevice, Remove-MsolDevice, Enable-MsolDevice, Disable-MsolDevice...}
- Command:
- Import Module using below command :
- Command:
Import-Module -Name MSOnline
- Command:
Step 2: Install required software
These steps are required once on your computer, not every time you connect. However, you'll likely need to install newer versions of the software periodically. Install the 64-bit version of the Microsoft Online Services Sign-in Assistant: Microsoft Online Services Sign-in Assistant for IT Professionals RTW.
Office 365 App Registration & Permissions in Azure AD
Register App
- Sign in to your Azure Account through the Azure portal.
- Select the Azure Active Directory.
- Select App registrations.
- Select an App created for AutomationEdge Plugin steps or alternatively, Select New registration.
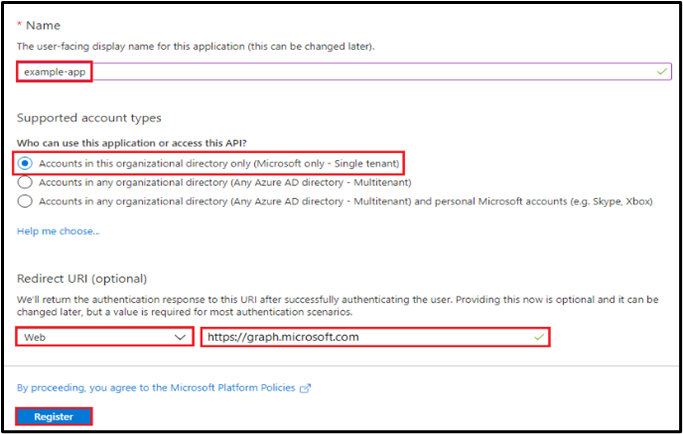
- Name the application. Select a supported account type, which determines who can use the application.
- Additionally, for email related steps- Download Email Attachments, Email Message Input and Send Email, under Redirect URI, select Web for the type of application you want to create. For example, https://automationedge.com as seen in the screenshot below. Select Register.
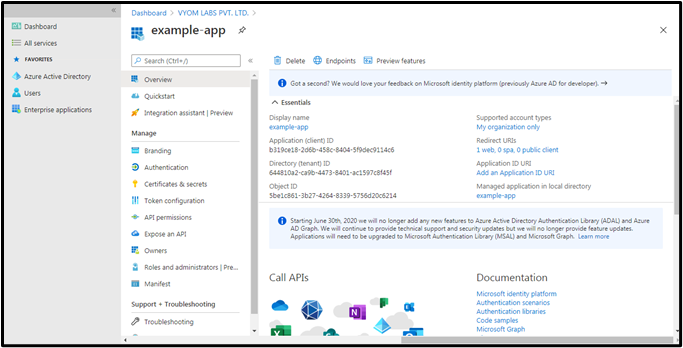
- Upon registration fetch Tenant ID and Client ID for the App as seen below.
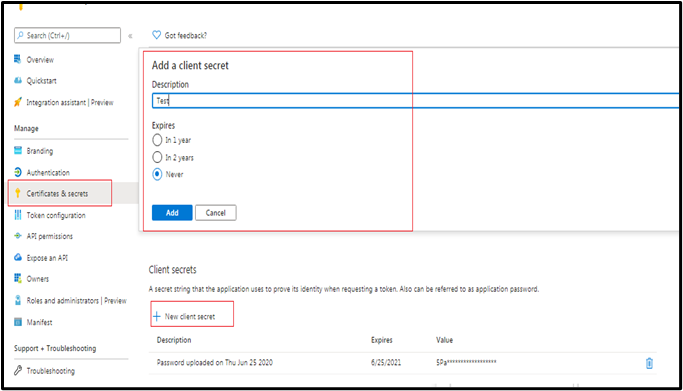
Creating Client Secret
- Click on Certificates and secrets
- Click on New client secret
- Enter Description
- Select one of Expires Radio Button
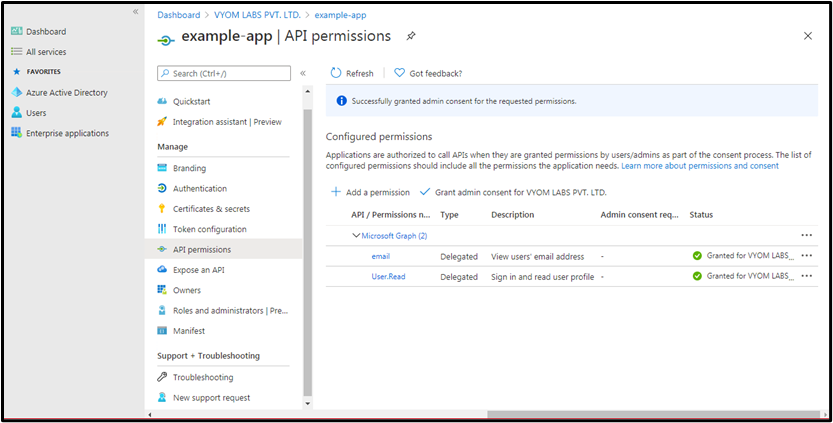
Provide API Permission
- Click on API Permission.
- Click on Add Permission.
- Click ‘Microsoft Graph’ as highlighted below on the top right corner.
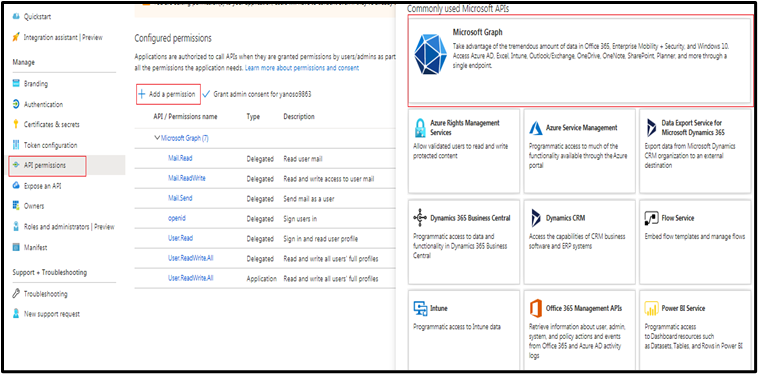
- Click ‘Delegated Permissions’ or ‘Application permissions’ as required and as mentioned in the Plugin Step documentation.
- Provide all required permissions for the Plugin steps to execute. The permissions required are mentioned in the Plugin steps.
Consent for Permission to App
Grant admin consent
You need to Grant Admin consent to the app to access all accounts data, for all Plugin steps except email related steps. Users can request Azure AD administrator to grant admin consent. The following screenshot shows an Administrator view with option to Grant Admin consent.