Office 365: Password Grant
Register App
- Sign in to Azure portal with the email address having permission to perform the action to be automated. The permission details are mentioned under the specific step documentation.
- For the automation of email handling actions, Sign in to the Azure portal with the email address that is going to be used in the step.
- Select the Azure Active Directory.
- Select App registrations.
- Select an App created for AutomationEdge Plugin steps or alternatively, Select New registration.
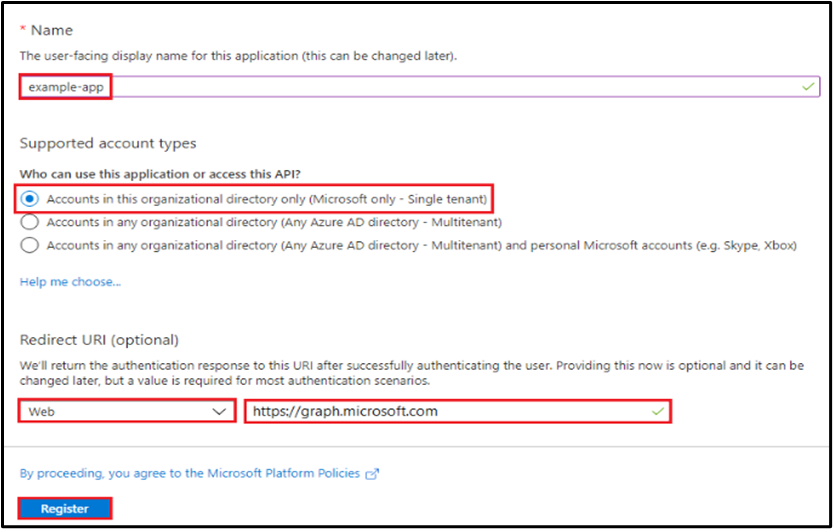
- Name the application. Select a supported account type, which determines who can use the application.
- Additionally, for email related steps- Download Email Attachments, Email Message Input and Send Email, under Redirect URI, select Web for the type of application you want to create. For example, https://automationedge.com as seen in the screenshot below. Select Register.
Upon registration fetch Tenant ID and Client ID for the App as seen below.

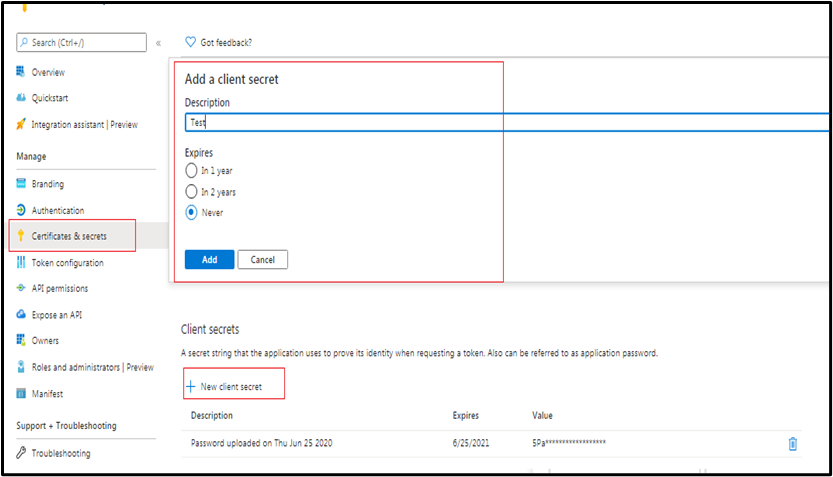
Creating Client Secret
- Click on Certificates and secrets
- Click on New client secret
- Enter Description
- Select one of Expires Radio Button
Provide API Permission
- Click on API Permission.
- Click on Add Permission.
- Click ‘Microsoft Graph’ as highlighted below on the top right corner.
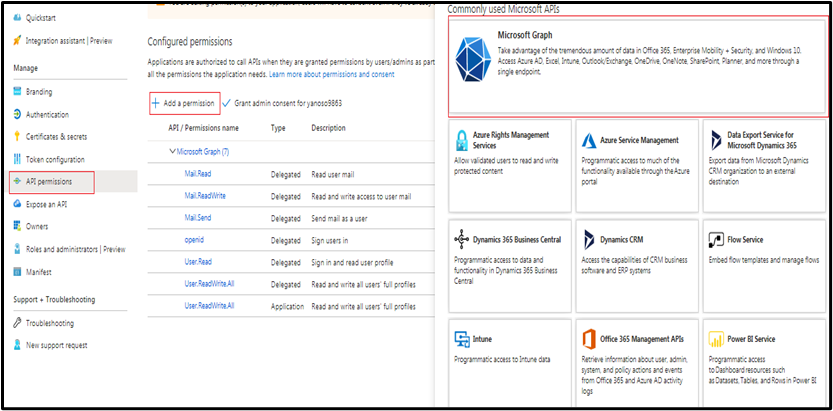
- Click ‘Delegated Permissions’ or ‘Application permissions’ as required and as mentioned in the Plugin Step documentation.
- Provide all required permissions for the Plugin steps to execute. The permissions required are mentioned in the Plugin steps.
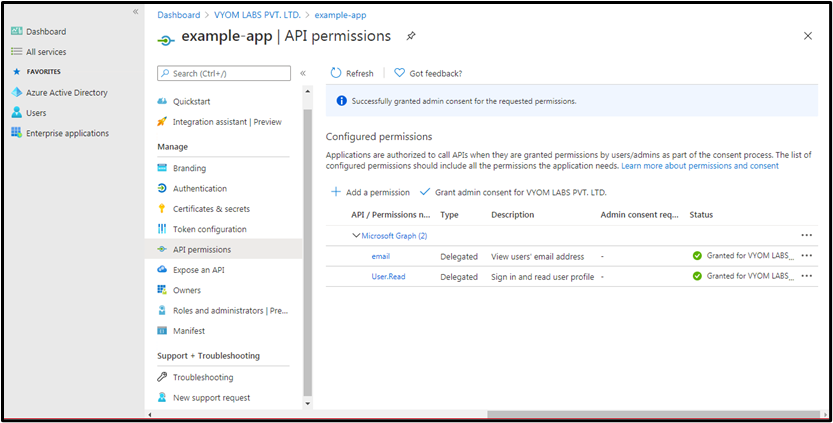
Consent for Permission to App
Grant admin consent
You need to Grant Admin consent to the app to access all accounts data, for all Plugin steps except email related steps as mentioned in the following section: Error: Reference source not found. Users can request Azure AD administrator to grant admin consent. The following screenshot shows an Administrator view with option to Grant Admin consent.
Build a URL and Run in Browser to allow permissions to the APP
The steps in this section are required for Office 365 Plugin steps - Download Email Attachments, Email Message Input and Send Email.
To allow your app to use the data provided in the permissions under section Provide API Permission perform the following steps.
i. Build a URL in the following format and run in browser. https://login.microsoftonline.com/Tenant_id/oauth2/v2.0/authorize?client_id=value&scope=Permissions &response_type=code.
Example: https://login.microsoftonline.com/2f906216-6aaa-4ee5-8c13-5bbb3af06089/oauth2/v2.0/authorize?client_id=e6080cc9-dccc-4e8b-a22e-93174e01459b&scope=Mail.Read Mail.ReadWrite Mail.Send openid User.Read &response_type=code
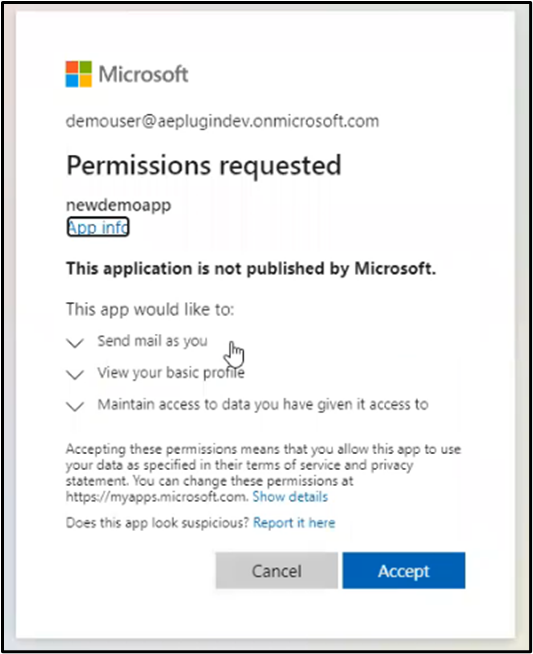
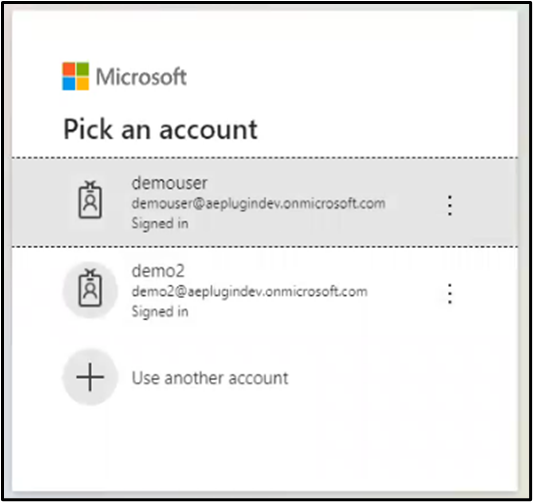
ii. After running the URL in the browser a login screen appears as below. Login with the user who created the App.
iii. After login Permissions Requested screen appears. Click on Accept Button.