Work with Settings
In the chapter, you will learn about the system level settings that you need to configure to work with AE.
The chapter includes the following topics:
System Settings
In the topic, you will learn about configuring system details, such as primary server URL, disaster recovery URL, and clean up request details. In addition, you will learn about the maintenance mode and the usage.
For details, see the following sections:
System Settings
You need to configure the server URL details to work with AE.
To setup server URL and cleanup requests:
-
In the menu, go to Settings→System Settings. The System Settings page appears with the System Settings tab selected,by default.
tipIf you are configuring the details for the first time, then the System Settings page appears blank.
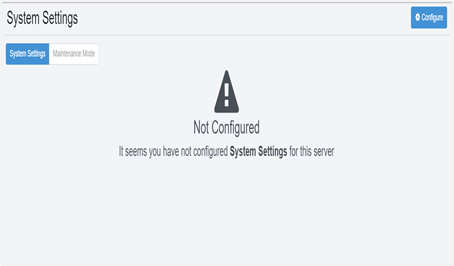
Figure 114: System Setting page
-
On the page, click Configure. The configuration fields appear.
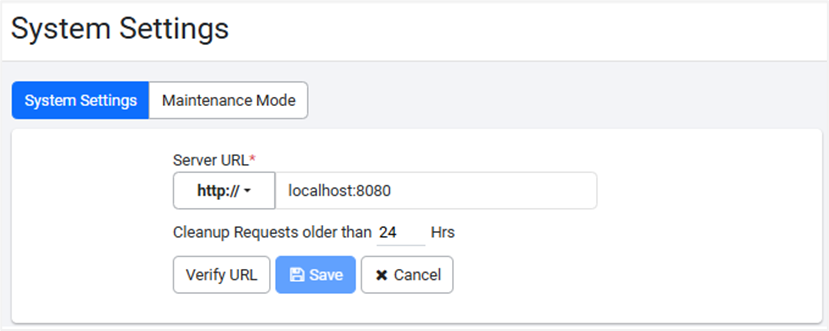
Figure 115: System Settings page -> System Settings tab
-
Enter the following field details:
Field name Description Server URL * Enter the URL of the primary server.
The server URL is the host name or IP address and Port of the AE server to connect to from the Intranet or Internet.
Note: The server URL is also the Primary Site.
For example, http://localhost:8080Cleanup Requests older than -Hrs* Enter the duration in hours after which requests in New state is cleaned up, and marked as Expired *: indicates a mandatory field.
-
Click Verify URL. A message confirming the URL is valid appears.
-
Click Save. A message confirming that the system settings are saved successfully appears.
tipIf you have set up a Disaster Recovery (DR) server, then click
 and select DR Site to configure the server details. For details on setting up the Disaster Recovery site, see AutomationEdge_Disaster_Recovery_Guide.
To modify the server URL and / or cleanup request details, click Configure or
, and make the changes.You cannot delete the server URL and / or cleanup request details.
-
Maintenance Mode
You can enable maintenance mode for tenants when you need to perform maintenance activities.
When you enable the Maintenance mode the following restrictions and stoppages happen:
-
Users will have restricted access to the UI.
-
All schedules on the server will stop generating new requests.
-
User access to Process Studio will be restricted.
-
Agents will not receive any new job or any other updates.
-
Integration Services receives information that the server is in Maintenance mode.
To enable maintenance mode:
-
In the menu, go to Settings→System Settings. The System Settings page appears with the System Settings tab selected, by default.
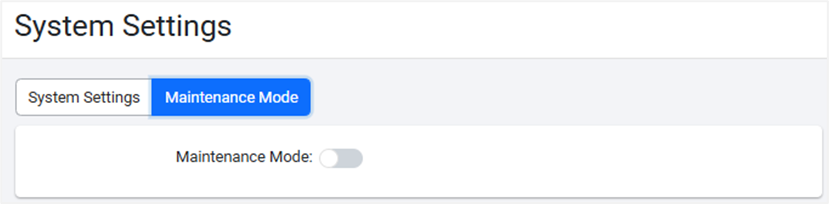
Figure 116: Maintenance Mode view -
On the page, click the Maintenance Mode tab, and then toggle the Enable Maintenance Mode switch. A message asking for confirmation to enable the mode appears.
-
On the message dialog, click Enable. The maintenance mode is enabled(
 )
)
Email Configuration
In the topic, you will learn about configuring the email server using SMTP Configuration and Exchange Cloud Configuration for sending emails to users.AE uses configuration details to send system emails.
The topic includes the following sections:
- SMTP Configuration
- Exchange Cloud Configuration
- LDAP Configuration
SMTP Configuration
You can configure the email server using the Simple Mail Transfer Protocol (SMTP) configuration.
To add an SMTP email configuration
-
In the menu, go to Settings→Email Configuration. The Email Configuration page appears.
tipIf you are configuring the details for the first time, then the Email Configuration page appears blank.
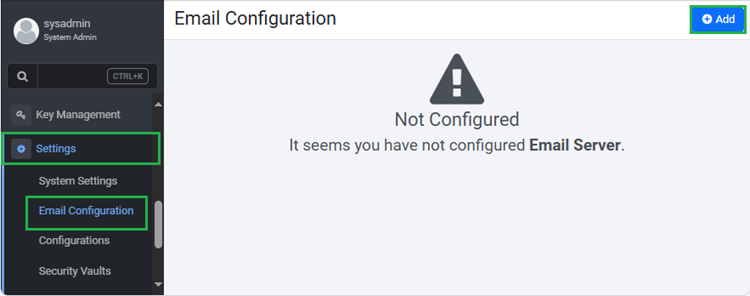
Figure 117: Email Configuration page -
On the page, click Add. The Email Configuration fields appears.
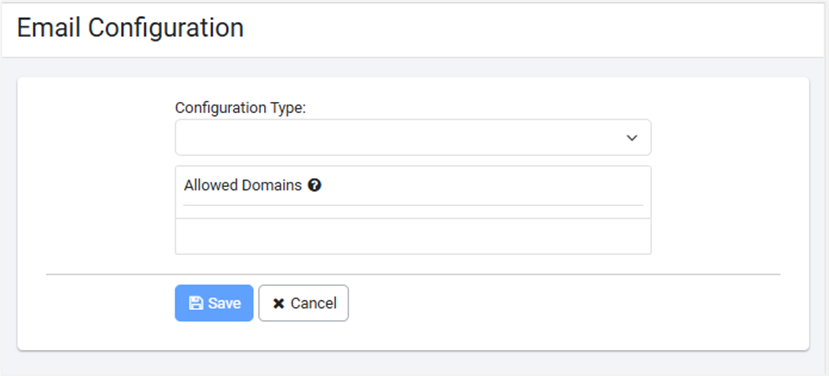
Figure 118: Email Configuration page
-
Click in the Configuration Type list and select SMTP Configuration. The SMTP Configuration detail fields appear.
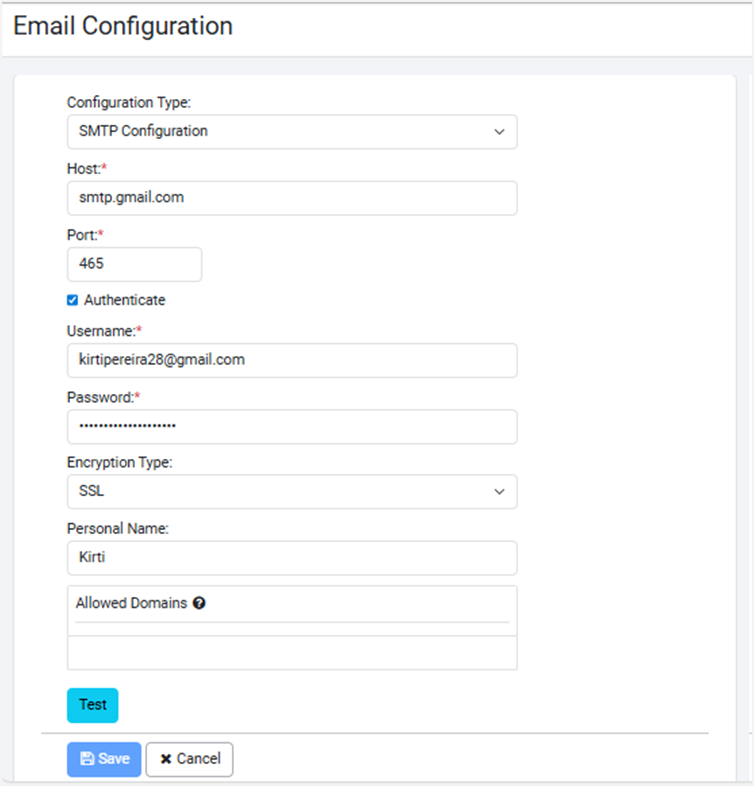
Figure 119: SMTP Email Configuration page
-
Enter the following field details:
Field Description Configuration Type Select the type of configuration for which you want to configure the email settings. For example, SMTP Configuration. Host* Enter the hostname or IP address of the LDAP server. Port* Enter the port number for LDAP connectivity. For example for Gmail SMTP server the port is SSL 465 TLS 582. Authenticate Select the checkbox if you want to authenticate the user before connecting to the SMTP server.
Note: If you select the checkbox, then the Password field is available.Username* Enter a username for authentication. For example, Email ID is the username for Gmail. Password* Enter the app password for user authentication. For example for Gmail the password is the 16 digit app password
Note: The app password is not your mail login password.Encryption type Select the type of encryption you want. Available options are:
- SSL
- TLS
Note: The Protocols field appears only if you select TLS..Protocols Select one or more protocols for setting up SMTP configuration. 
Figure 120: Encryption Type dialogPersonal name Enter the personal name as it will appear in the email. Allowed Domains Enter the names of domains to which you want to send the emails. You can add multiple domains by separating them with commas or by pressing Enter after each domain.
For example, if you have added gmail.com to the domain list then you can send emails only to Gmail domain users.
Note: If you have not created the allowed domain list, then you can send emails to users of any domain. And, if you create the allowed domain list, then you can send emails to users of the listed domains only. You will see an error message, if you try to send email to users outside the listed domains. Allowed domains is applicable throughout AutomationEdge UI.* Indicates mandatory field.
-
Click Test to validate the SMTP connectivity. A message confirming the success of the connectivity appears.
-
Click Save. The SMTP configuration details are saved.

Figure 120: Email Configuration
• To modify the email configuration details, click Edit.
• To remove the email configuration details, click Delete.
Exchange Cloud configuration
To use Exchange Cloud configuration, you must have a Microsoft account. Create an account through the Azure AD portal.
For details, see Appendix 17: Office 365 App Registration for Grant Type Refresh Token in Plugin Reference Guide
To add an Exchange Cloud configuration:
-
In the menu, go to Settings→Email Configuration. The Email Configuration page appears.
-
On the page, click Add. The Configuration Type selection dialog appears.
-
From the list, select Exchange Cloud Configuration. The Exchange Cloud Configuration detail fields appear.
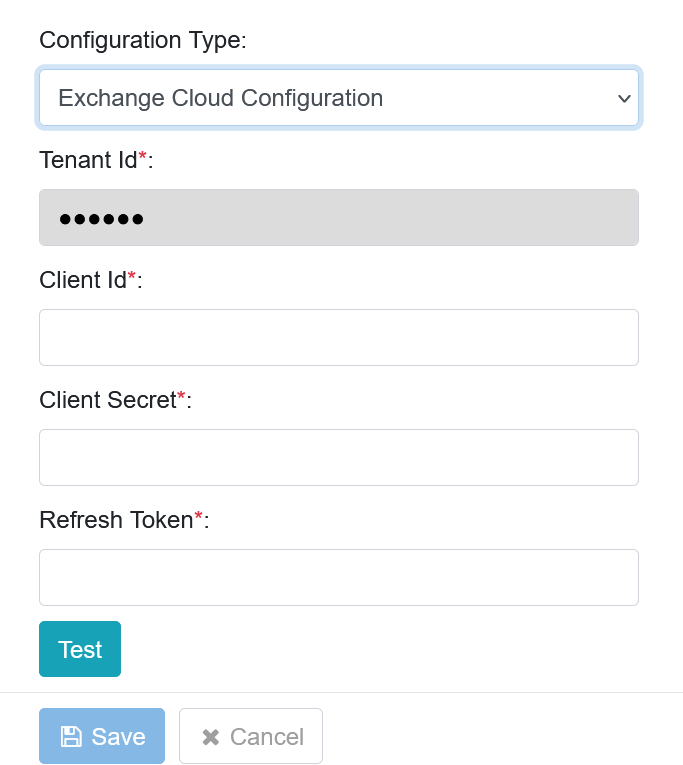
Figure 121: Exchange Cloud Configuration page
-
Enter the field details:
tipAccess your Microsoft account to fetch the details and copy-paste them in configuration page.
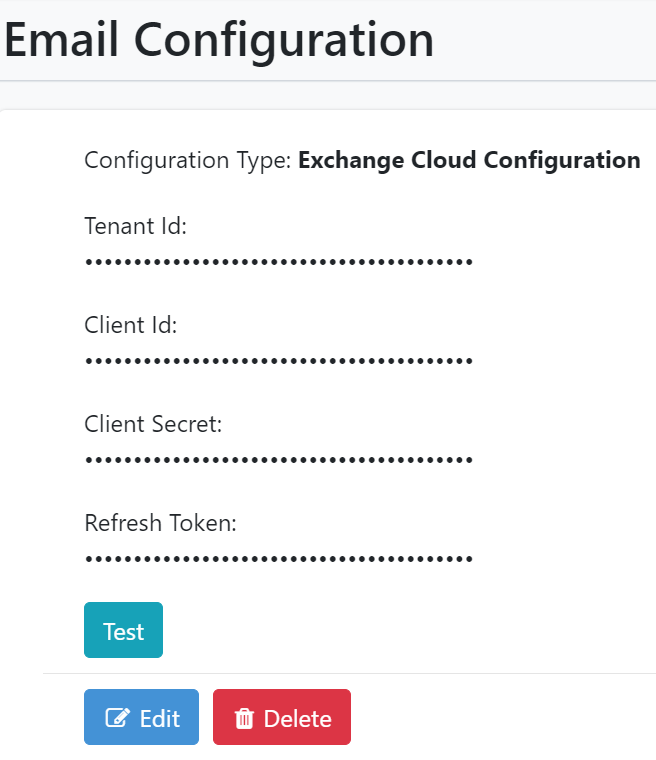
Figure 122: Exchange Cloud Configuration detailsThe details will appear encrypted in the fields
Field Description Configuration Type Select the type of configuration for which you want to configure the email settings. For example, Exchange Cloud Configuration. Tenant Id* Copy-and-paste your Microsoft account Tenant Id. Client Id* Copy-and-paste the client ID of the application created in your Microsoft account. Client Secret* Copy-and-paste the client secret generated in your Microsoft account. Refresh Token* Copy-and-paste the refresh token generated in your Microsoft account. Allowed Domains Enter the names of domains to which you want to send the emails. You can add multiple domains by separating them with commas or by pressing Enter after each domain.
For example, if you have added gmail.com in the domain list then you can send emails only to the Gmail domain users.
Note: If you have not created the allowed domain list, then you can send emails to users of any domain. And, if you create the allowed domain list, then you can send emails to users of the listed domains only.
You will see an error message, if you try to send email to users outside the listed domains.
Allowed domains are applicable throughout AutomationEdge UI.* Indicates mandatory field.
-
Click Test to validate the Exchange Cloud connectivity. A message confirming the success of the connectivity appears.
-
Click Save. The Exchange Cloud configuration details are saved.
You can set the email configuration details for either, SMTP Configuration or Exchange Cloud Configuration. However, to change the email configuration, click Edit on the Email Configuration page, and enter or change the required details.
Delete email configuration
You can delete the email configuration, if required.
To delete an email configuration:
-
In the menu go to Settings->Email Configuration. The Email Configuration page appears.
-
On the Email Configuration page, click Delete. The confirmation dialog appears. For example, if you are deleting SMTP Configuration, then the Confirm SMTP Configuration Deletion dialog appears.
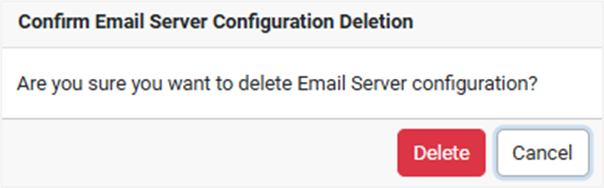
Figure 123: Confirm SMTP deletion dialog
-
On the dialog, click Delete. The SMTP configuration deleted successfully message appears.
Configurations
You can view or configure the policy for sign in attempts, creating a password, and concurrent logins.
The assumption is that you are already signed into the AE UI as System Administrator.
The topic contains the following sub-topics:
- View System Administrator configurations
- Modify System Administrator policies
- Unlock user account
View System Administrator configurations
View the various policy configuration details.
To view the configuration details:
-
In the menu, go to Settings -> Configurations. The Configurations page appears.
-
Click the links to view the respective policy details:
Login Policy: View the configured number of login attempts.
Password Policy: View the password policy configuration.
Login Session Control: View the concurrent login configuration.
Modify System Administrator policies
You can modify the details of the System Administrator policy, if required.
To modify the System Administrator policy details:
-
In the menu, go to Settings -> Configurations. The Configurations page appears.
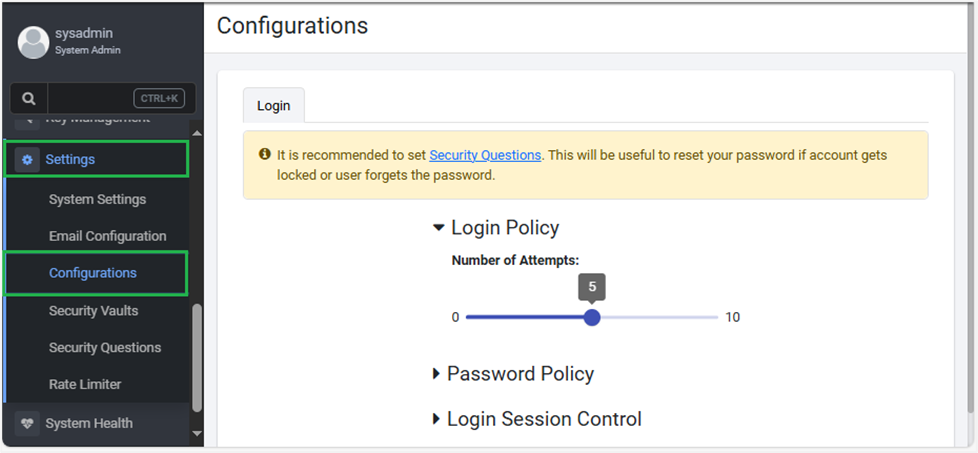
Figure 124: Configurations page
-
Click Login Policy and toggle the switch to set the number of login attempts for the user. You can set the value between zero to ten (0 to 10).
• The default value is 0, which indicates that there is no limit on the number of times a user will be able to sign in even after an incorrect sign in attempt.
If you set a value other than 0, the user is informed about the number of attempts left after every incorrect sign in attempt.
If the number of attempts exceed the set value, then the user account is locked. For more information on unlocking a user account, see Unlock user account.
• You can also configure the maximum limit for the Login Policy, as per your organization security requirements. In the ae.properties file, configure login-policy.upper-limit.number-of-attempts. login-policy.upper-limit.number-of-attempts:10
- Click Password Policy, and toggle the switches for the respective fields:
| Field | Description |
|---|---|
| Password Policy | NOTE: You can also configure the maximum limits for the Password Policy, as per your organization’s security requirements. In the ae.properties file. • password-policy.upper-limit.password-validity-months:12 • password-policy.upper-limit.password-history:30 • password-policy.upper-limit.max-length-password:30 • password-policy.upper-limit.min-length-password:20 |
| Password Expiry (In months) | Scroll to set the password expiry month. You can set the month between 0 to 12. NOTE: If you set the value as 0, then there is no expiry month for the password. |
| Password History | Scroll to set the number of previous passwords that cannot be reused by the user. The default value is one. NOTE: One is the minimum value and maximum value is 20. |
| Minimum Length | Scroll to set the minimum length of the password. The default minimum length of a password is six characters. |
| Maximum Length | Scroll to set maximum length of the password. The default length is 30 characters. NOTE: If you want you can modify the password-policy.upper-limit.max-length-password value in the ae.properties file, ensure that you also update the maxLengthOfPassword value in the aeui-config.properties file. For example: In ae.properties, add: password-policy.upper-limit.max-length-password = 20 In aeui-config.properties, add: maxLengthOfPassword = 20 |
| Minimum Uppercase | Scroll to set the minimum uppercase characters you want in the password. The default and minimum value is one and maximum value is 17. |
| Minimum Lowercase | Scroll to set the minimum lowercase characters you want in the password. The default and minimum value is one and maximum value is 17. |
| Minimum Special Characters | Scroll to set the minimum special characters you want in the password. The default and minimum value is one and maximum value is 17. For example, special characters, such as @, #, and so on. |
| Minimum Digits | Scroll to set the minimum digits you want in the password. The default and minimum value is one and maximum value is 17. |
The maximum limits for Login Policy and Password Policy can be configured in the ae.properties file. Setting limits for Login and Password policies helps meet company security rules.
- Login Policy login-policy.upper-limit.number-of-attempts:10
- Password Policy
password-policy.upper-limit.password-validity-months:12
password-policy.upper-limit.password-history:30
password-policy.upper-limit.max-length-password:30
password-policy.upper-limit.min-length-password:20
Note: This feature is available from 8.1.2 onwards.
- Click Login Session Control, and enter the following field details:
If you have configured the Concurrent Login details in the ae.properties file (for details see, Installation guide prior to release 8.0.1), then you will have to reconfigure the details through the AE UI.
| Field | Description |
|---|---|
| Control Options | Select from any of the following option to configure for concurrent logins to AE: • Allow Multiple Sessions : The default configuration. If the option is selected, a user can login concurrently and have multiple active sessions at the same time. • Prevent New Sessions: If the option is selected, the user will be unable to log on to a new session if a session is already in progress. If a session is active and a user tries to login again then an error message appears. • Invalidate Old Sessions: If the option is selected, then the user will log out of the current active session and will log into the new session. |
| User Exception List | Select the tenant users for whom you don't want to allow concurrent logins. |
- Click Save. The details are saved, and the Confirm Policy dialog appears.
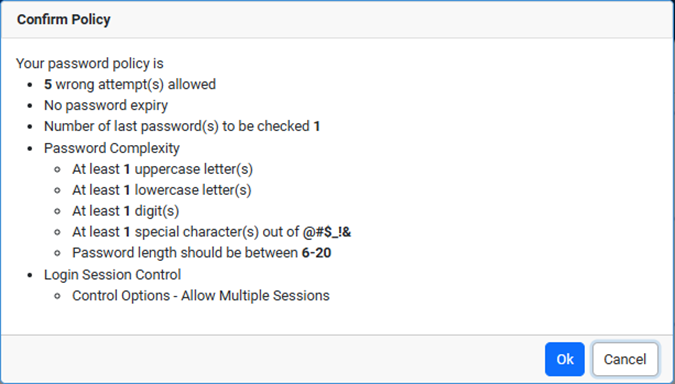
Figure 125: Confirm Policy Dialog
- Click Ok. The password policy updated successfully.
Unlock user account
An account can get locked because of number of invalid sign-in attempts. A system administrator can unlock the user account. User account is unlocked during the scheduled night job or by resetting the password after answering the security questions.
When you sign in for the first time after the account is unlocked then you will need to change the password. However, for LDAP users you need not reset the password after signing in after account unlock.
Security Vaults
Security Vaults is a secure enclosure used for storing valuable items.It often implies a high level of security. The System Administrator can assign security vaults to different tenants. Once the vaults are given to the tenants, the Administrator can set up connections to the vaults. The security vault allows users to access and retrieve the credentials stored in the security vaults.
- The Security Vaults option is available only if you set the enableSecurityVault key to true in the ae.properties file.
- You need to add ae.feature.security-vault-integration.enabled = true in ae.properties file.
You will have to change the key value in the ae.properties file every time you upgrade the AE UI.
To assign security vaults to tenants:
-
In the menu, go to Settings->Security Vaults. The Security Vaults page appears.

Figure 126: Security Vaults page
-
On the page, click Assign Vaults. The Assign Vaults dialog appears.
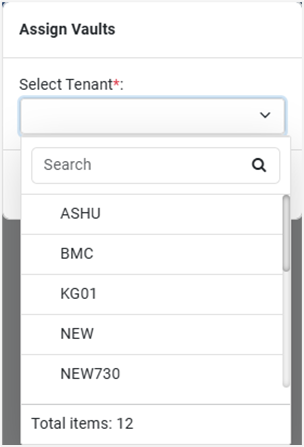
Figure 127: Assign Vaults dialog: Tenants
-
Select the tenants to which you want to assign the vaults, and then select the vault type.
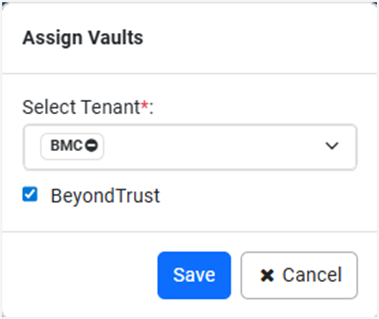
Figure 128 : Assign Vaults dialog: Type
-
Click Save. The vault is assigned to the selected tenant.
For details about using the vaults, see the AutomationEdge User's Guide.
Set Security Questions
Setting security questions is essential in enhancing the security of user accounts and supporting account recovery.
To set security questions:
- In the menu click, Settings -> Security Questions. The Set Security Questions page appears.
- Select the queries that you want to set as security questions, enter the answers, and then click Save. A message confirming that the security questions are set successfully appears.
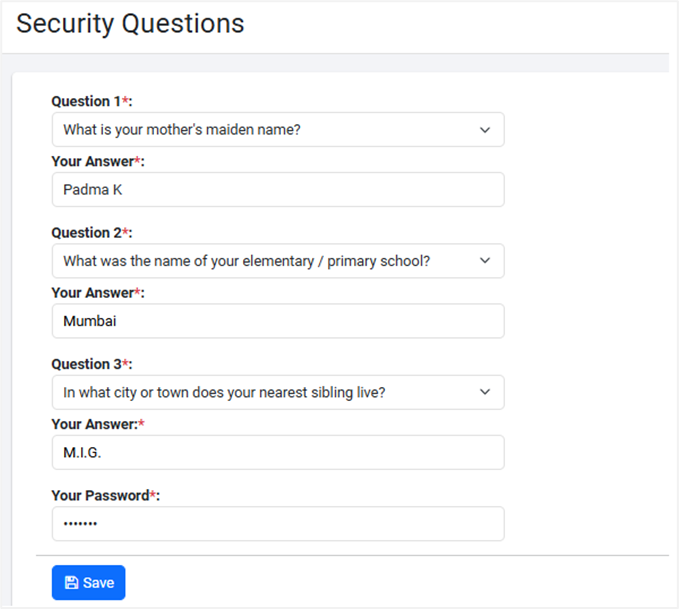
Figure 129: Security Questions dialog
If you click Skip, you are directly taken to the Tenants page.
Rate Limiter
Use the Rate Limiter functionality to set the number of times a user can perform an action within a specific timeframe.
For example, if you use authenticated Get All Tenant Users(); API to fetch users through an AE app, then multiple requests are made to get the data. Each request consumes the available rate limits.
If the rate limit is consumed, you will see a message informing you about the duration after which you can re-attempt to fetch more users. In the example, there is a limit set at two levels
-
Number of times the API request can go through.
-
Time limit after which you can attempt to fetch more users.
In AE, you can apply the rate limit to the number of requests a tenant and a tenant user can raise in a specific time period and also the duration after which you can attempt to make the requests again.
Limiting the number of times, the user can perform an action within the specified time helps controlling network traffic and over usage of server resource by one tenant and a tenant user.
Rate limit consumption is applicable to both, API and UI requests. However, rate limit is not applicable to the following:
-
AE Agent specific APIs
-
Integration service specific APIs
Type of rate limits
In AE, the type of rate limits available are:
- Unauthenticated API rate limit: Will track unauthenticated requests using the IP address. A rate limit is assigned for each IP address. If you exceed the rate limit, you will see the following message:
You have exhausted the service consumption quota. Please try after<time in seconds>.
-
Tenant level rate limit: Will have an upper limit, which will be applicable for tenants and their users for fair usage of system resources. The tracking will ensure that multiple users of the same tenant do not overload the system.
If you exceed the rate limit, you will see the following message:
You have exhausted the configured service consumption limit. Please try after <time in seconds> -
User level rate limit: Will apply a rate limit to each user.
The Tenant rate limit is greater than User rate limit, as a Tenant must cater to multiple users.
If a user is having multiple sessions, then the limit will be applicable across the multiple sessions.
If you exceed the rate limit, you will see the following message:
You have crossed the service consumption limit configured for your user. Please try after <time in seconds>.
Understand rate limit calculation
In AE, both, Tenant rate limit and User rate limit, is applicable for each authenticated request.
For example:
-
Tenant rate limit: has a rate limit of 100 requests per minute at tenant level.
-
User rate limit: has a rate limit of 10 requests per minute at each user level.
Therefore, when a user performs an action in the AE application, the authenticated request uses, both, Tenant rate limit and User rate limit. As the user continues to make requests the rate limits are utilized.
If the tenant user consumes all rate limits available at user level, then the user must wait for the User rate limit to refill, which happens after a specific time period. Similarly, if the rate limits from Tenant rate limit are consumed, then the users can attempt making calls only after a specific time period.
In case of HA, the Tenant rate limit, User rate limit, and Unauthenticated API rate limit is applicable individually to each available server.
For example, if the Tenant rate limit is 50 requests per minute, and there are three HA servers, AE_server1, AE_server2, and AE_server3, then each server will have a rate limit of 50 requests per minute, that is, AE_server1 = 50 requests per minute, AE_server2 = 50 requests per minute, and AE_server3 = 50 requests per minute.
The chapter includes the following sub-topics:
- Applied Rate Limits
- Rate Limit Properties
Applied Rate Limits
When you create a tenant, a default request limit and time period in which the tenant or the tenant user can reattempt to raise a request is applied. You can modify the limit settings at individual tenant or user level or for all tenants or users.
To view or modify the applied rate limits
-
In the menu, go to Settings -> Rate Limiter. The Rate Limiter page appears.
-
The Rate Limiter page has two tabs, Applied Rate Limits and Rate Limit Properties tabs. The Applied Rate Limits tab is selected, by default.
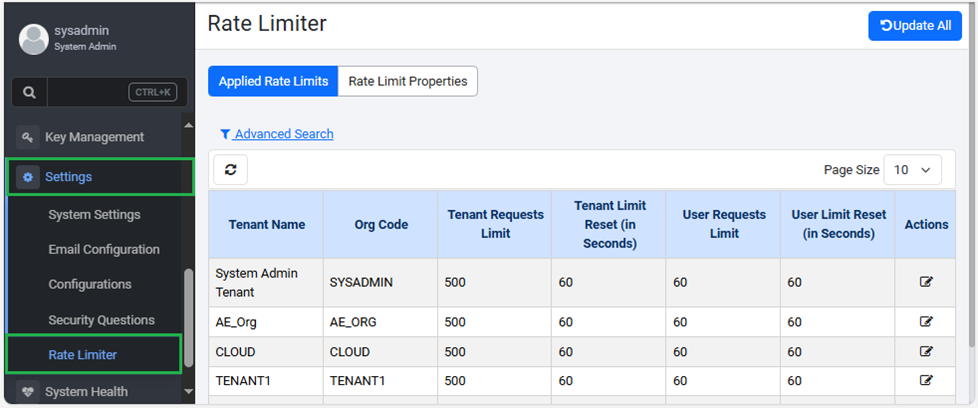
Figure 130: Rate Limiter page
The default applied limits are same for all tenants and tenant users.
-
To modify the request limit details at individual level, click
 . The Update Rate Limits for the Tenant dialog appears.
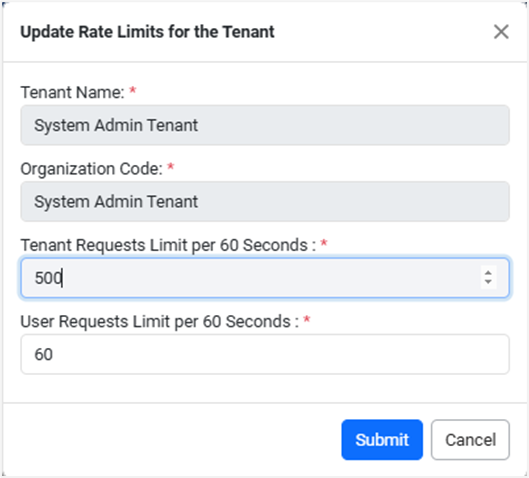
Figure 131: Update Rate Limits for the Tenant dialog -
Modify the tenant or user request limit, and click Submit. The updated details appear in the table on the Rate Limiter page.
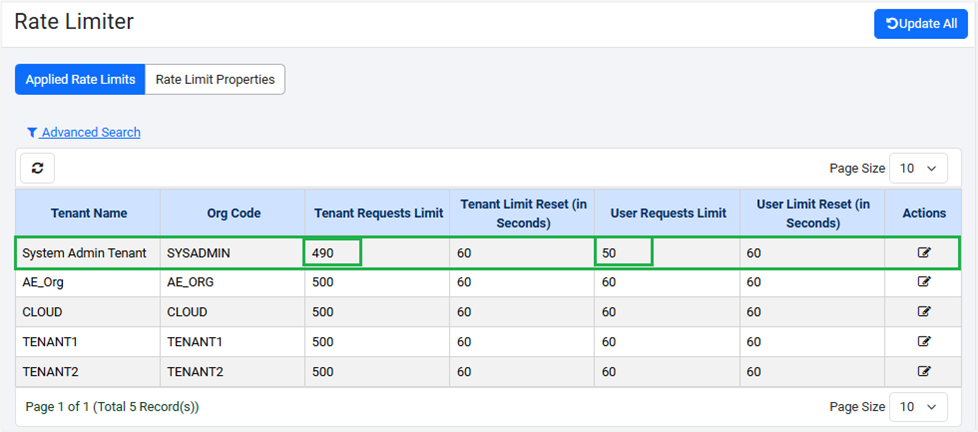
Figure 132: Applied Rate Limiter page
To modify the request rate limits for all tenants and tenant users:
-
Click Update All. The Update Rate Limits for All Tenants dialog appears.
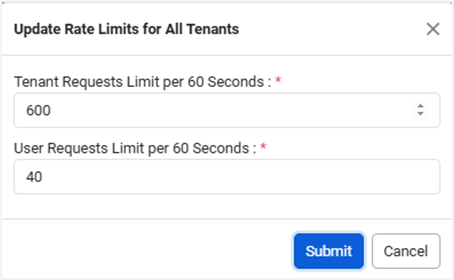
Figure 133: Update Rate Limits for All Tenants dialog
-
Enter the value you want as the rate limit in the Tenant Requests Limit per <displays user defined value> Seconds and User Requests Limit per <displays user defined value> Seconds fields, and then click Submit. The updated details appear in the table on the Rate Limiter page
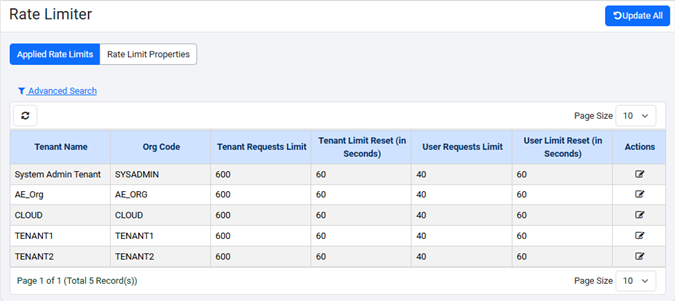
Figure 134: Update Rate Limits for All Tenants dialogtip<displays user defined value> is the value configured in the Rate Limit Properties tab. For example, if the configured rate limit is 60 seconds, then Tenant Requests Limit per 60 Seconds and User Requests Limit per 60 Seconds is displayed.
You can search for tenant details using Search or Advanced Search options.
Rate Limit Properties
In addition, you can modify the rate limit for unauthenticated requests and the time limit after which the users can again attempt to make request calls.
To modify the rate limit properties
-
In the menu, go to Settings -> Rate Limiter. The Rate Limiter page appears.
-
Click the Rate Limit Properties tab. The properties details appear.
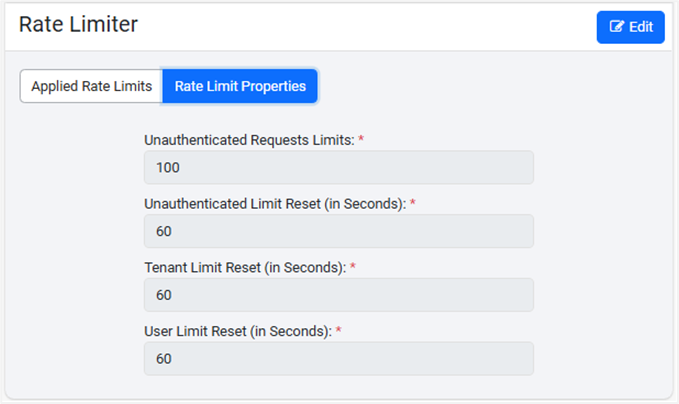
Figure 135: Rate Limit Properties dialog
-
Click Edit. The read-only fields become available for modifying the details.
-
Modify the details, as required, and click Save. The limit details are updated.