Work with Pending Tasks
Pending Tasks show you all the tasks that are waiting for your action — whether it's an approval, a document review, or a task assigned specifically to you. When a workflow reaches a Human-in-the-Loop or Reject/Repair step, it pauses and creates a task for the designated approver or reviewer. Until someone acts, the workflow remains in an Awaiting Input state and the agent thread stays blocked. This feature ensures that human decisions are captured at the right point in the workflow without being missed or delayed. Approvers can act directly from the task list for speed, or open full task details to review and modify data fields before taking action. Admins have additional controls to cancel tasks that have been pending too long, preventing indefinite agent thread blockage.
The Pending Tasks section displays all tasks that require user action. You can view the list of documents or tasks that are waiting for approval, assignment, or review. This section helps you track and complete tasks on time.
- You can also see the pending tasks that are triggered from Process Studio. Tasks with source request ID 0 are created through process-studio.
- The task detail's Workflow name field shows the Process Studio workflow name.
- Users with the Manage Document Metadata and Task Templates permission can create a task through Process Studio. For more details see, Work with Roles section.
- Purging job will archive pending tasks created with request_id = 0 based on the purge policy defined.
- Creating task through Process Studio is applicable from version 8.5.0 onwards.
Approvals
A workflow generates a pending task for an approver. When the workflow is paused, it waits for the approver to act.
In the Requests tab, the status is shown as Awaiting Input.
- Approvals appear in Awaiting state only if the template uses the Pause Workflow Execution option.
- The workflow can also create a task and then resume or complete execution.
- The approver, defined in the Human in Loop plugin of Process Studio, must log in and open the Tasks tab. For more details about Human in Loop Step, see AutomationEdge Standard Plugins Guide.
- Under Pending Tasks, the task appears with the title specified in Process Studio.
If the Pause Workflow option is selected while defining the related task template, the workflow pauses automatically.
The request state is shown as Awaiting Input, and the agent thread remains blocked until one of the following occurs:
- The approver acts on the task created by the workflow.
OR - An Admin cancels the request due to no action from the approver.
- Tasks are not auto-cancelled. One of the above action is mandatory. Developers should consider this when using related task templates, as it impacts agent availability.
- The blue circle with the number (for example, 2) in the navigation menu indicates the total count of Approvals and Assigned to Me tasks.
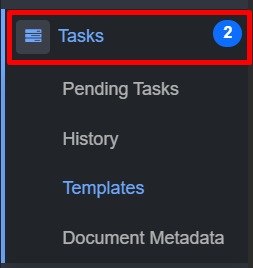
Tasks menu
To view pending task details:
-
In the menu, click Tasks → Pending Tasks. The Pending Tasks page appears.
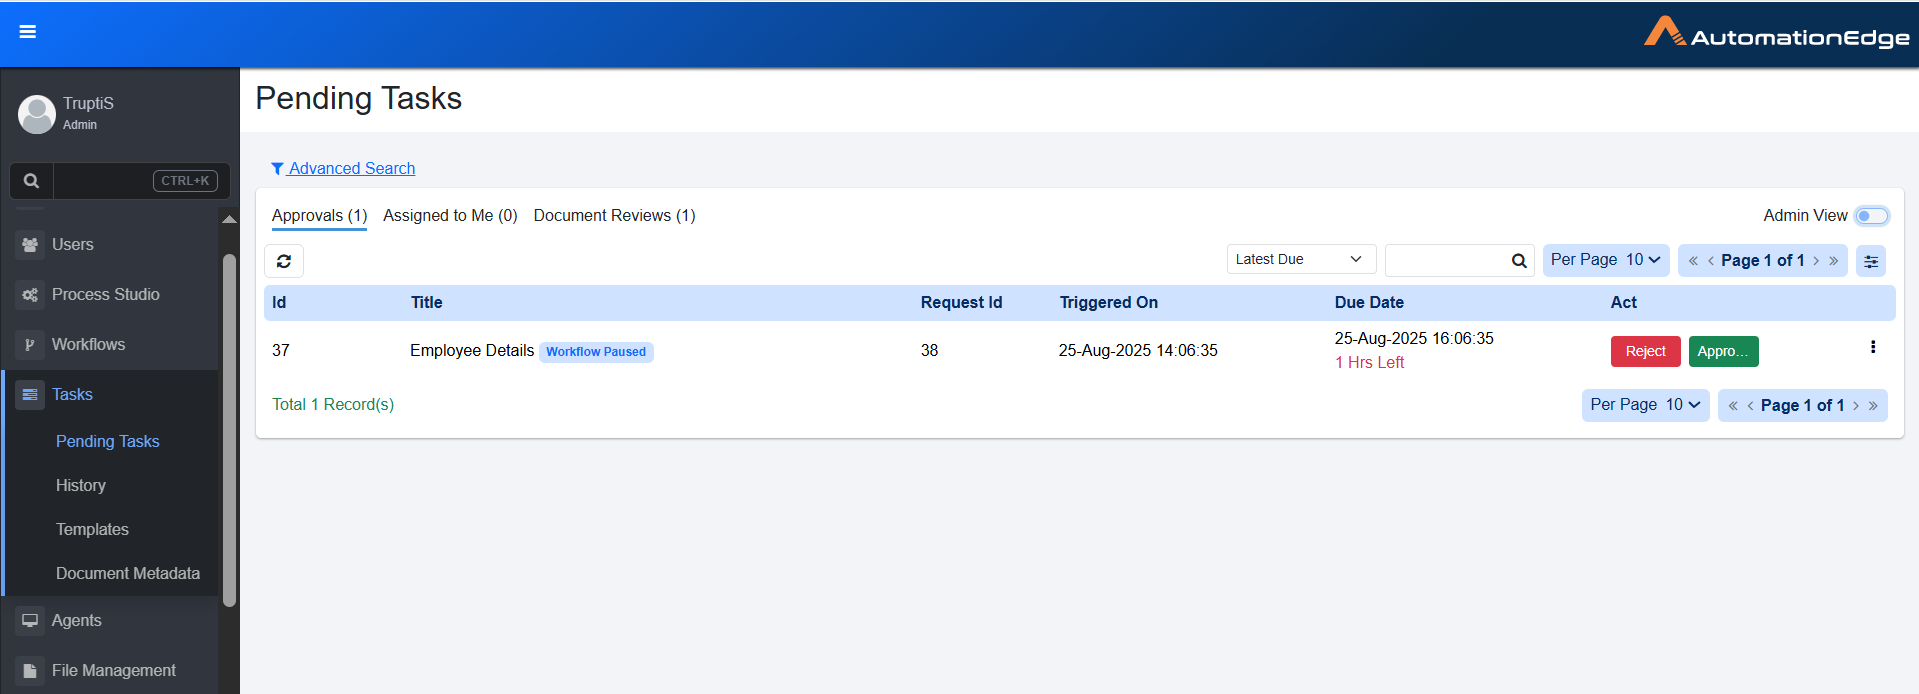
Pending Tasks page
-
View the following column details:
| Column name | Description |
|---|---|
| Id | Displays unique Id of the task. |
| Title | Displays title of the task. |
| Request Id | Displays the request ID from the Request tab that generated this task. |
| Triggered On | Displays date and time when the task was generated. |
| Due Date | Displays the date and time for the task deadline. Note: You can view the remaining time in the due date for a task.  |
| Act | Perform action on the task. For more details, refer to the Act section. |
Act
The approver can view the input fields populated in the Human in Loop plugin. The approver can add comments and modify the values in the input fields, if required.
When the approver takes an action, the task moves from Pending Tasks to History. If the approver does not act, the task remains in Pending Tasks.
If a task is assigned to multiple groups or users, it is moved to the History tab when any one person acts on it.
To act on the task:
-
In the menu, click Tasks → Pending Tasks. The Pending Tasks page appears.
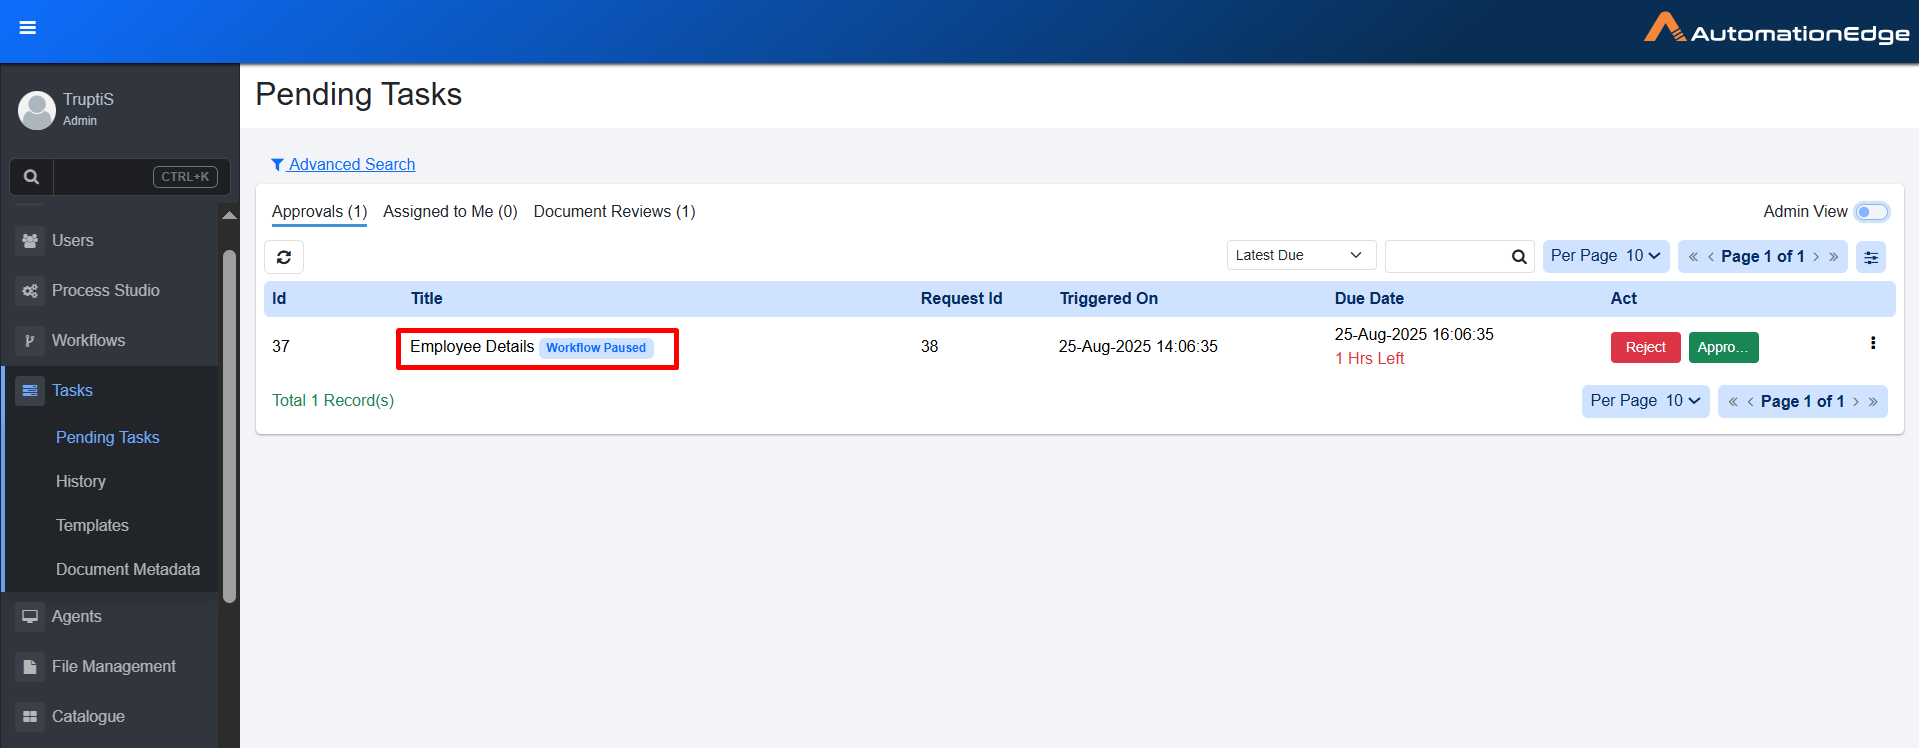
Pending Tasks - Approvals tab
-
In the Approvals tab → Title column, click the task title. The Task detail page appears.
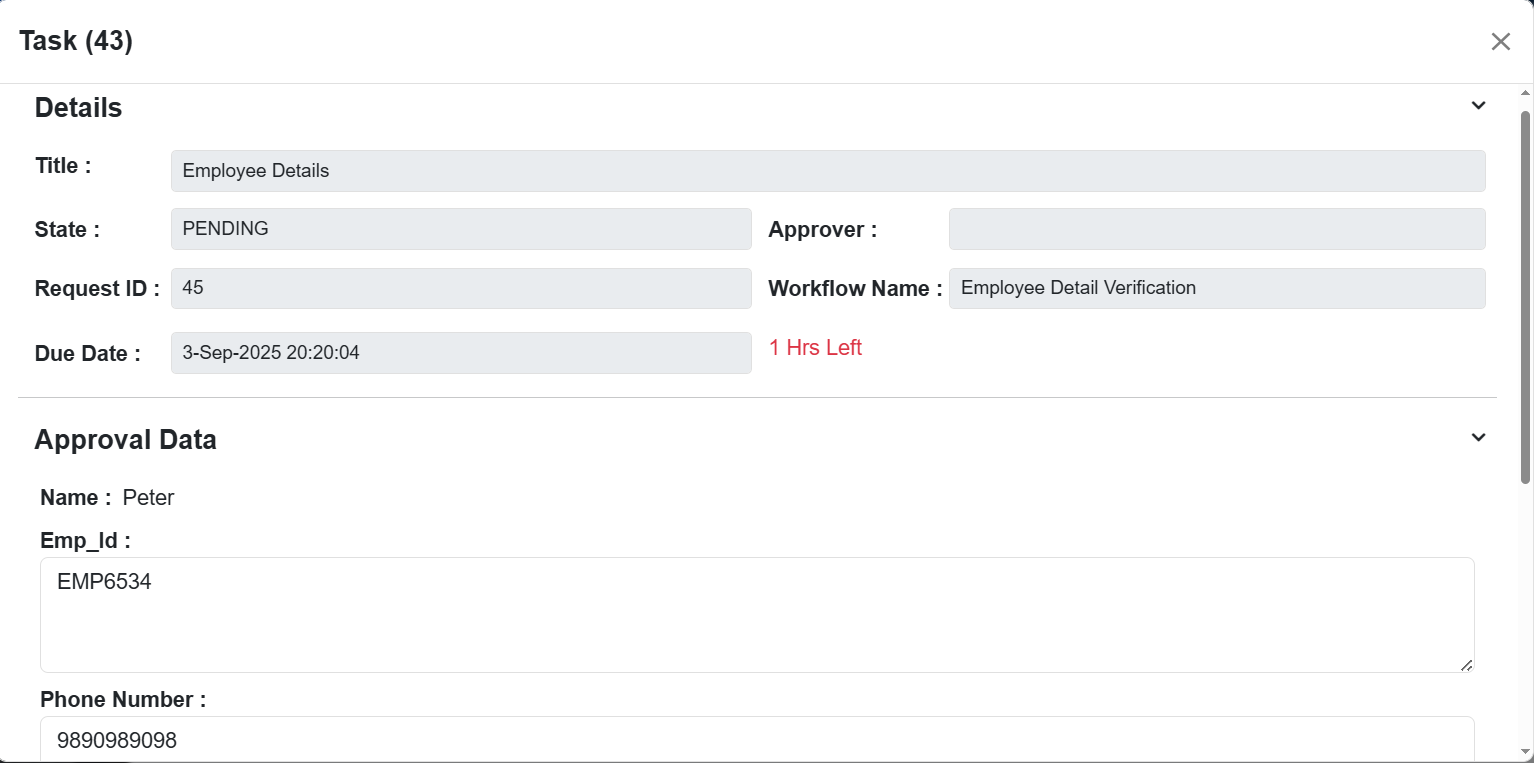
Task detail page
-
The approver can review and edit the data fields values. After making the necessary changes, the approver can act on the task using customized action buttons.
NoteDuring validation, the system detects any change a user makes to extracted data or task field values and highlights the edited field. This makes edits easy to spot, improves auditability, and speeds up reviews.

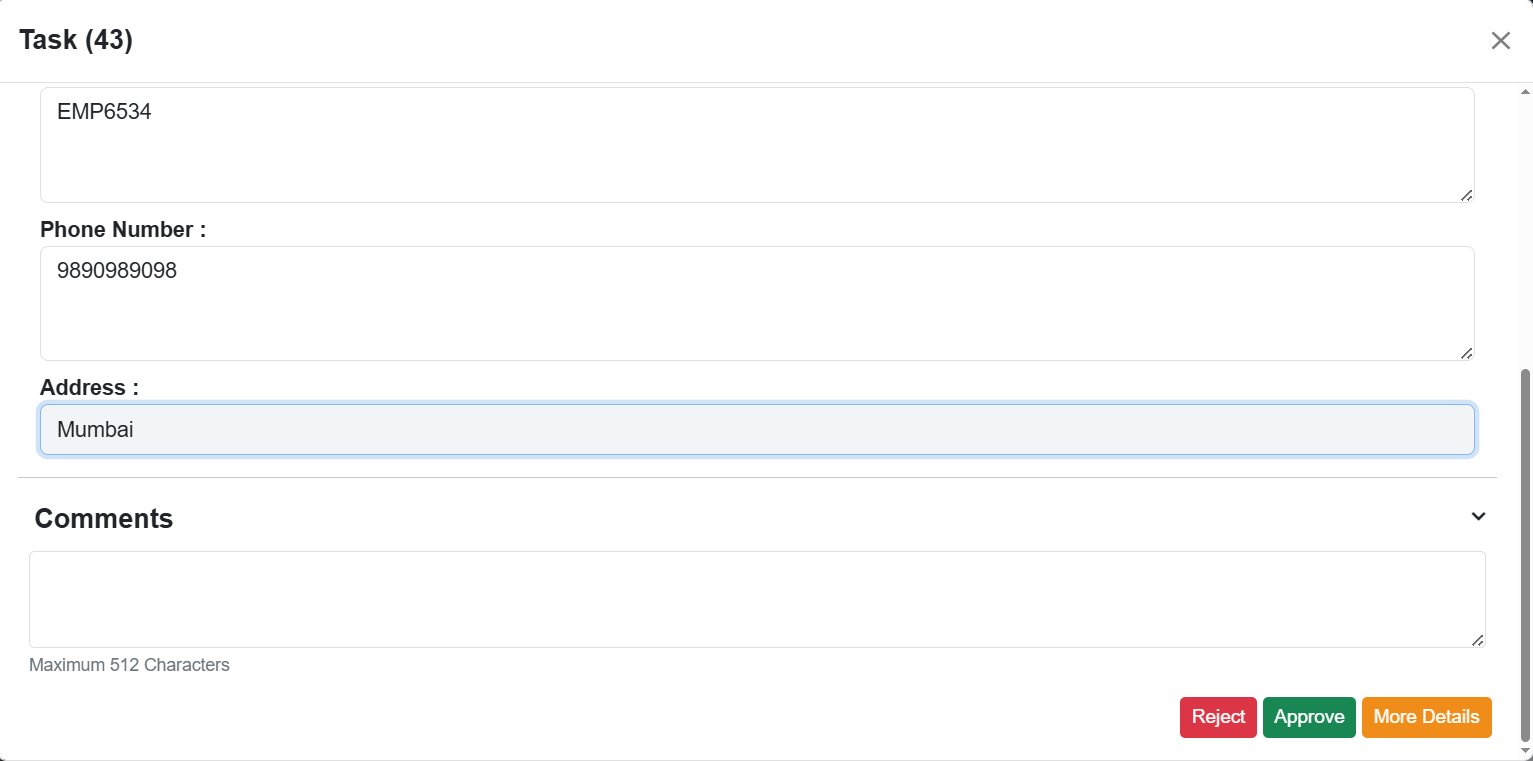
Task detail page with data fields and action buttons
-
Click Approve and a confirmation dialog appears. Click Yes to approve the task.
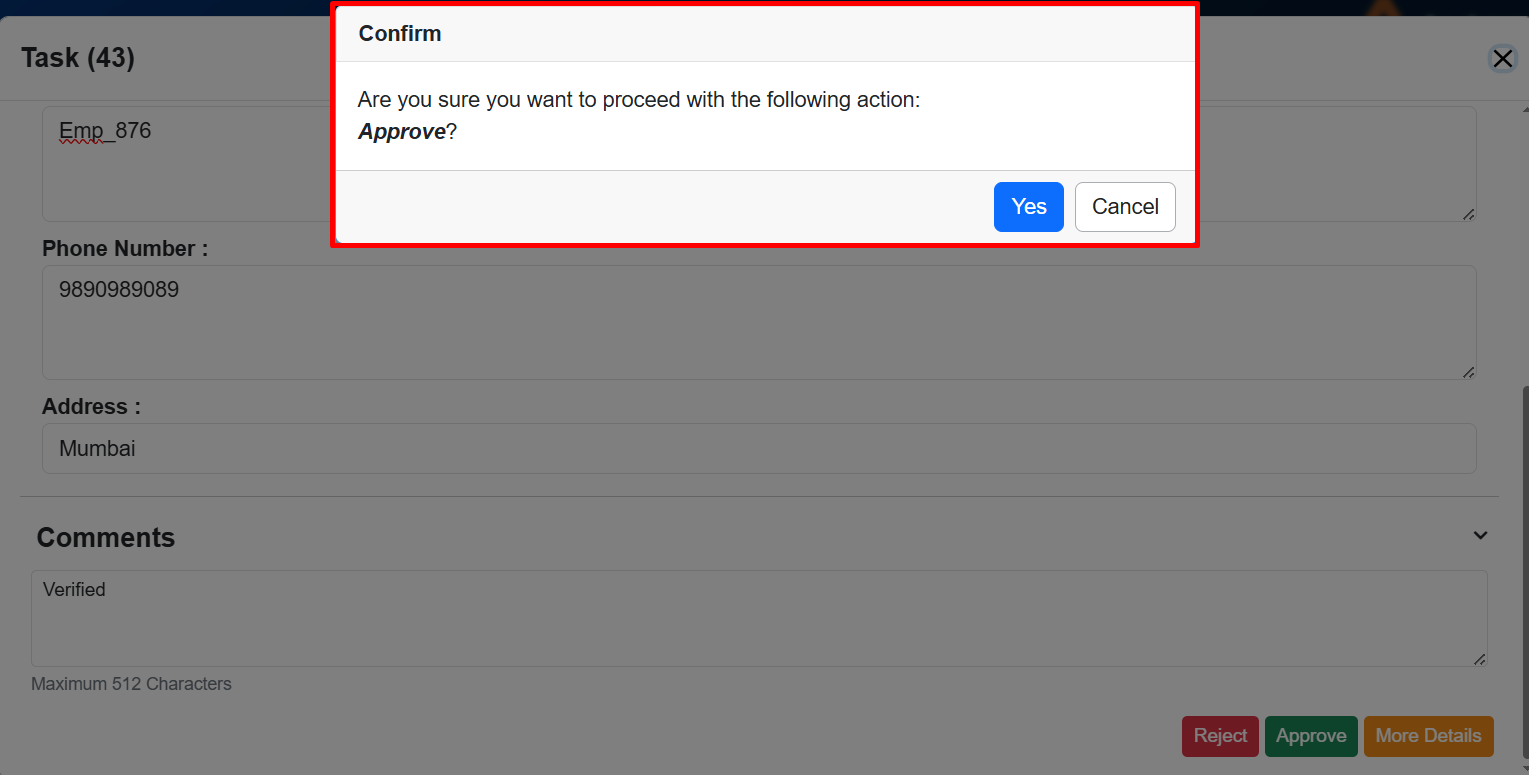
The Confirm dialog
- To make approval faster, approvers can act directly on tasks from the task list by selecting the action buttons that appear on each row instead of opening the full task details. The first two buttons from the task template appear directly on the row, while additional actions are available in the overflow menu.
- Use this option when no fields need to be entered or verified, or when you already know the task details.
Assigned to Me
You can assign the task to yourself to review a document.
This locks the document task for your review. For more details, refer to the Document Reviews section.
To review the document:
- In the menu, click Tasks → Pending Tasks → Assigned to Me. The Assigned to Me page appears.
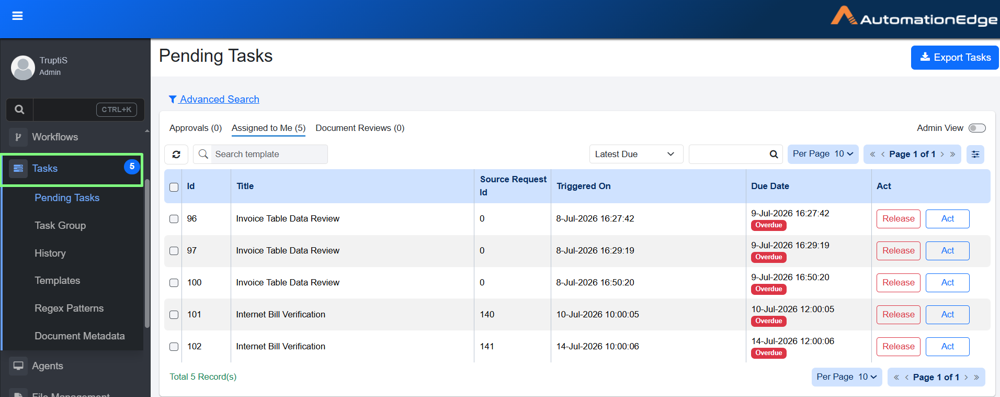
The Assigned to Me tab
- In Assigned to Me, you can either act on the document or release it. Releasing the document sends it back to the Document Reviews queue.

The Assigned to Me tab – Release or Act
You can see Overdue in the due date column if the action is not taken within the deadline mentioned in Reject/Repair step.
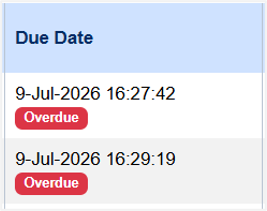
The Assigned to Me tab view
-
Click on Act or on the Task Title. The document with extracted data appears.
Note- The extracted data view is also known as the Reject Repair view.
- All the values for Human in the Loop fields are saved in the String format.
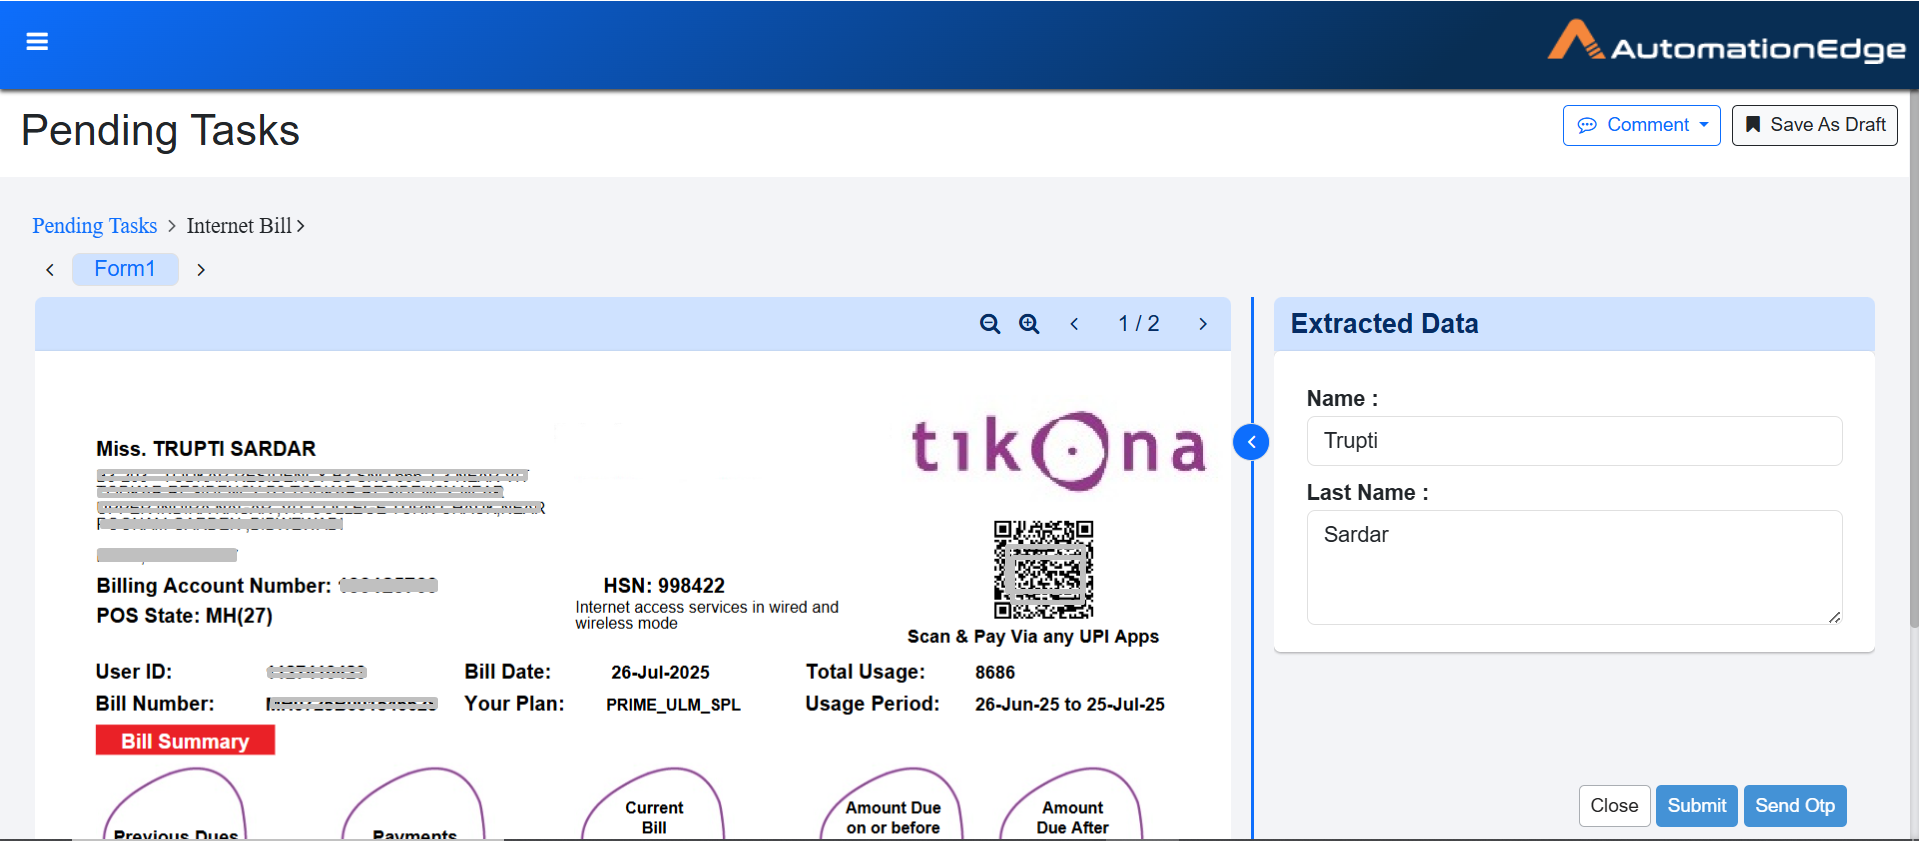
The Reject Repair view
-
You can make the required changes, if any.
Note-
If the confidence level is Low,
 appears next to the extracted data.
 -
If the confidence level is Medium,
 appears next to the extracted data.
 -
If the confidence level is High,
 appears next to the extracted data.

Extracted Data
Note-
Fields that are changed after the initial data load are highlighted. This helps users quickly identify updated fields and review changes more efficiently.

-
Hover over the text to preview long values, making them easier to review and validate.
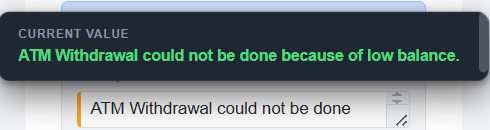
-
If there is a table field in the form the reviewer can add or delete row in existing table.
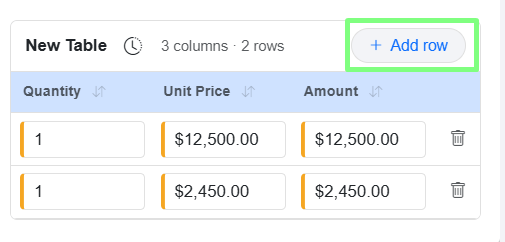
-
-
You have an option to Save as Draft if you want to come back to review the documents later. If you complete your changes in one session, you don't need to save the draft and can proceed directly to the next step.
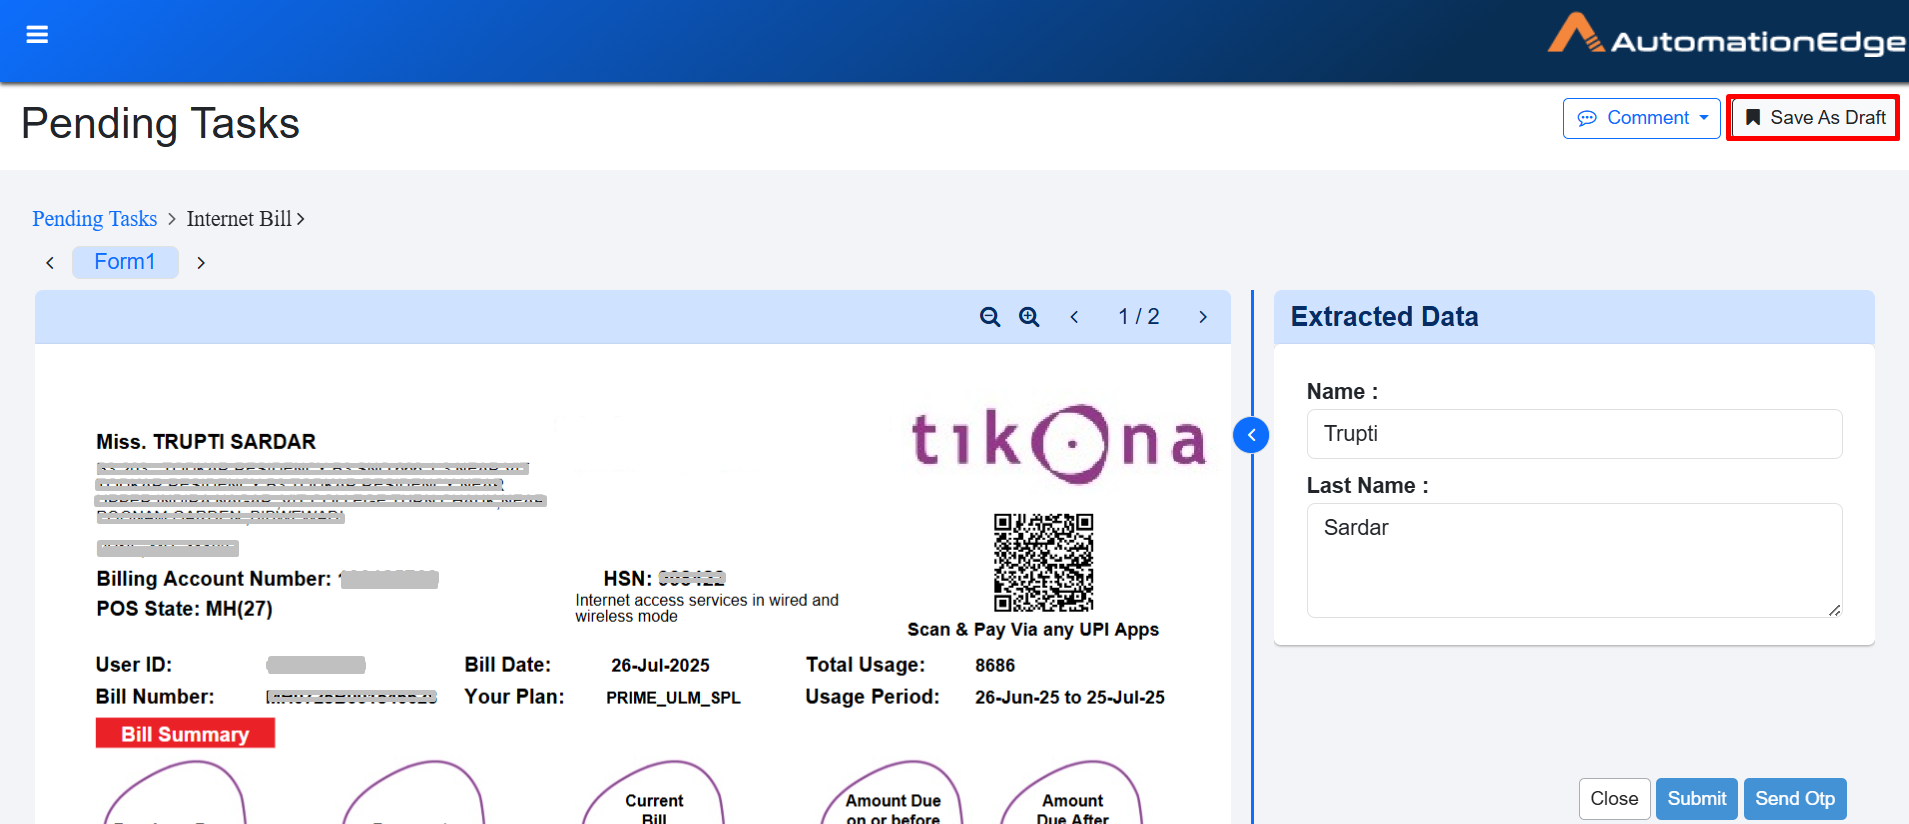
Extracted Data view
-
After completing the changes, click Submit (or any other action button). The task is completed.
NoteIf you click Release the task is moved to the Document Reviews tab for other users to review.
Document Reviews
The Document Reviews tab works as a queue. All tasks that require approval appear here and are visible to all approvers and approver groups. Each nominated approver sees the same list of pending documents. When an approver wants to review a document, they must select Assign to Me. This action locks the document for that approver, and the document is removed from the Document Reviews queue. Other approvers will no longer see the document in their queue. The approver who locked the document can now review and work on it.
To view Document Review Page:
-
In the menu, click Tasks → Pending Tasks → Document Reviews tab. The Document Reviews page appears.
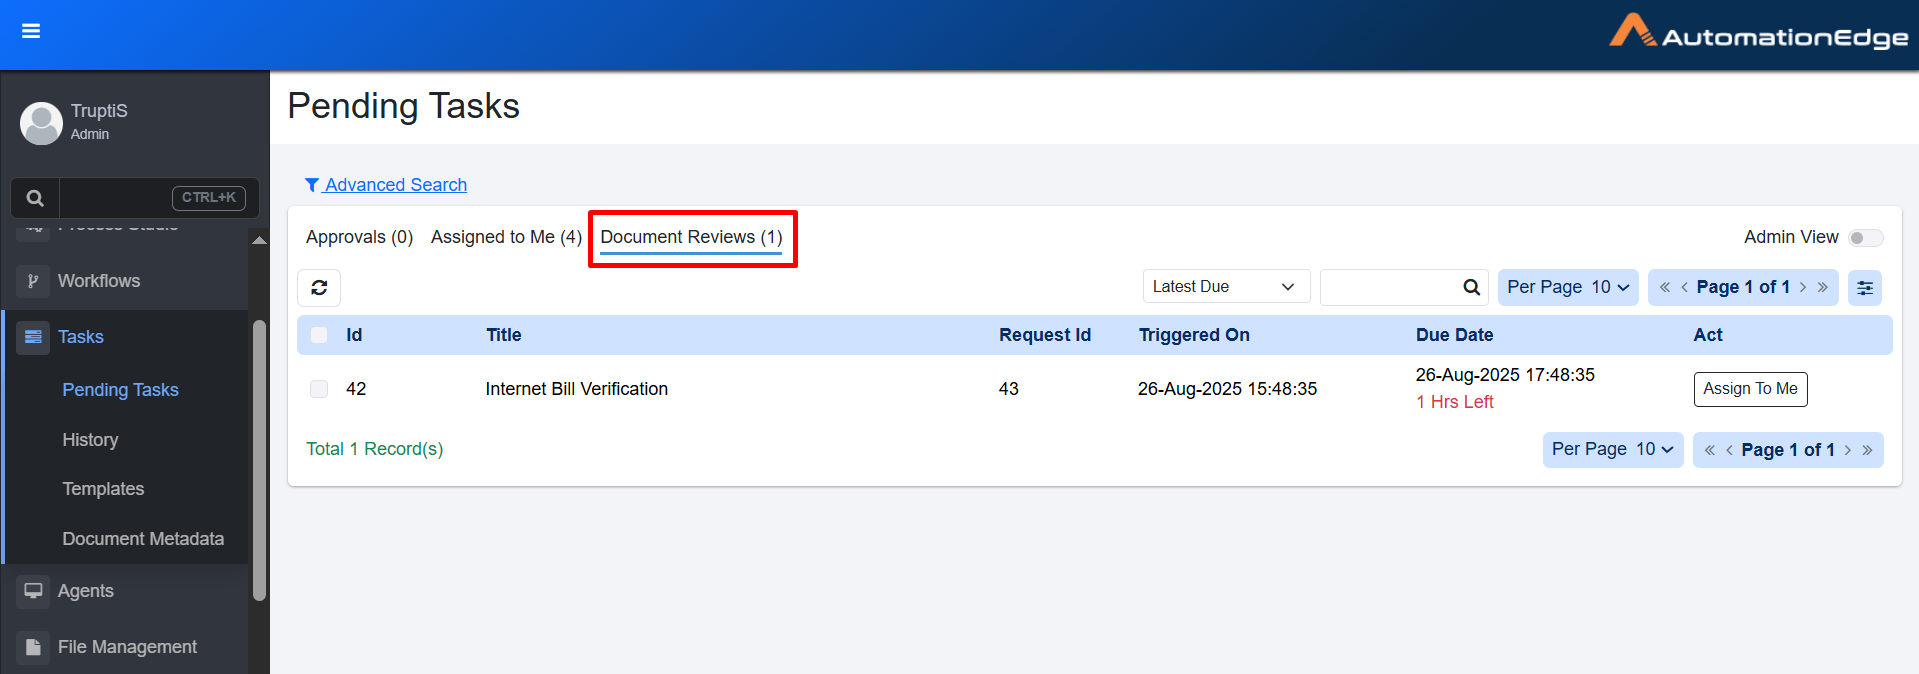
Document Reviews tab
-
View the field details:
Column name Description Id Displays unique Id of the task. Title Displays title of the task. Request Id Displays the request ID from the Request tab that generated the task. Triggered On Displays date and time when the task was started. Due Date Displays the date and time for the task deadline.
Note: You can view the remaining time until the due date for a task.Act To assign the task to yourself, click Assign to Me. To understand how to act on a task, see Assign to Me section.
Admin View
Only Admin users can see this switch. In Admin View, the admin can see task prompts. If a task has been pending for a long time, the admin can cancel it. Only the admin has the authority to cancel approval tasks. The admin cannot assign the task to another user; the task can only be cancelled. The admin can also view the list of approvers for that task.
To cancel the task:
-
Toggle on the Admin View switch. The Admin View appears.
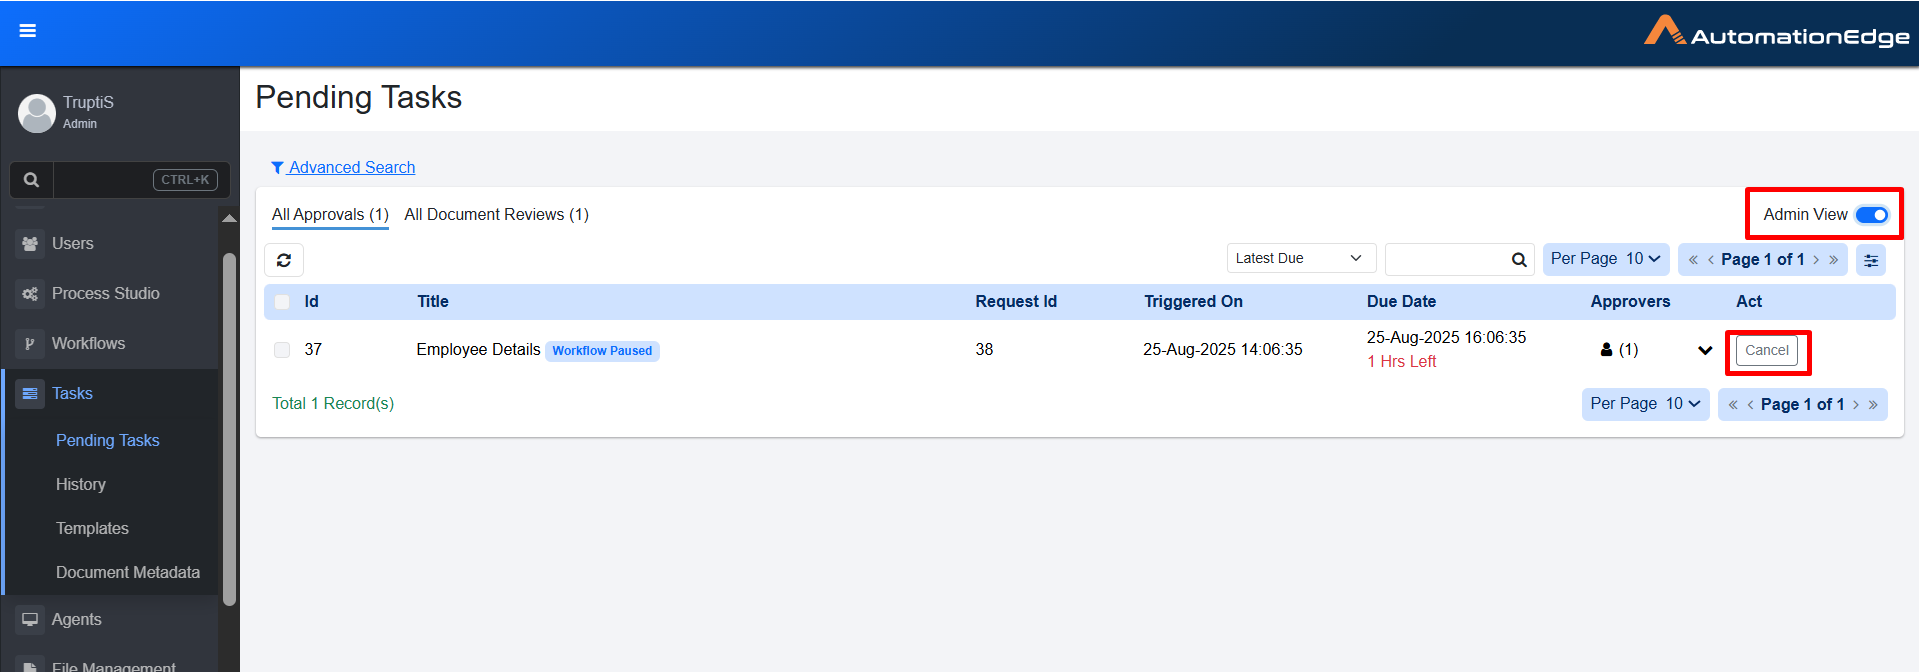
Admin View
-
Select the checkbox next to the task you want to cancel and click Cancel. The task is cancelled.
-
Go to the Task History page to view the task. The task status is updated to Cancelled.
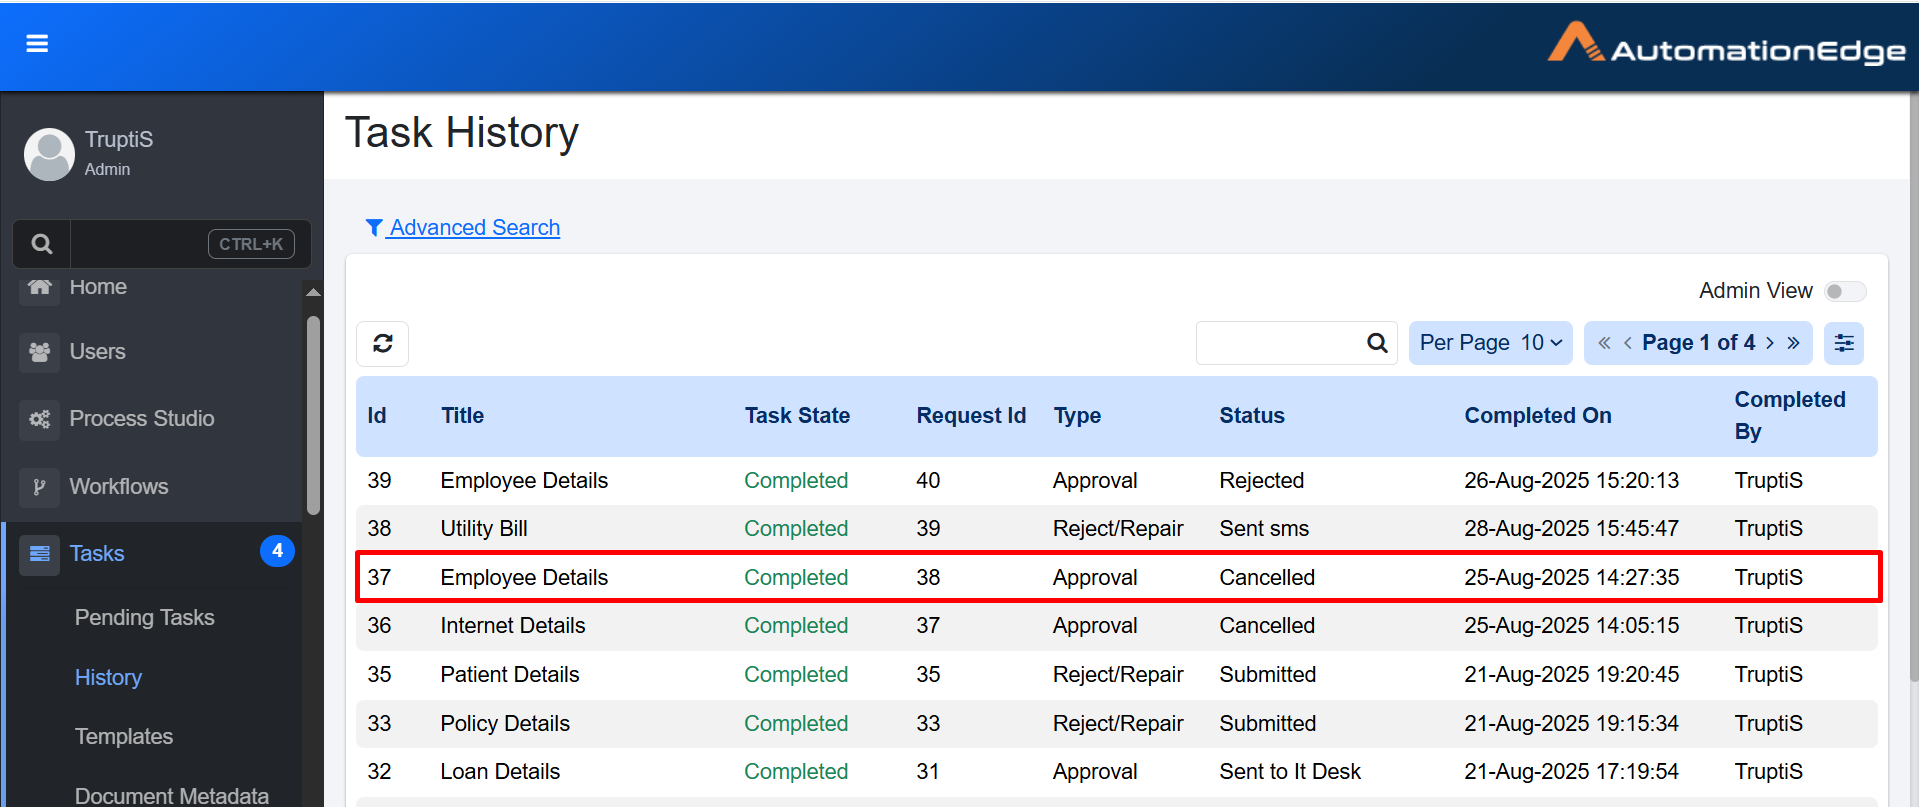
Task History page view