Work with Document Metadata
Document Metadata lets you define the field-level data that appears during the Reject/Repair document review process, separately from the task template itself. This JSON defines the fields and information that need to be extracted or displayed during the Reject Repair process. This separation is intentional — a single template can be associated with multiple documents and vice versa, so keeping metadata independent allows maximum reuse across different task templates. Admins create and manage document metadata, which can also be exported and imported in JSON format for reuse across tenants. The Reject/Repair step works in a similar way to the Human-in-Loop step, but in a Document Review template, only the actions are defined within the template while the data fields are configured in the Document Metadata tab.
In the Reject Repair step, the required JSON data is provided in Document Metadata. This JSON defines the fields and information that need to be extracted or displayed during the Reject Repair process. By configuring the metadata separately, you ensure that the template contains only the action buttons, while the field-level details are maintained in the Document Metadata.
The Reject Repair step works in a similar way to the Human-in-Loop step. However, in a Document Review template, only the actions are defined within the template.
Currently, the Reject Repair screen does not support masking specific documents. The Masking UI control is not implemented, so users cannot select masking areas or receive masked documents after submitting a request or task.
The data fields are not defined in the template itself. Instead, they are configured in the Document Metadata tab. This separation is intentional because a single template can be associated with multiple documents and vice versa. By keeping metadata separate, the same template can be reused with different documents, and document metadata can be used in different task templates since they carry their own specific field definitions.
To view Document Metadata:
-
In the menu, click Tasks → Document Metadata. The Document Metadata page appears.
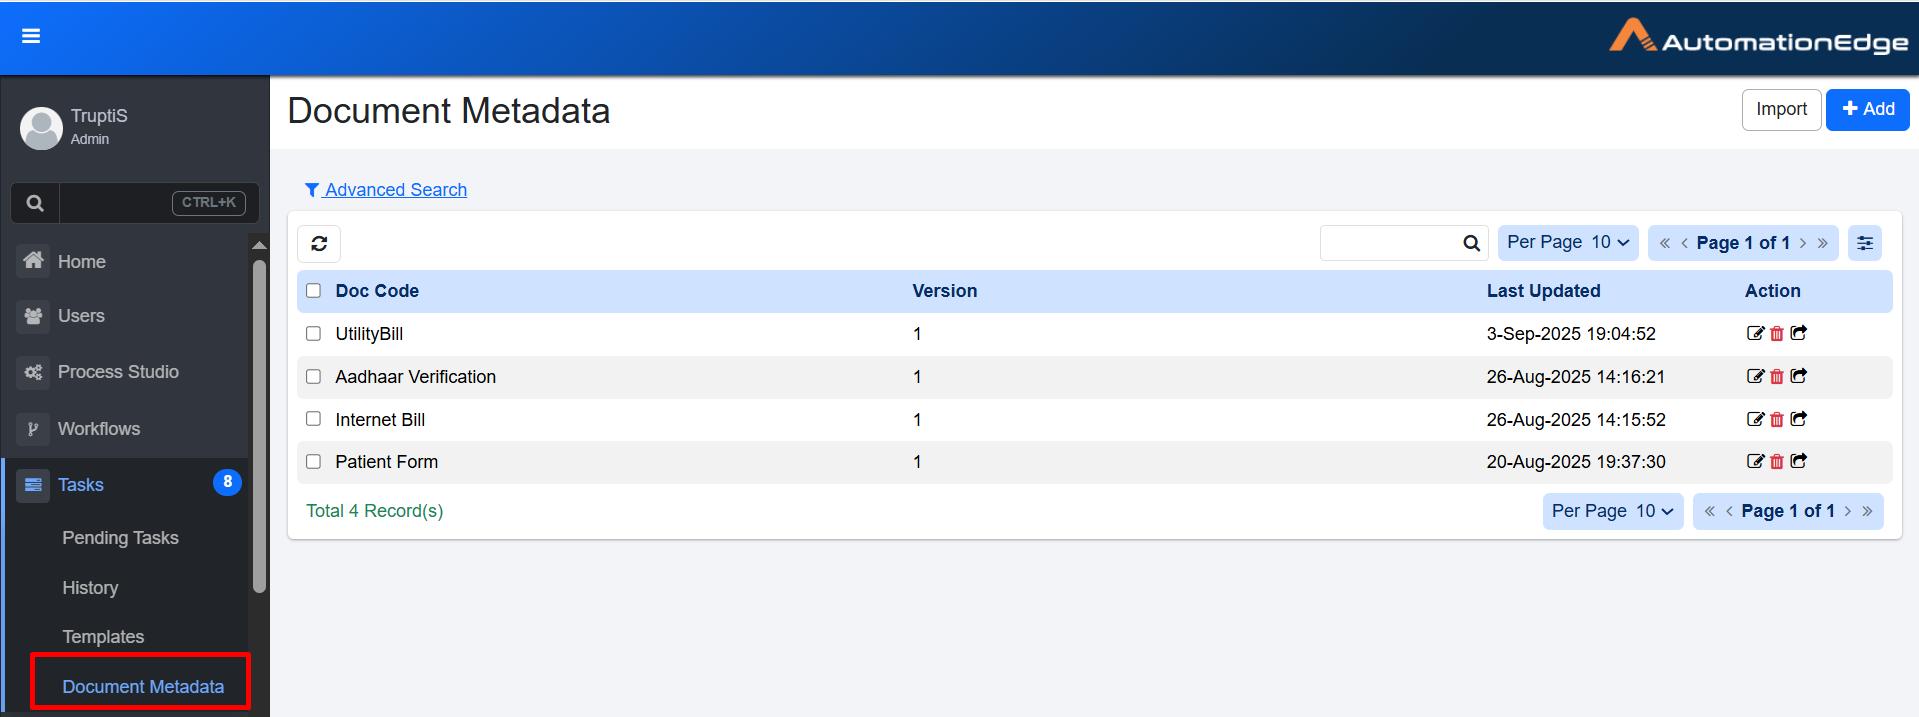
Document Metadata page
-
View the following columns:
Column name Description Doc Code Displays the unique name of the document. Version Displays version number of document. Last Updated Displays Date and time when the Document Metadata was last updates Action Click Edit  , Delete
  or export
  to manage the document metadata. For more details, see Action.
Action
-
Edit Click
to open the task template in edit mode. This allows you to update the template details such as Data Fields, Action buttons and other configurations. After making changes, save the template to apply the updates. -
Delete Click
to delete the template. A confirmation dialog appears asking you to confirm the deletion. -
Export Click
to export the Document Metadata in JSON format.
Import
You can import document metadata if it has already been created and exported in JSON format.
To import the Document Metadata:
-
Click Import. The Import Document Metadata dialog appears.
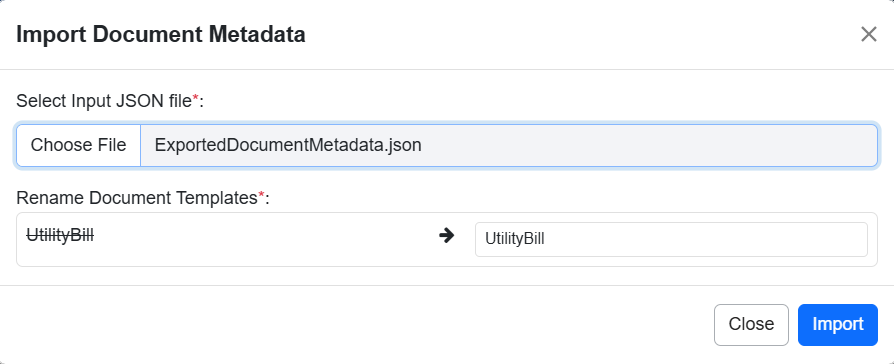
Import Document Metadata
-
Select the file, rename the document metadata, and click Import. The Document Metadata is imported successfully.
To create Document Metadata:
-
In the menu, click Tasks → Document Metadata. The Document Metadata page appears.
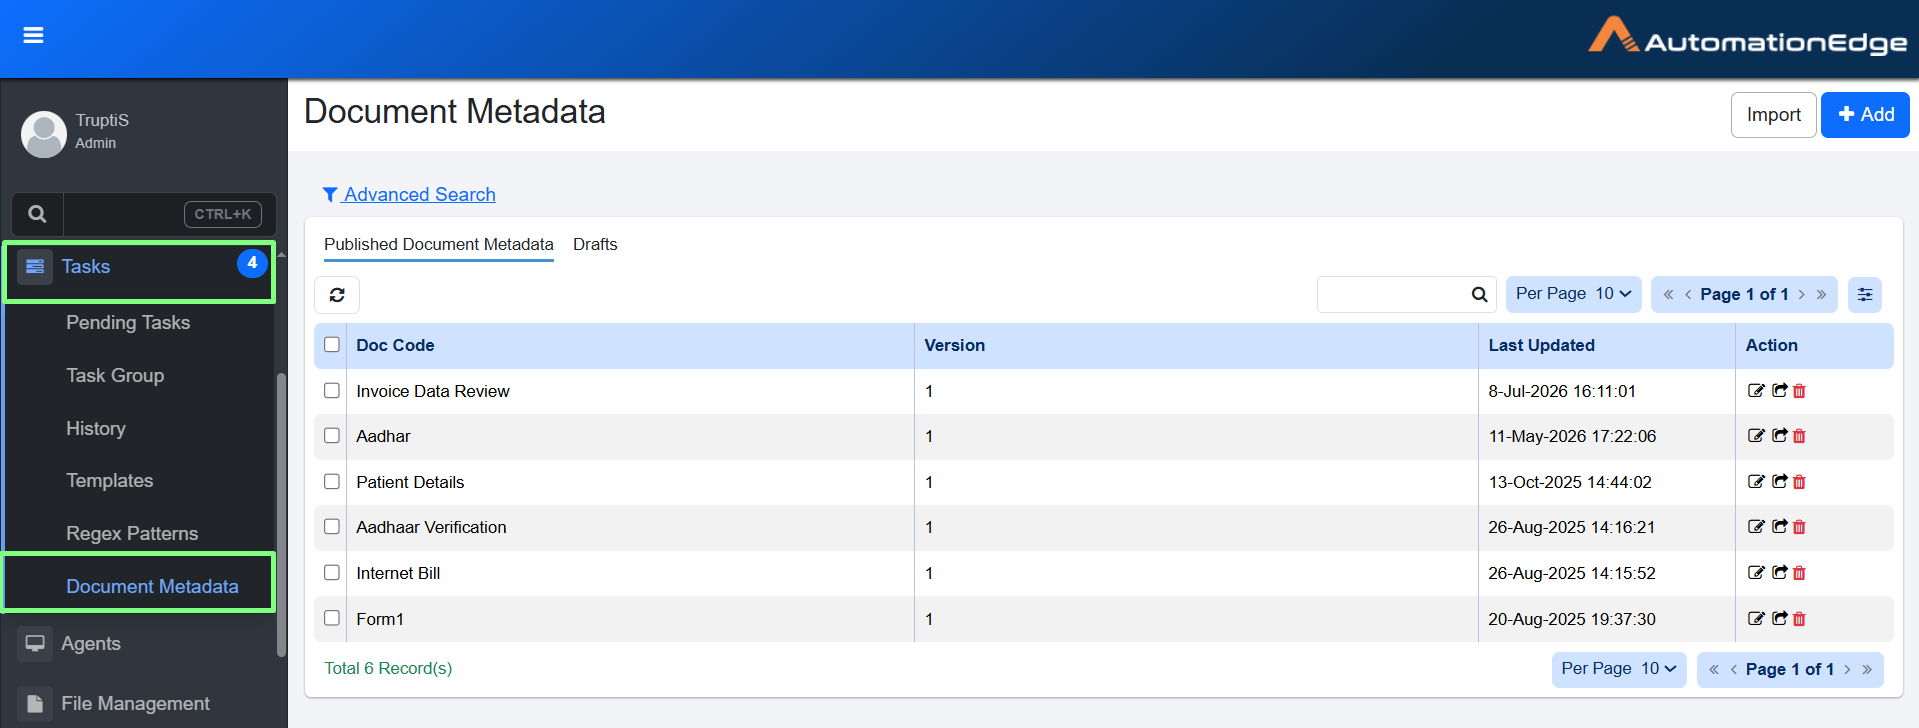
Document Metadata page
-
Click Add. The Add New Document Metadata page appears.
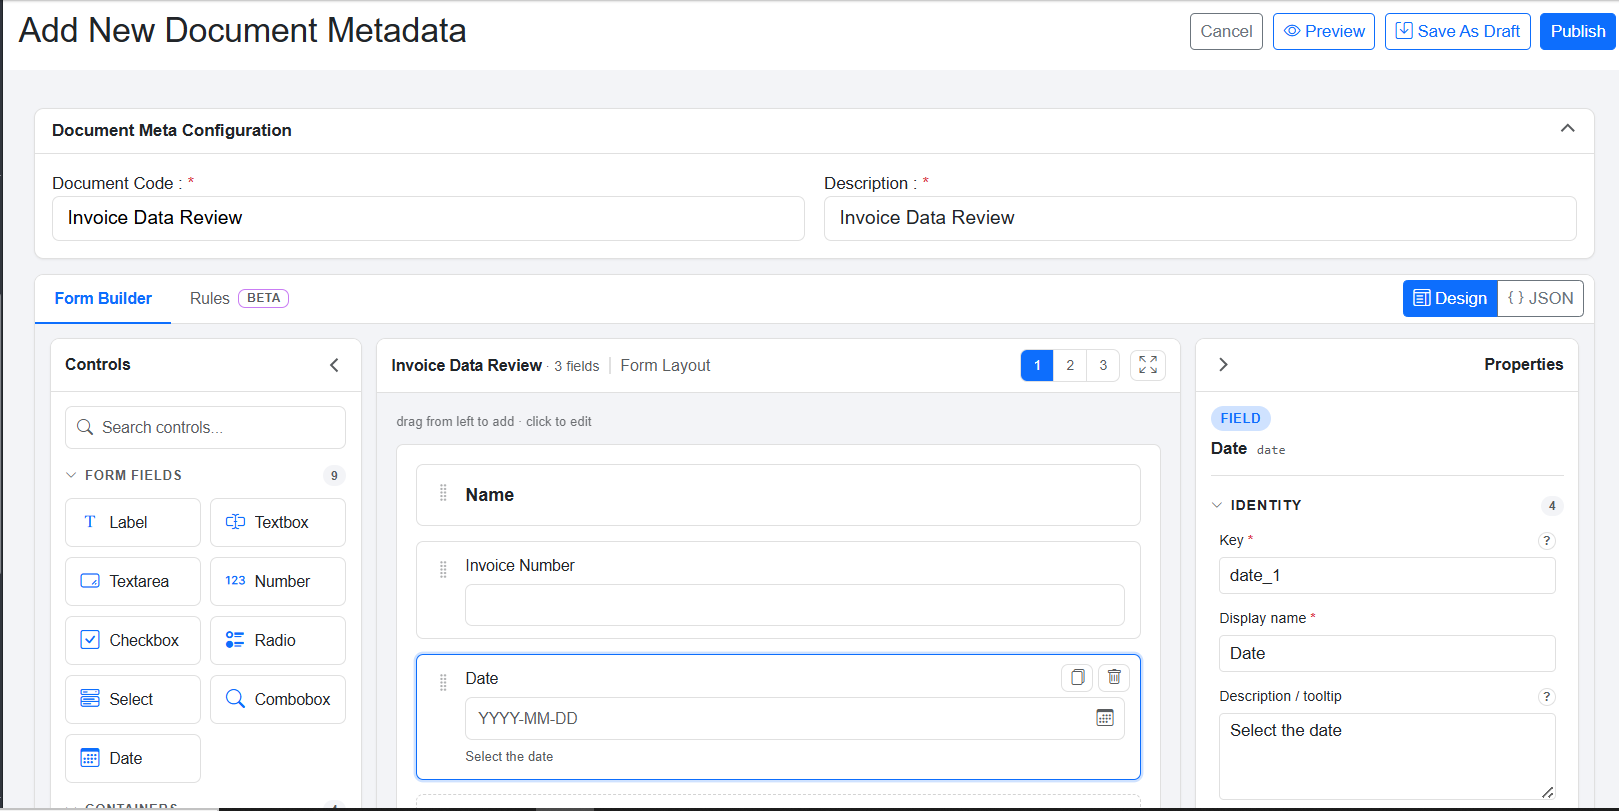
Add New Document Metadata page
-
Enter the following field details:
Field name Description Document Met Configuration Document Code * Enter the unique document code Description Enter a brief description of what the task is for (up to 500 characters). Form Builder For details, refer Form Builder. -
Click Create. Document Metadata is created.
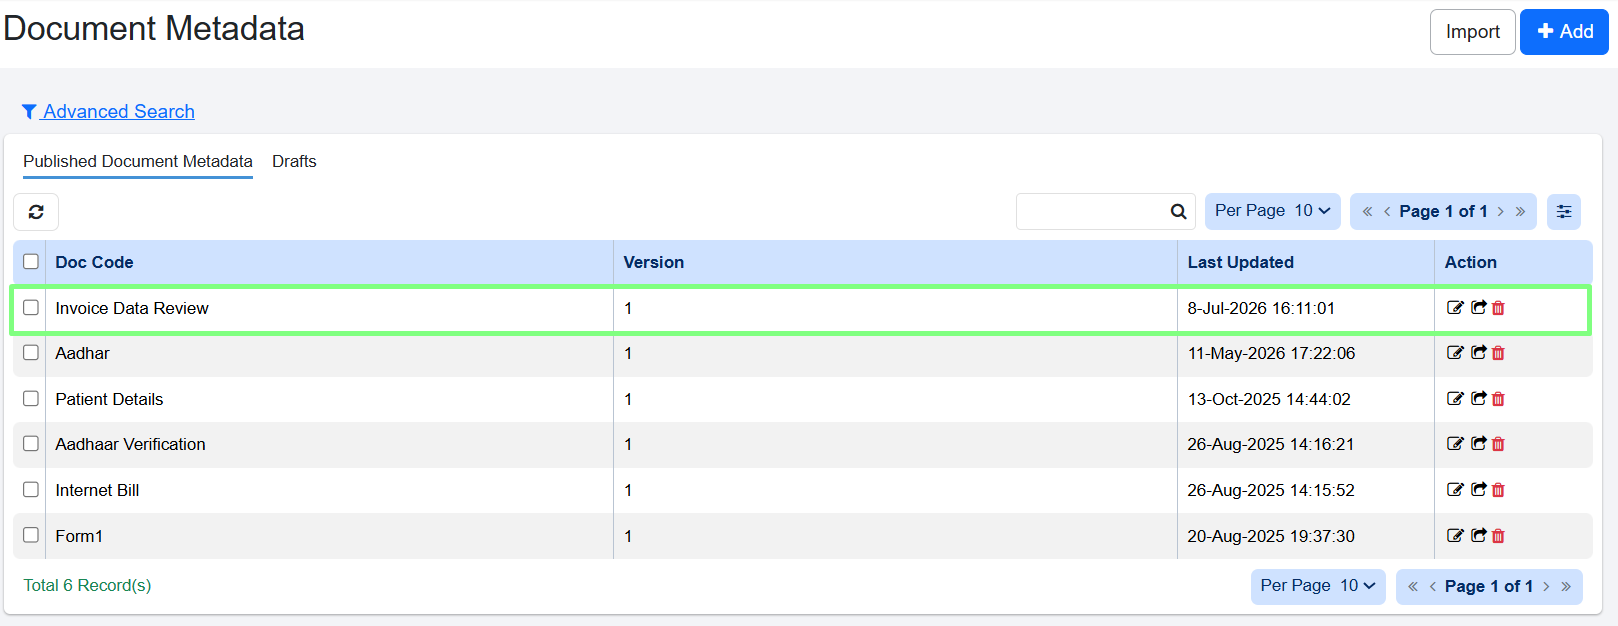
Document Metadata page
Purging of Task
Tasks are generated only when a request is submitted, and they remain associated with that request. While purging, if the request entity is deleted, all dependent entities such as metrics and tasks are also purged.
You can see the Purged Tasks in Archived tab.