AE initiated SSO with ADFS using SAML
ADFS Identity Provider supports OpenID Connect and SAML protocols. In the topic, you’ll learn the configurations to set up AutomationEdge SSO with ADFS using the SAML protocol. In addition, you’ll understand how to get the required parameters for AutomationEdge – Keycloak Single Sign-On Settings.
Get the following parameters from the IDP configuration:
- Identity Provider Metadata (store in descriptor.xml)
- Client ID
- Redirect URIs
In addition, for IDP SSO configurations you need:
- Keystore file, Keystore Alias, Keystore Password
- Certificate file (.crt)
To generate Self Signed or CA Certificate, see Keystore and Certificate Generation.
To configure ADFS for SAML:
-
In Windows Server 2016, go to the Server Manager section and click the Tools tab. In the Tools tab, select AD FS Management.
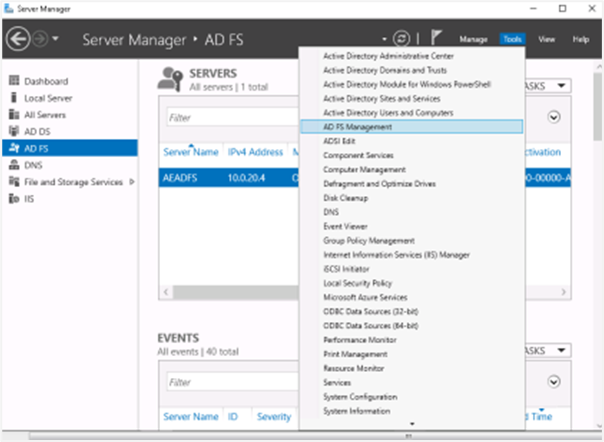
SAML Configuration in Server Manager
-
Under the ADFS folder, right-click on Relying Party Trusts and select Add Relying Party Trust….
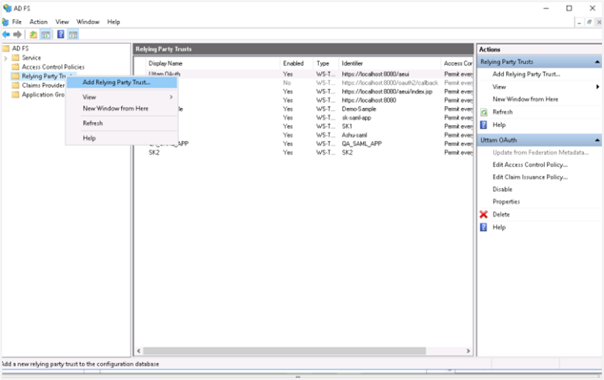
Add Relying Party Trust
-
In the Add Relying Party Trust Wizard:
Click Claims aware and then click Start.
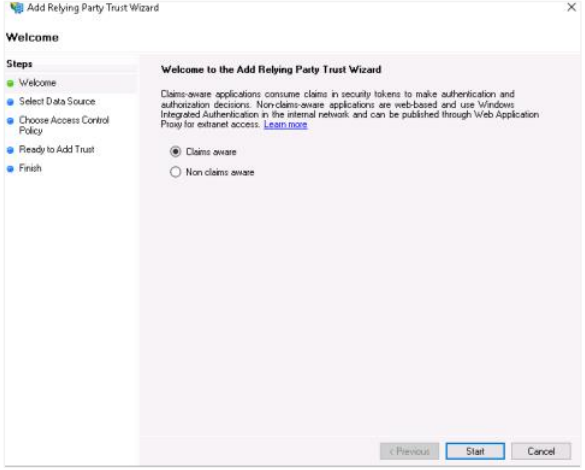
Claims aware selection
In the Select Data Source section, select Enter data about the relying party manually and then click Next.
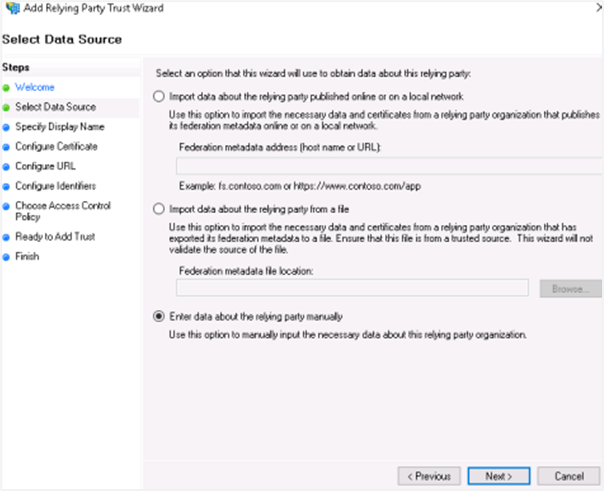
Select Data Source
In the Specify Display Name section, enter the display name for the relying party trust name, which will display after the configurations, and then click Next.
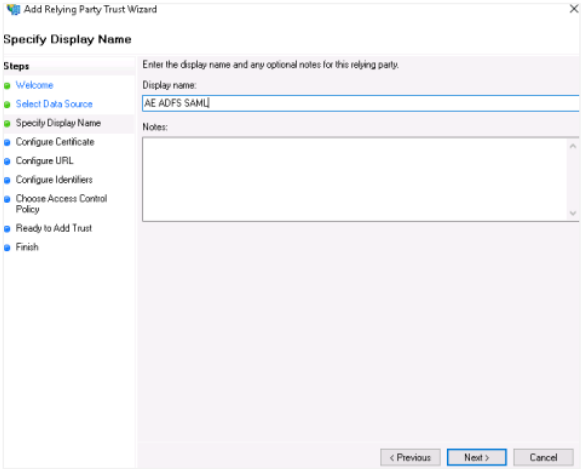
Specify Display Name
NoteIn the Configure Certificate section, click Next, as you’ll configure the certificate later.
In the Configure URL section:
- Select Enable support for the SAML 2.0 WebSSO protocol.
- In service URL, enter the redirect URL. If you are using AE redirect URL, then ensure you are using
httpsbecause ADFS needs secure communication. For example,https://Automationedge:Port/aeui/index.jsp. - Click Next.
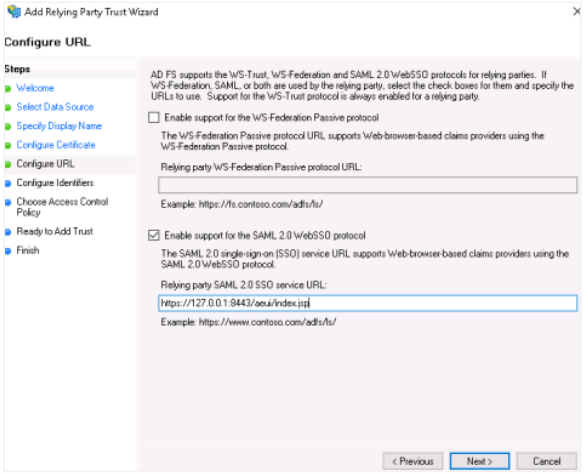
Configure URL for SAML 2.0 WebSSO
In the Configure Identifiers section, enter the same relying trust display name, and then click Add. The display name is added to the Relying party trust identifier field.
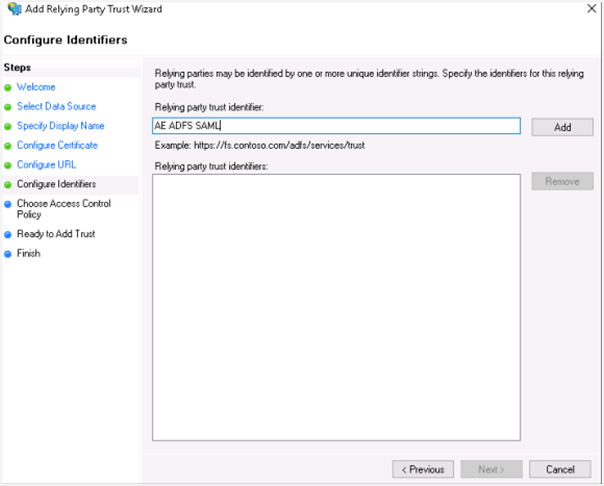
Configure Identifiers
Click Next. In the Choose Access Control Policy section, select the access control policy that you want to use. Select Permit everyone policy.
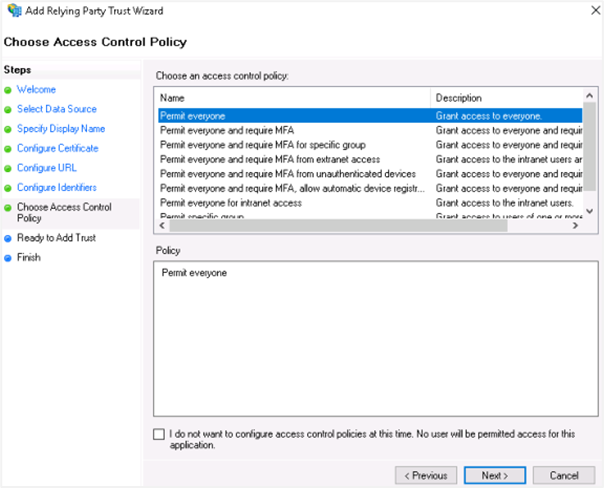
Choose Access Control Policy
Click Next. In the Ready to Add Trust section, review the settings and click Next.
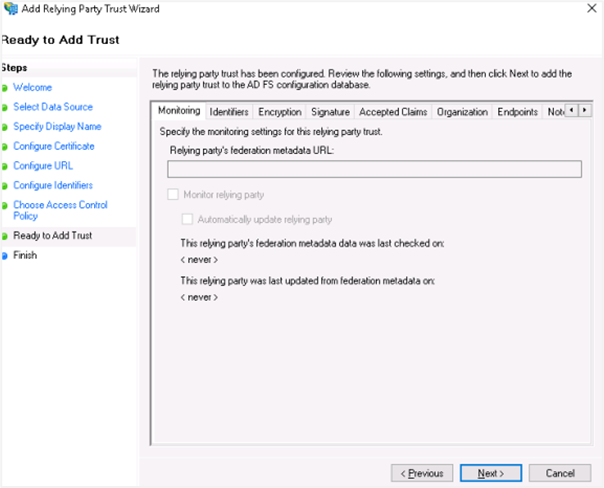
Ready to Add Trust summary
In the Finish section, as we still need to configure claims and upload a certificate, select Configure Claims issuance policy for the application checkbox.
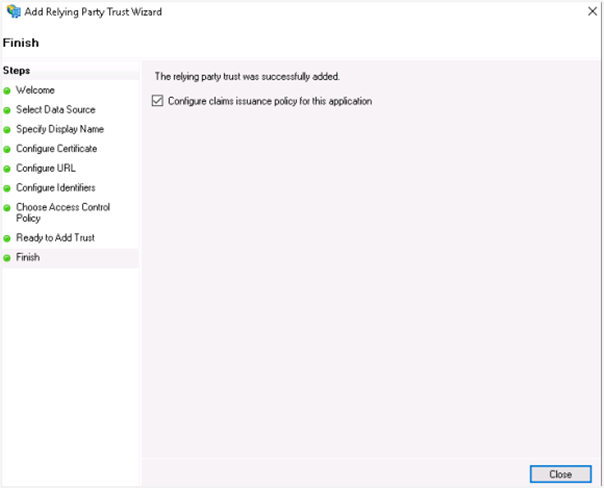
Configure Claims issuance policy
Click Close. The wizard is closed.
-
Add Claim Issuance Policy
Add claims for the party trust. Highlight your party trust and click Edit Claim Issuance Policy.
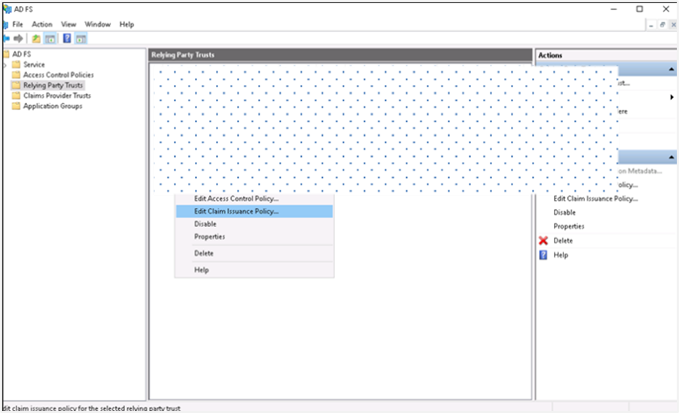
Edit Claim Issuance Policy
On the Issuance Transform Rules tab, click Add Rule. The Add Transform Claim Rule Wizard appears.
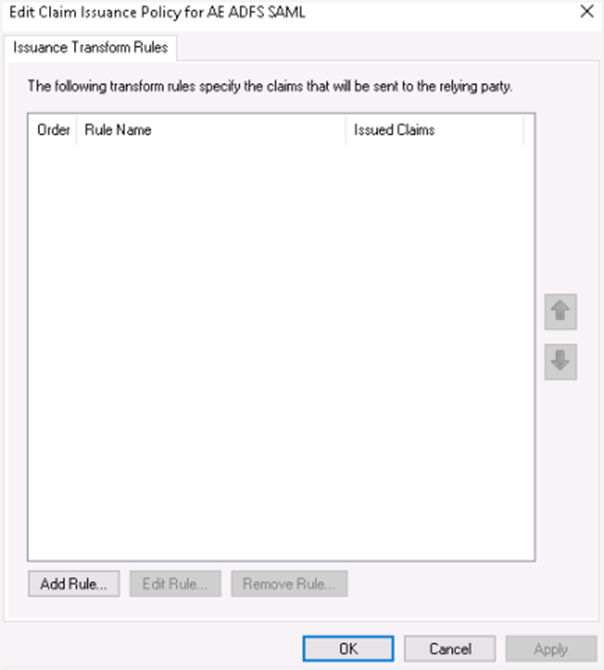
Issuance Transform Rules
-
Rule 1
In the Select Rule Template window, select Send LDAP Attributes as Claims from the Claim rule template list, and click Next.
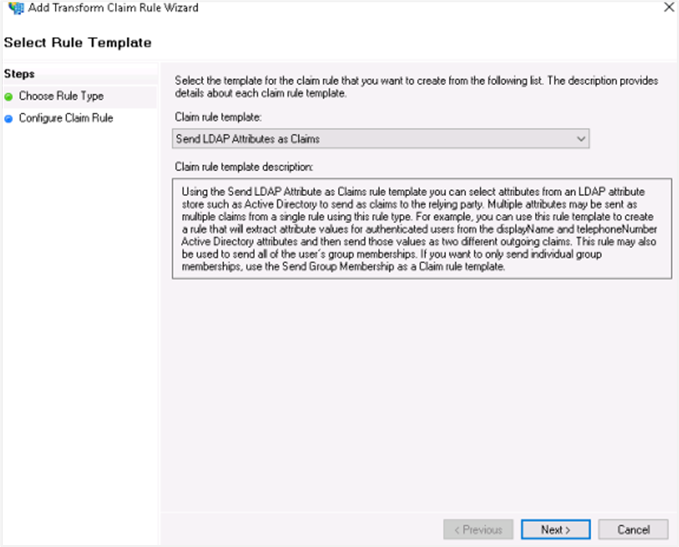
Send LDAP Attributes as Claims template
In the Attribute store list, select Active Directory and enter a name for the claim in Claim rule name box.
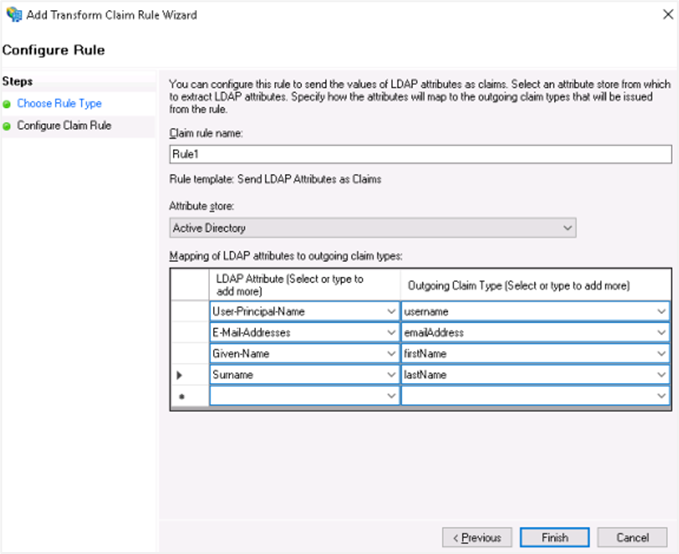
Configure claim rule with Active Directory
Use the following attribute mapping:
LDAP Attribute Outgoing Claims User-Principal-Name username E-Mail-Addresses emailAddress Given-Name firstName Surname lastName Click Finish.
-
Rule 2
Add another claim for the party trust. Follow step 4 (i) and (ii).
In the Select Rule Template window, select Transform an Incoming Claim from the Claim rule template list, and click Next.
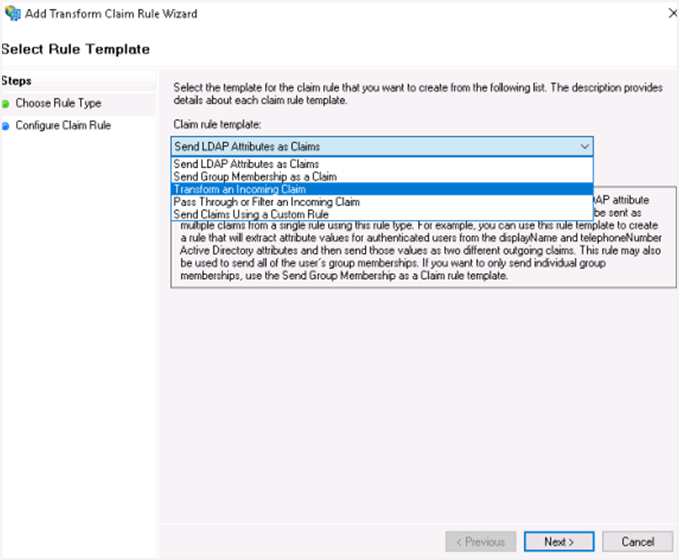
Transform an Incoming Claim template
Select the following field details:
-
Incoming claim type: UPN
-
Outgoing Claim type: Name ID
-
Outgoing name ID format: Transient Identifier
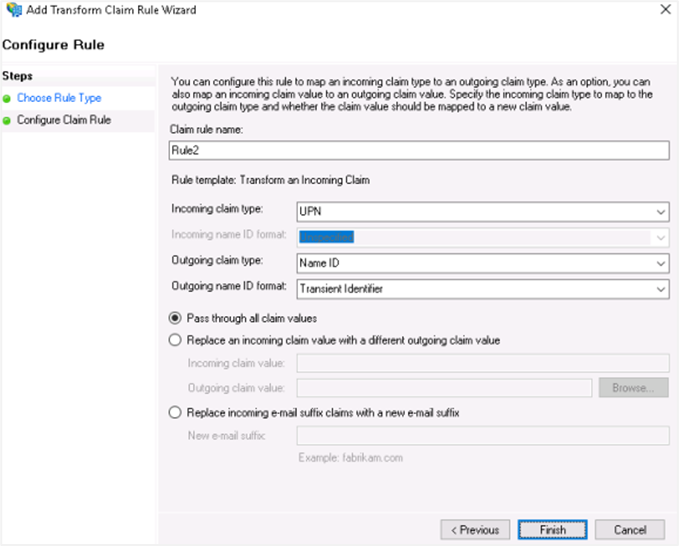
Incoming claim attribute details
Click Finish. You can see the two rules you created.
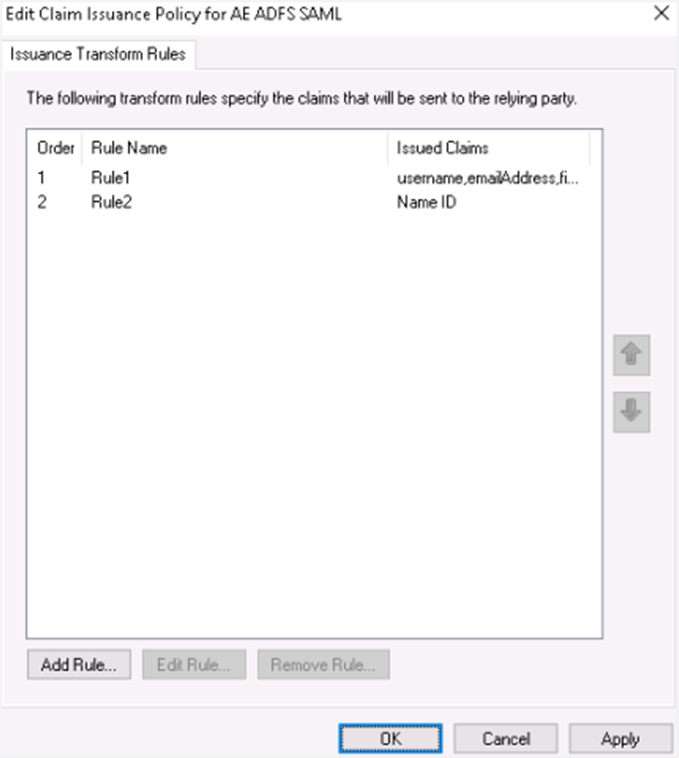
Configured claim rules
-
-
NoteYou can edit the rules, if required.
-
Upload RSA Certificate for Relying Party Trust
Open the Windows Server Manager console and open the ADFS tool. Right-click on your Relying Party Trust and select Properties.
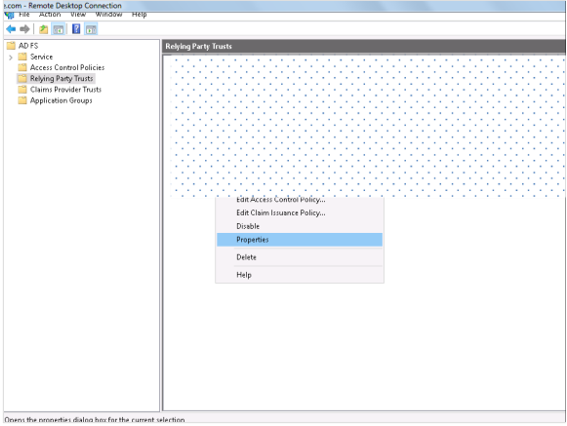
Relying Party Trust Properties
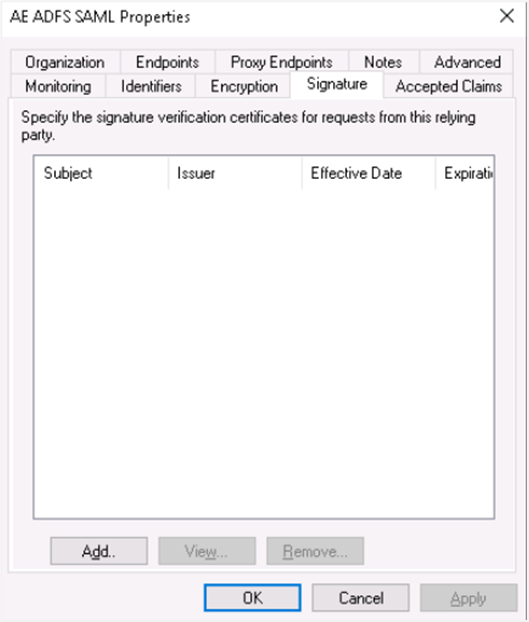
Click the Signatures tab. In the tab view, click Add and browse for the RSA certificate.
NoteTo generate Self Signed or CA Certificate, see Keystore and Certificate Generation.
Upload RSA certificate in Signatures tab
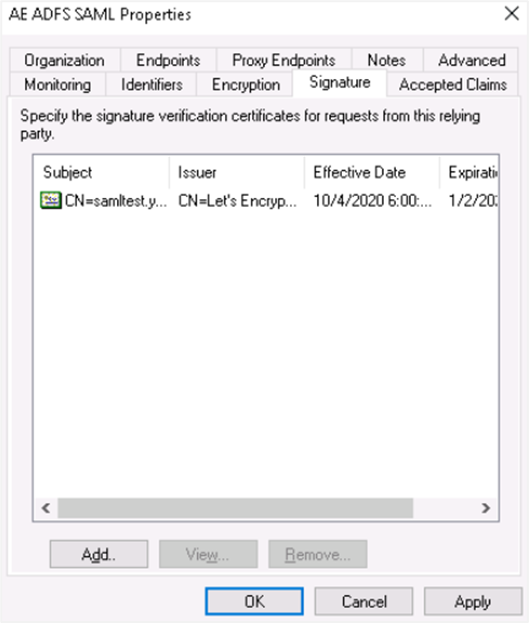
The RSA certificate is uploaded and then click Apply. The certificate is applied.
RSA certificate applied
-
Endpoints
Click the Endpoints tab and click Add SAML....
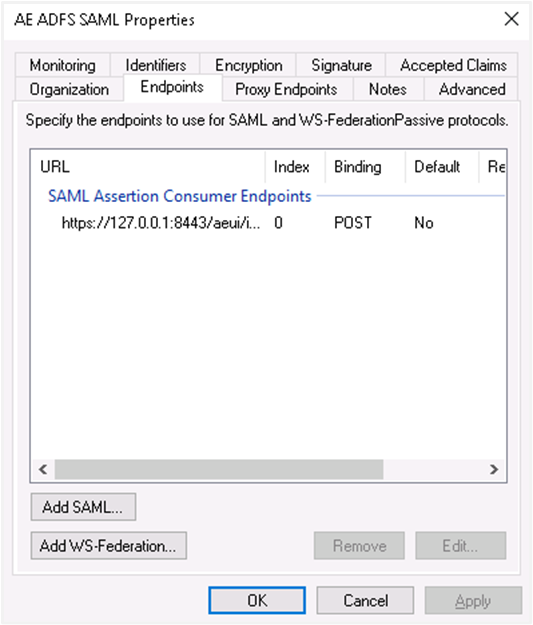
Endpoints tab with Add SAML option
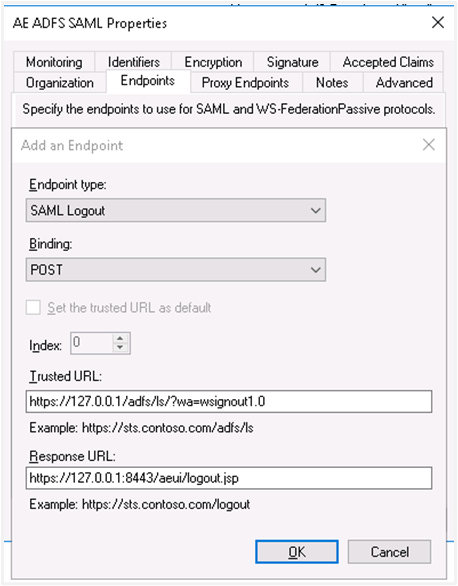
Select the endpoint type to SAML Logout, under binding go for post. Internally we are using post binding for logout requests.
For the Trusted URL, create a URL using:
- The web address of your AD FS server
- The ADFS SAML endpoint you noted earlier
- The string
'?wa=wsignout1.0'
For example, the URL can be:
https://sso.yourdomain.tld/adfs/ls/?wa=wsignout1.0In the response URL section, specify the redirect after logout, for example,
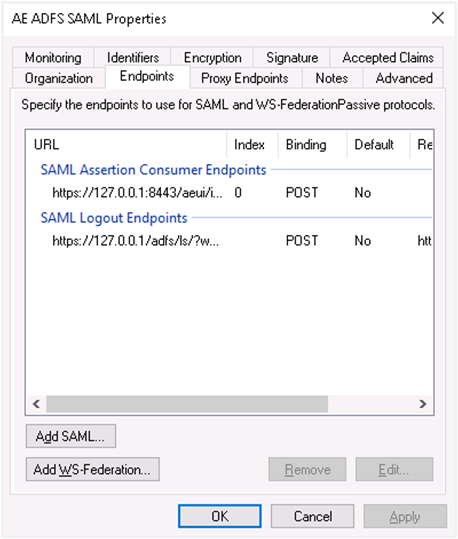
https://automationedge.port/aeui/logout.jspClick OK. The Endpoints configuration appears as follows:
Endpoints configuration
Click Add WS-Federation.
Add WS-Federation endpoint
Add
https://sso.yourdomain.tld/adfs/ls/as a trusted URL and click OK.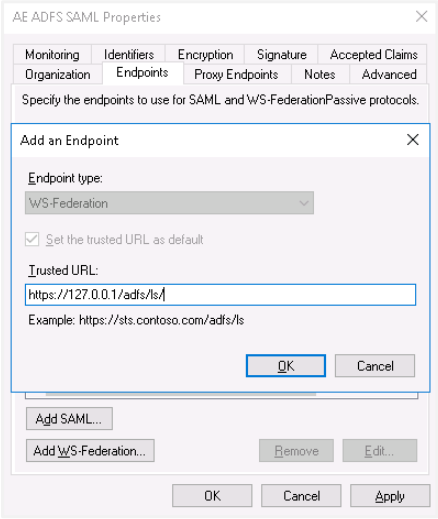
WS-Federation trusted URL configuration
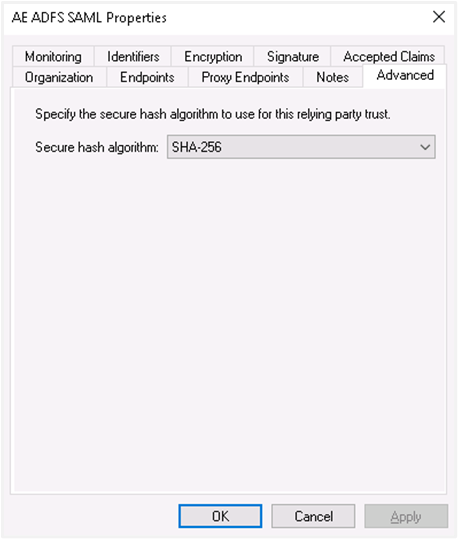
In the Advanced tab, make sure SHA-256 is specified as the secure hash algorithm.
SHA-256 secure hash algorithm in Advanced tab
-
Upload RSA certificate in AD FS:
NoteTo generate Self Signed or CA Certificate, see Keystore and Certificate Generation.
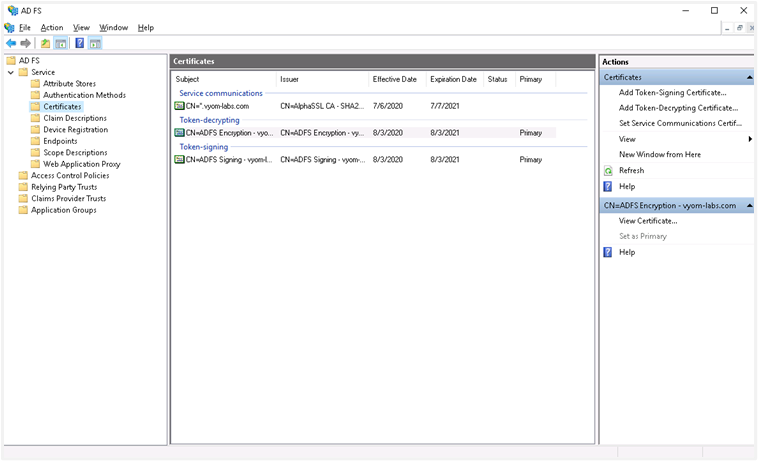
On AD FS console lookout for Certificate and move on to Add Token Signing Certificate. Upload the certificate.
If there are multiple certificates uploaded, mark an appropriate certificate as the primary certificate for signing. Right-click on the Certificate and select the option ‘Set as Primary’.
Set primary token signing certificate
-
descriptor.xml:
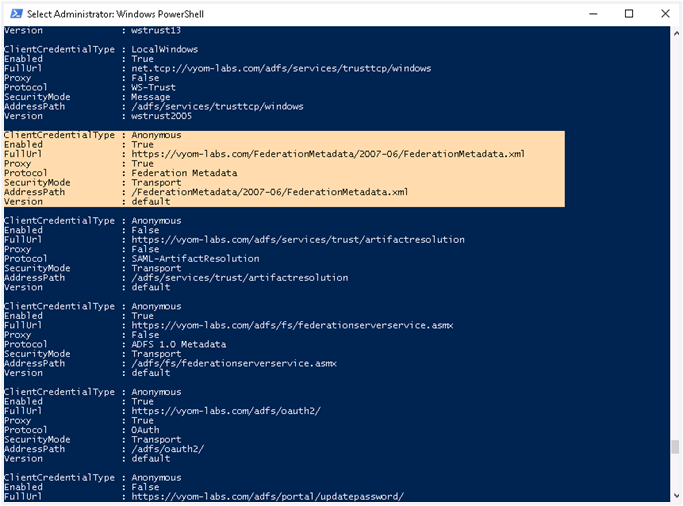
To get descriptor.xml, you need to open PowerShell and type the following command:
Get-AdfsEndpointScroll a little and search for Protocol: Federation Metadata.
Copy the Full URL and paste it into the browser for federation details. Copy the XML data into a file and save it as descriptor.xml.
Single Sign-on configuration in AutomationEdge requires descriptor.xml.
Federation Metadata descriptor.xml
-
Create User
You may use an existing user or create a new user mapped with AutomationEdge user for SSO.
In Windows Server Manager under Tools, select Active Directory Users and Computers.
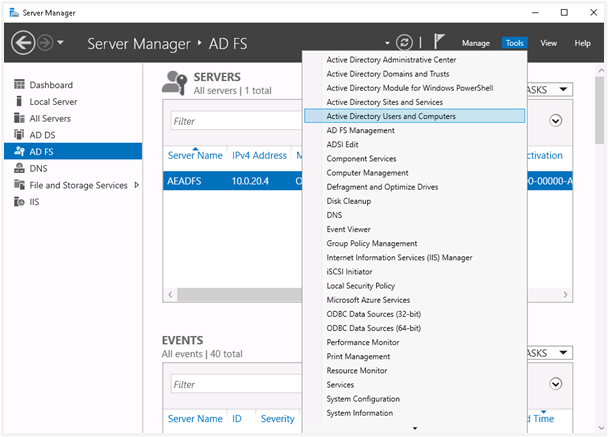
Active Directory Users and Computers in Windows Server Manager
Configure the new user with General and Account tabs as displayed in the following image:
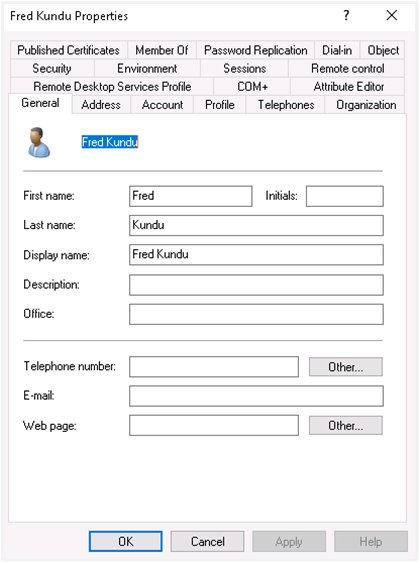

New user General and Account tab configuration
AutomationEdge SSO Configuration
-
Single Sign-On is configured under the AutomationEdge Settings tab, as follows:
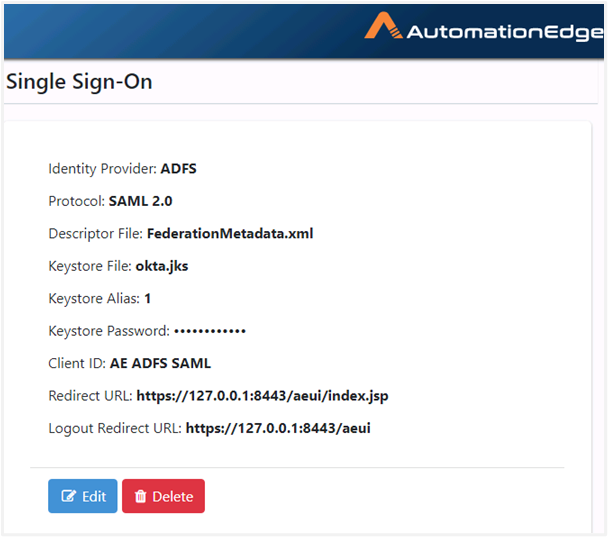
AutomationEdge SSO Configuration
NoteTo generate Self Signed or CA Certificate, see Keystore and Certificate Generation.
-
An AutomationEdge SSO user is visible as seen in the following image:
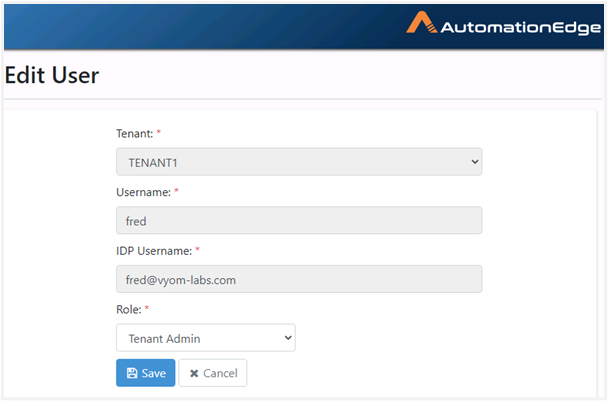
AutomationEdge SSO user
-
On the AutomationEdge login page, click Sign In with SSO.
-
Specify the organization code as follows:
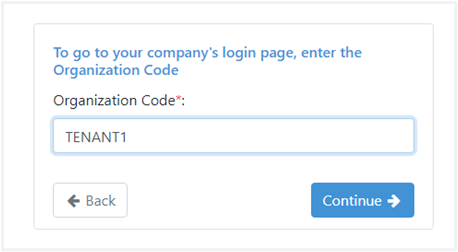
Organization code entry for SSO
-
It takes you to the ADFS login page the first time you log in.
-
The AE Home page appears after logging on.