Work with Plugins
The Plugins allow users to perform a variety of automation tasks, integrate with different systems, and enhance the overall efficiency of their automation processes. The System Admin can upload plugins and assign them to tenants. Based on the plugins assigned, users can utilize them in Process Studio.
Once plugins are available on the AutomationEdge server, Process Studio can connect to the server to download new plugins or update existing ones.
Plugin Upload
Upload plugins to the AutomationEdge server from the Plugin UI screen.
Upload one or more plugins as a zip file or as individual plugin jar files. The following three sections cover different Plugin Upload scenarios, followed by a summary table of all scenarios.
You can upgrade or downgrade the plugins of your choice. However, if you downgrade a plugin, then some workflows that are using new features introduced in the later version of the plugin may stop working.
Upload New Plugin Zip
To upload plugins zip,
-
Navigate to the Plugins menu. Plugin page appears.
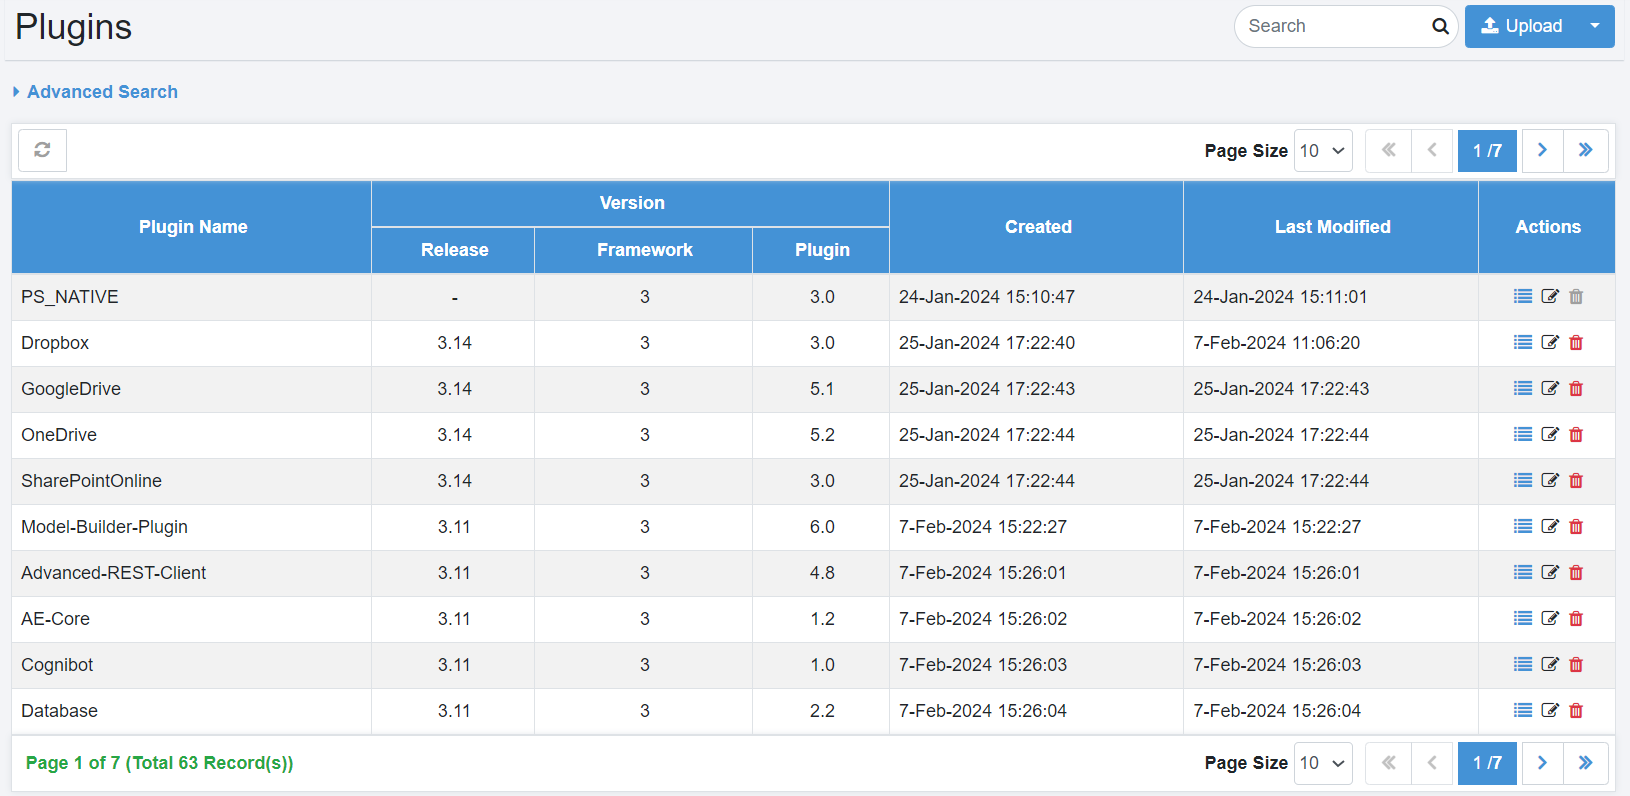
Figure 43: Upload Plugins- Select Operation
-
Click Upload. The Upload Plugin dialog appears.

Figure 44: Upload Plugins- Choose Zip file option
-
In the Upload Plugin dialog, choose a plugin zip file, and then click Upload. After the plugin file is uploaded, the Plugins Upload Preview page appears.
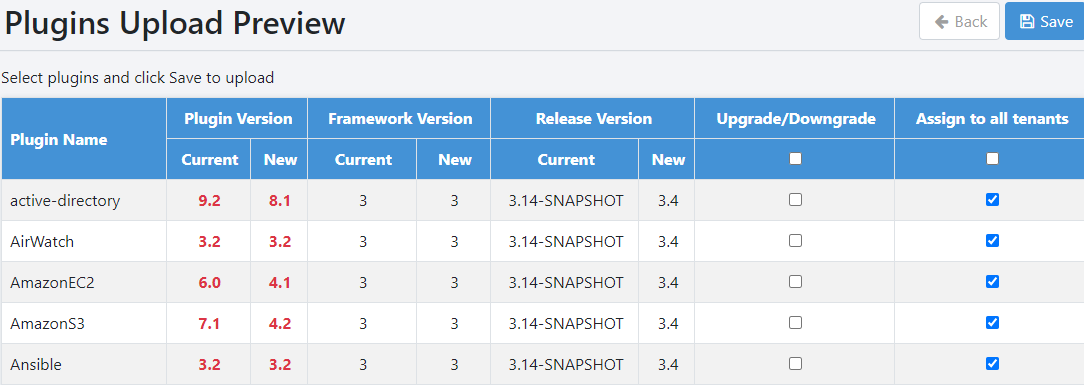
Figure 45: Upload Plugins Details and Selection
-
Choose the Upgrade/Downgrade check box to upload a new plugin or an upgraded/downgraded plugin to overwrite an existing plugin.
Note: If you are downgrading a plugin, then you will see a message asking for confirmation to proceed with uploading the downgraded plugin. -
Select the Assign to all tenants checkbox to assign all or selected plugins to all tenants, and then click Save. The Plugin Upload Status page appears.
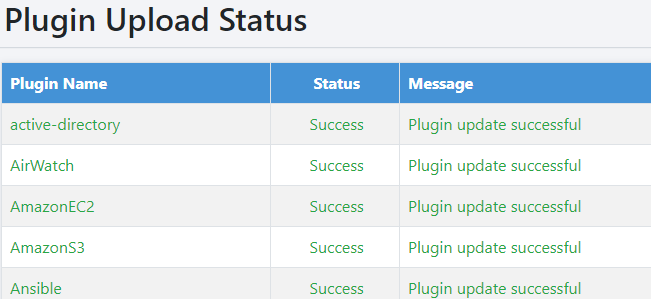
Figure 46: Plugins Upload Status
Upload New Plugin jar file
Use the "New Plugin" option on Upload to upload a new plugin jar file and assign it to all tenants.
Following are the steps to upload a New Plugin jar file.
-
Navigate to the Plugins page.
-
Click the arrow next to the Upload
 and click New Plugin.
 -
Browse for a Plugin jar file from the AutomationEdge Plugin Distribution releases. Choose the jar of a plugin not uploaded yet.
-
You may Enable the Assign To All Tenants checkbox.
-
Click the Upload.
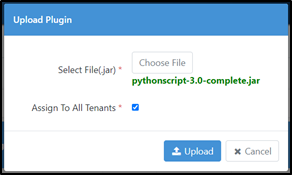
Figure 47: Choose Plugin jar
- The Upload Plugin progress bar appears, followed by the Plugins uploaded successfully message.
Upload Existing Plugin jar file
To upload existing plugin jar file use the Actions -> Edit option.
The following are the steps to upload plugin jar.
Actions
In the tabular listing of plugins, three options are available in the actions column as follows.
Plugin Steps
-
Click the Plugin Steps (
 ) to view the steps for the Plugin.
 -
The following figure shows the PS_Native plugin steps.
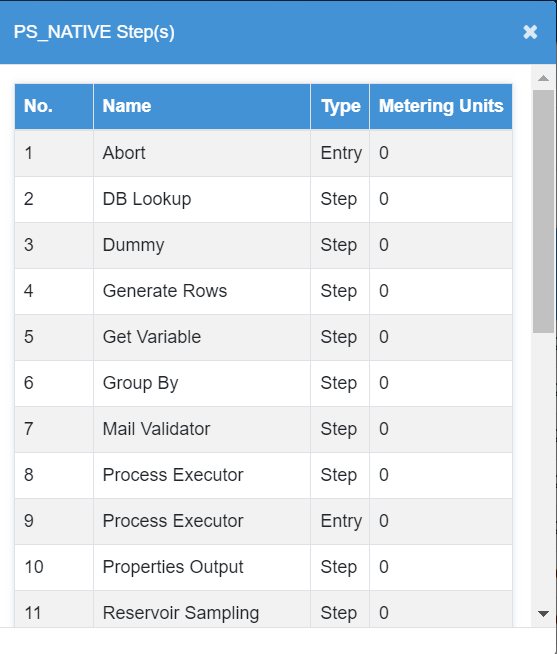
Figure 48: Plugin Steps
Edit
Actions Edit option updates an existing plugin using a jar file.
-
Click the icon (
 )next to a Plugin to edit the
Plugin.
)next to a Plugin to edit the
Plugin. -
Click Choose File and browse for the updated jar file.
-
Click Update. The plugin/plugins are uploaded, and it displays a success message.
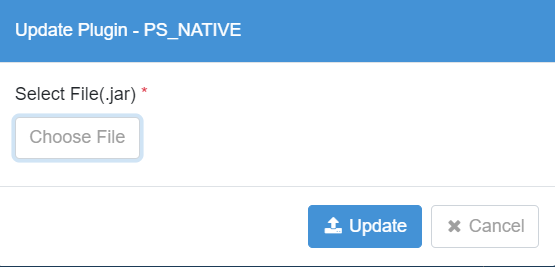
Figure 49: Edit/Update Plugin
Delete
The Actions Delete option deletes an existing Plugin.
-
Click the icon (
 )next to the Plugin to delete.
 -
Confirm plugin deletion.
Plugin Assignments
The System Admin can assign specific plugins to each tenant. Once plugins are assigned, tenants can use only those plugins that have been allocated to them.
Assign a Plugin to multiple Tenants
You may assign a Plugin to one or more Tenants
-
Navigate to Plugins->Plugin Assignments. [Plugin Assignment page appears.]
-
Click on(
 ) list. In the following list you can
select the plugin that you want to assign to the tenant.
) list. In the following list you can
select the plugin that you want to assign to the tenant. -
Click Edit. The Tenant list is now active.
If you want to assign the plugin to all tenants then select the checkbox next to TenantOrgCode. All tenants are selected. If you want to assign to a particular tenant then search for the tenant through search.
-
Click Save. The plugin is assigned to all tenants.
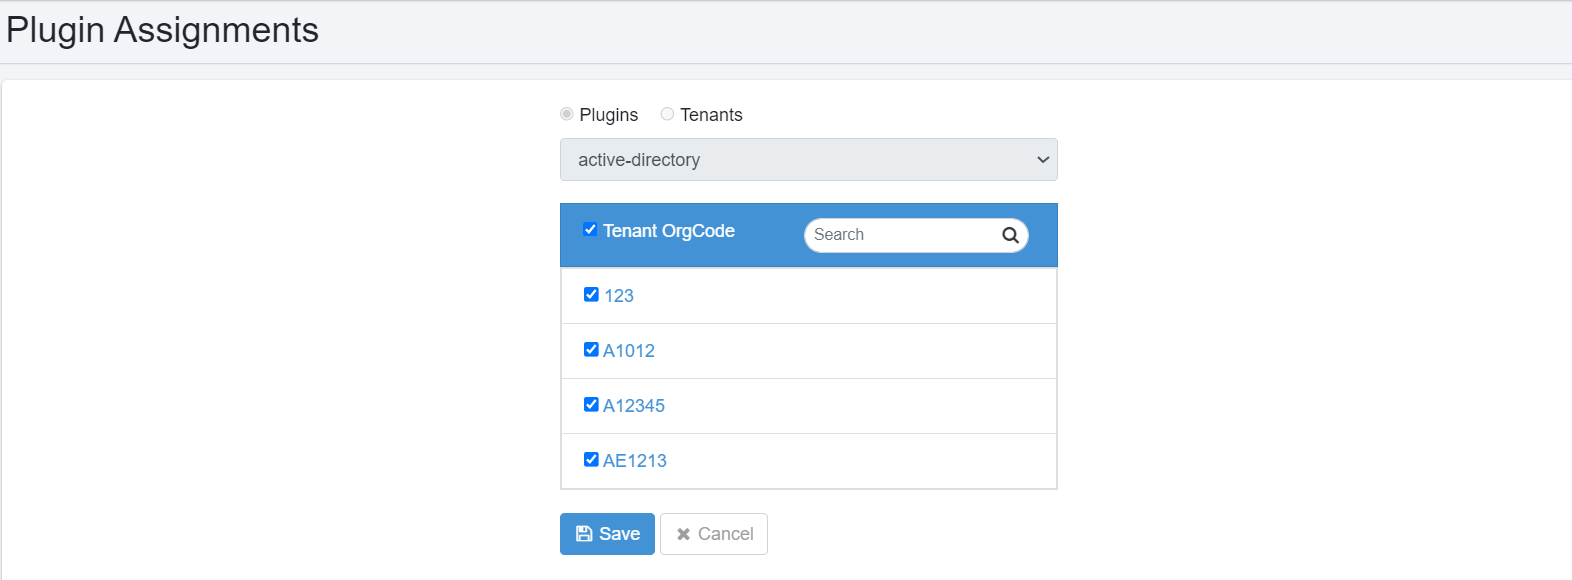
Figure 51: Select Tenants for Plugin Assignment
- When assigning or unassigning a plugin, a warning Revoke Assignment appears. Acknowledge by clicking Ok.
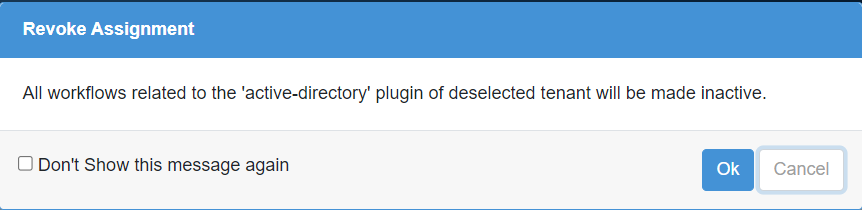
Figure 52: Warning for deselected Tenants
- Click Save. Plugins are assigned for specific tenants.
In a Similar Way, Use the "Select Tenants" Option to Assign Multiple Plugins to a Tenant
System Administrators can selectively assign or un-assign Plugins to a Tenant from the Plugin Assignments menu (Tenants option). However, you cannot un-assign a plugin for a Tenant if it is assigned to all Tenants. You need to first un-assign the Plugin to at least one Tenant from the Plugin Assignments menu (Plugins option) |
To unassign a plugin or tenant, simply uncheck the box next to the respective plugin or tenant. |
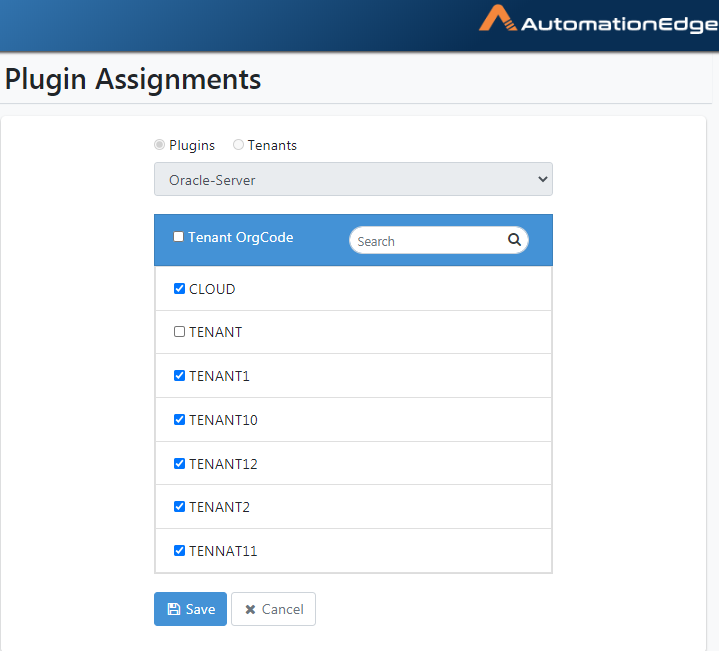 Figure 54: Unchecked Tenants for un-assignment