Set Tenant Message
Tenant Message lets Admins broadcast messages to all users within their tenant — useful for communicating maintenance windows, policy changes, or important alerts. You can customize the message content, set the message type (information, important, or alert), and schedule start and expiry dates so messages appear only during the relevant timeframe. Without this feature, Admins would need to rely on external communication channels to reach platform users. This provides a direct, in-platform communication channel that ensures all users see critical announcements when they log in.
To set tenant message:
-
In the menu, click Settings → Tenant Message. The Tenant Message page appears.
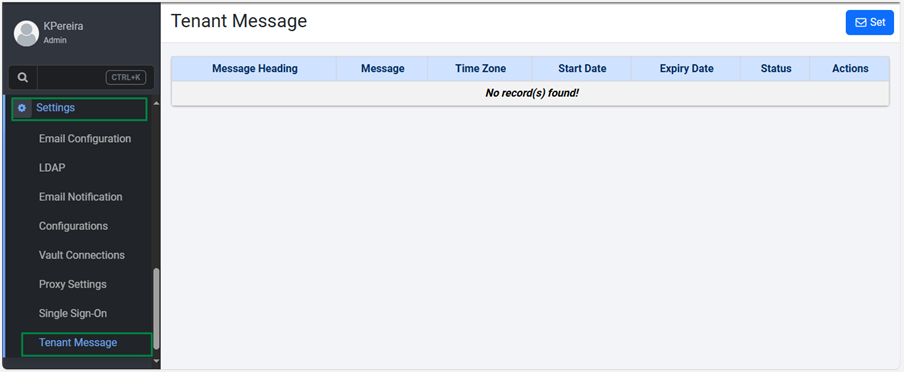
Tenant Message page
-
Click Set. The tenant message fields appear.
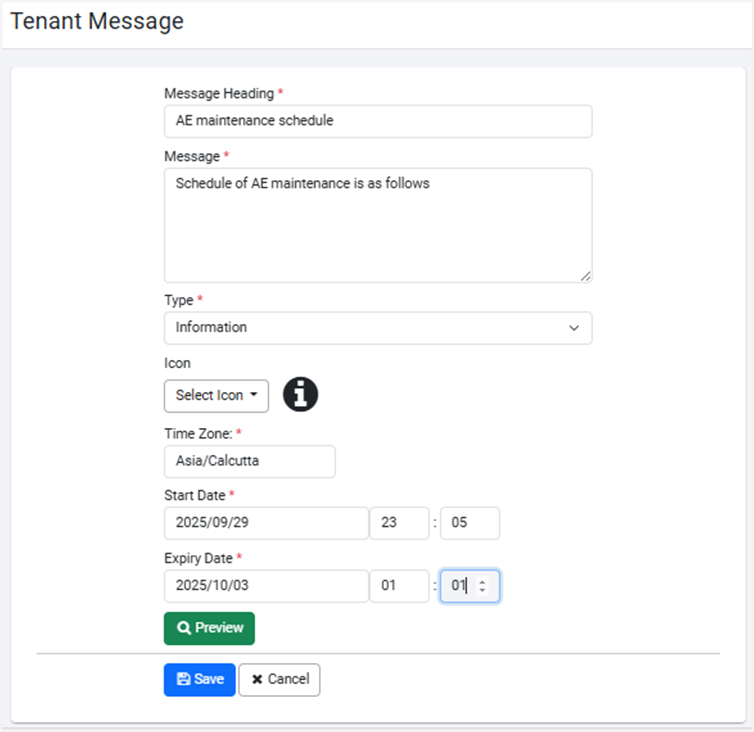
Tenant Message fields
-
Enter the field details.
| Field name | Description |
|---|---|
Message Heading* | Enter a message title. For example, HTML Tags. |
Message* | Enter the message you want to send. Note: You can also use HTML tags to format the content. Supported HTML tags are: <a>, <b>, <blockquote>, <br>, <caption>, <cite>, <code>, <dd>, <div>, <dl>, <dt>, <em>, <font>, <h5>, <h6>, <hr>, <img>, <li>, <ol>, <p>, <pre>, <span>, <strike>, <sub>, <sup>, <table>, <tbody>, <td>, <tfoot>, <th>, <thead>, <tr>, <u>, <ul> |
Type* | Select the type of message you want to send, that is, important or informative or alert. Available message types are: - Information - Important - Alert |
| Icon | Select the icon you want to attach to the message. The icon changes depending on the selected message type. For example, for informative message with Type: Information, the default icon is  Note: You can search for an icon of your choice, if required. |
Time Zone* | Select the time zone of the message. |
Start Date* | Select the date and time when you want to send the message. |
Expiry Date* | Select the date and time after which the message will no longer be available to the users. |
* Indicates mandatory field.
-
Click Preview. You can view the message before saving it.
-
Click Save. The details are saved, and users will see the message when they sign in to the AEUI.

Tenant Message saved
-
After the expiry date and time has elapsed, the status of the message changes to Expired.
-
Click
 to modify the message.
 -
Click
 to delete the message.