Set LDAP Configuration
LDAP Configuration lets Admins connect AutomationEdge to your organization's directory server so users can authenticate with their existing corporate credentials instead of maintaining separate passwords. AutomationEdge supports three user types — Native, LDAP, and SSO — and LDAP users are authenticated against the configured LDAP server while their details are fetched from the directory during first login. Without this configuration, you cannot create LDAP user accounts in the platform. Setting up LDAP integration eliminates the need for users to manage separate credentials and aligns your automation platform with your organization's identity management strategy.
The topic contains the following sections:
Add LDAP Configuration
In the section, you’ll learn how to add LDAP configurations.
The add LDAP configurations:
-
In the menu, click Settings → LDAP. The LDAP page appears.
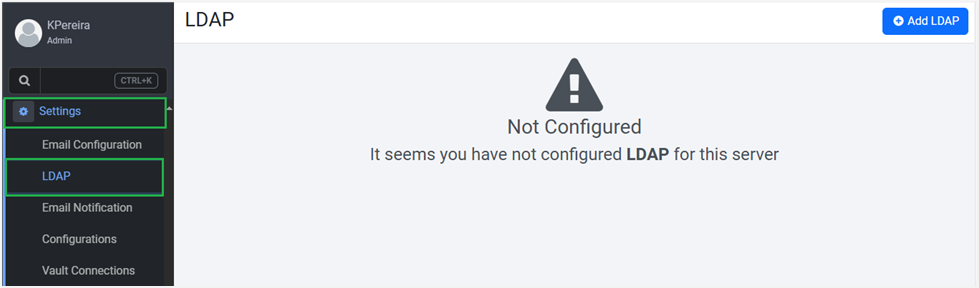
LDAP page
-
Click Add LDAP. The LDAP details page appears.
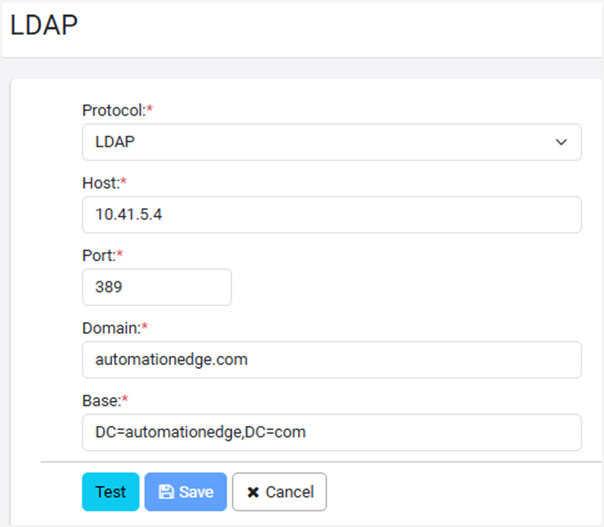
LDAP details page
-
Enter the LDAP field details, as required:
Field Description Protocol* Select the protocol from the following options:
• LDAP
• LDAPSHost* Enter the host IP address. For example, 10.41.5.4. Port* Enter the port number to which to connect. For example, 389. Domain* Enter the domain name which you want to use. For example, automationedge.com. Base* The details appear as you enter your details in the Domain field. For example, Base:DC=automationedge,DC=local. *Indicates mandatory field.*
-
Click Test. The domain connection is validated.
-
Click Save. The LDAP configuration details are saved.
View LDAP configuration
In the section, you’ll learn about viewing and modifying the LDAP details.
To view LDAP configurations:
-
In the menu, click Settings → LDAP. The LDAP page appears.
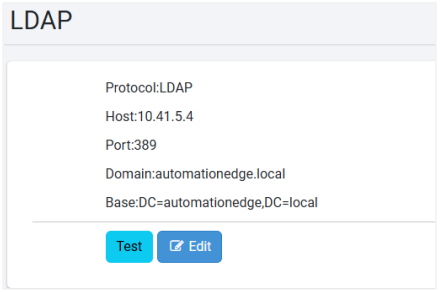
LDAP configuration details
-
View the following field details:
Field Description Protocol Displays the selected protocol. Host Displays the host IP address. Port Displays the port number. Domain Displays the added domain. Base Displays the base details.
To modify the LDAP details, click Edit.