User Defined Roles
User Defined Roles let you create custom roles tailored to your tenant's specific access requirements — going beyond what the system defined roles offer. You can base a new role on an existing system defined role template and then adjust its permissions, or create a completely new role from scratch with only the permissions you need. Each role has granular, capability-level permissions that control access to specific platform features and actions. The Web Portal Access option lets you control whether a role has full UI access or API-only access, which is useful for service accounts or integration users. This flexibility ensures that every user has exactly the level of access they need — no more, no less.
To create new roles
-
In the menu, click Roles. The Roles page appears.
-
In the User Defined Roles tab, click New Role. The New Role page appears.
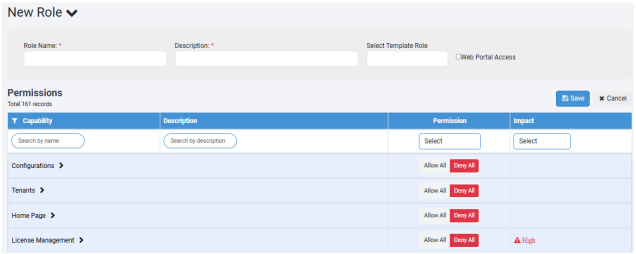
New Role page
-
Enter the following field details:
| Field Name | Description |
|---|---|
| Role Name* | Enter a name for the role you want to create. |
| Description* | Enter a description of the role. |
| Select Template Role | Select the role based on which you want to create the new role. Available options are: - Admin - Activity Monitor - Agent Admin - User Admin - User - Workflow Admin |
| Web Portal Access | Select the checkbox to allow users to sign in to AEUI with both, API and UI access. Note: If the checkbox is clear, then the user will have only API access to allowed modules and will be unable to access the UI pages. For example, see the following screenshot: 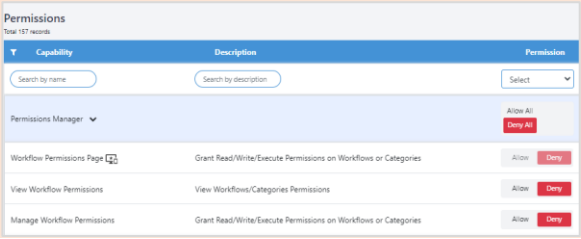 You will be unable to modify the permission of the Workflow Permissions Page, which is accessed through the UI. However, you can modify permissions of other sub-capabilities that can be accessed through the API. |
| Permissions | Note: If you select the system defined role for creating the new role, then by default all the system defined role's permissions are assigned to the new role. However, you can modify the permission details. |
| Capability | Displays the name of capability that you can assign to the role. |
| Description | Displays the description of the capability. |
| Permission | Displays the permission available for each capability. If you want to assign complete permissions to a capability, click Allow All. Else, click on the capability and provide permission at sub-capability level. 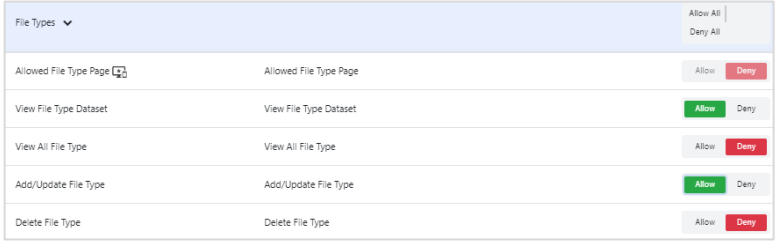 Similarly, you can deny permission at the capability or sub-capability level. |
| Impact | Displays the impact of the assigned capability. Impact values are: High or Medium. High: Permissions impacting the business highly. For example, permission to delete a tenant. Medium: Permissions impacting the business, but at the user level in a tenant. For example, permission to enable or disable the workflows. |
*Indicates mandatory field.
-
Click Save. The new role details are saved.
Note- To modify the role and permission details, click
 .
. - To delete the role, click
 .
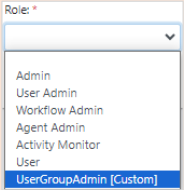
. - The new roles appear in the Role list in the Users → User List → Add New User page.
- To modify the role and permission details, click
To delete one or multiple workflow files:
- Select the checkbox in the File Extension column. The Selected tab appears with the count of selected files selected.
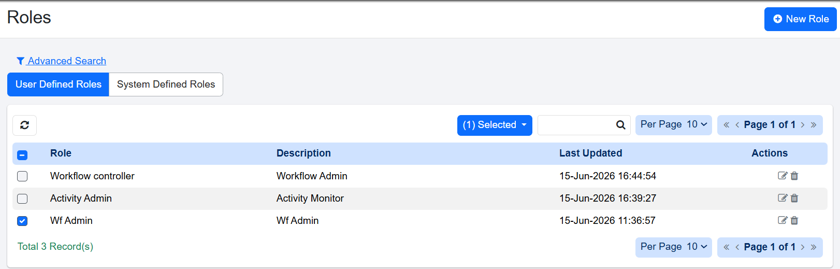
Allowed file Types multiselect
The options in the Actions column become inactive.
- Click Delete to remove all the selected files extension. The Confirm File Types deletion dialog appears.
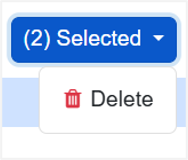
Selected tab view
- In the Confirm File Types deletion dialog, click Delete. The Bulk Action Result dialog appears, which displays if the holiday calendar deletion was successful or a failure.
- In the Bulk Action Result dialog, click Ok. The Allowed File Types page displays the file extension list.