Surface Spy
Introduction
Process Studio Surface Spy is used to capture images/regions on the screen. Locate this image based on a matching pattern specified. It is advantageous on remote machines with no handle to the content, and everything is an image or pattern.
Start Using Surface Spy
Follow the steps below to set up and use Surface Spy.
- Open Process Studio.
- In this demo, In Spy Project, create a folder Surface Spy. The Surface Spy folder is visible in the workspace as below.
-
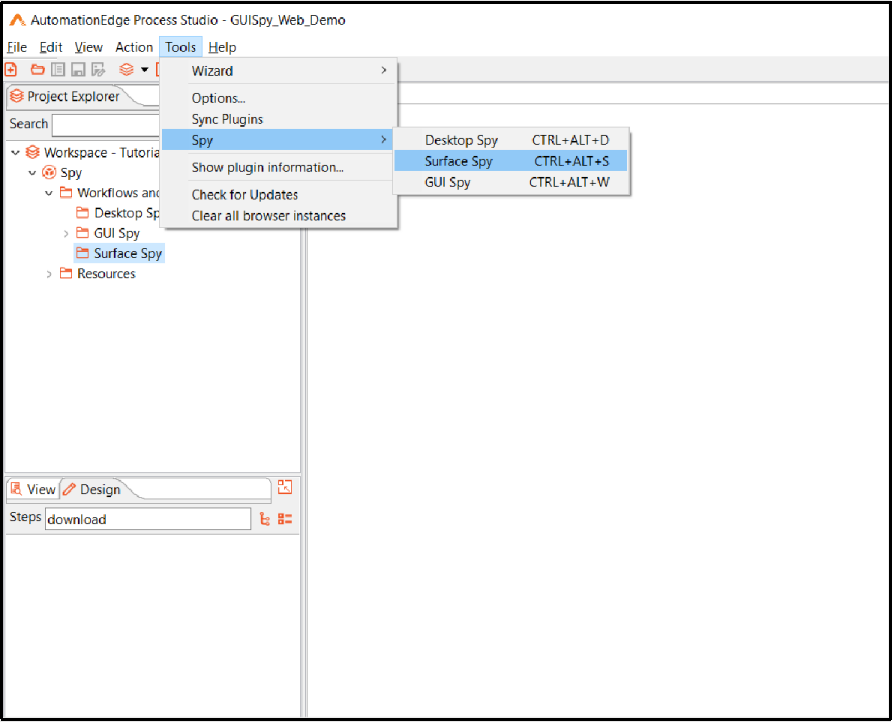
To launch Surface Spy, click Tools -> Spy -> Surface Spy menu option.
-
A warning message to create a workflow displays. The default workflow name is Workflow_1. Click OK.
-
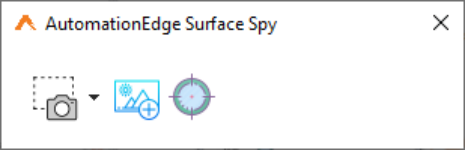
Surface Spy opens in the foreground to Process Studio as seen in the snapshot below.
-
The three icons on Surface Spy are explained below and implemented in the steps that follow.
| Icon on Surface Spy | Description |
|---|---|
| On hovering over the icon it shows the name of the icon - Capture Image.If you click on the drop down arrow it shows three options, - Capture now If you click on the Capture Image icon or select Capture now from the drop down list, you see a + mouse pointer that can be used to outline any area on the screen. - Capture in 3 Seconds If you select Capture in 3 Seconds from the drop down list you see a + mouse pointer after 3 seconds, that can be used to outline any area on the screen. - Capture in 10 Seconds If you select Capture in 10 Seconds from the drop down list you see a + mouse pointer after 10 seconds, that can be used to outline any area on the screen. This is useful if the area to outline is not on the screen immediately but you need less than 3 or 10 seconds as mentioned in the two points above, to navigate to a desired screen. Note: If you select a small icon or image, for example,capture a icon in Process Studio, then the captured image is enlarged in the AutomationEdge Surface Spy or Surface Click dialog, and it will appear aligned in the middle. For example, the view in the AutomationEdge Surface Spy dialog appears as follows: | |
| Click to upload an image from your local system. | |
| On hovering over the icon, it shows the name of the icon -Locate Images.Once you outline an area using Capture Image, the next step is to Locate Images. Clicking on Locate images icon searches for matching patterns(/images) based on the Matching Pattern selection from: - Retrieve Single closest match - Retrieve Multiple close matches - Retrieve All matches |
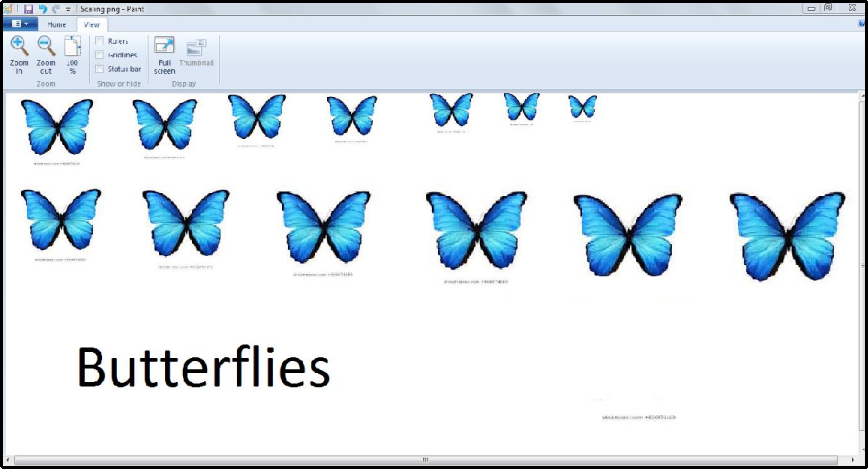
- Capture Image on the paint document as shown in the screenshot below. Let us assume the image on the top left corner to be the base image with a size 100%. The images on the right are smaller images with 10% reduction in size each. The images in the bottom row are in ascending order of size ascending by 10% each.
-
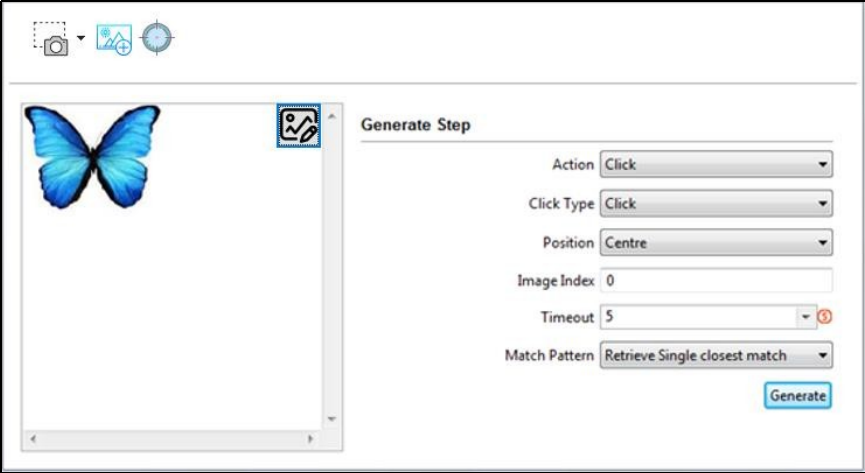
Once you capture an image or pattern, the AutomationEdge Surface Spy window expands, as shown below. In this case, we have captured the third image from the left in the top line.
-
Use
 to crop the image, if required before proceeding with step generation.
 -
Generate Step configuration screen options differ depending on the Action chosen.
-
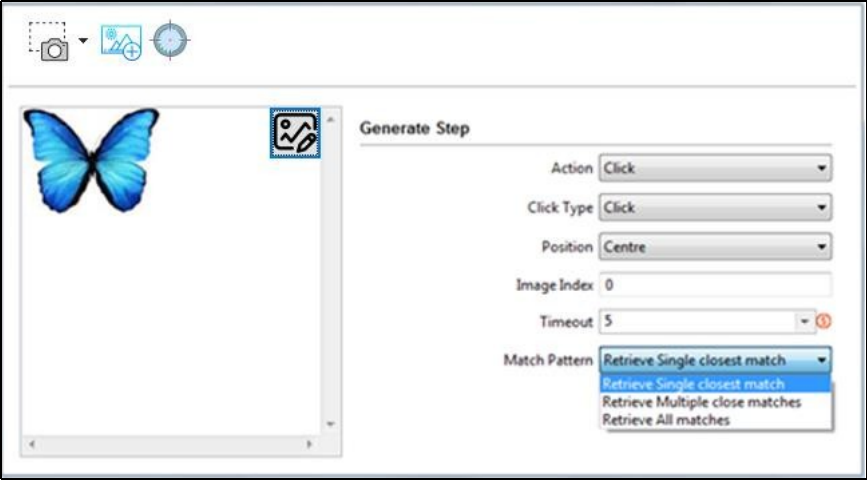
The following screen shows the Generate Step configuration options when Action chosen is Click as seen above also.

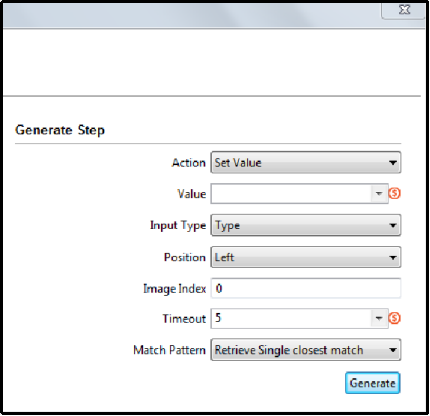
- The following screen shows the Generate Step configuration options when Action chosen is Action Set Value.
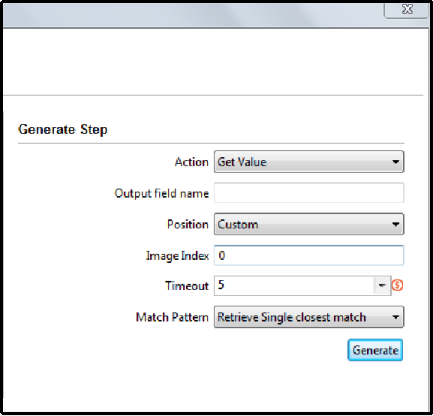
- The following screen shows the Generate Step configuration options when Action chosen is Action Get Value.
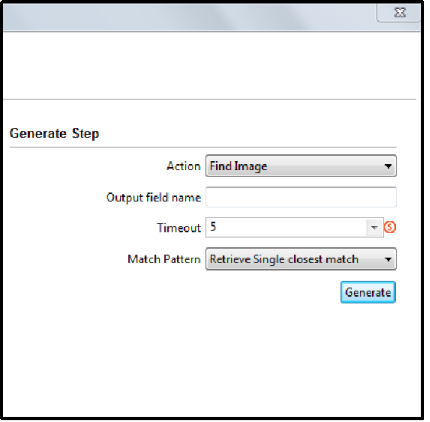
- The following screen shows the Generate Step configuration options when Action chosen is Action Find Image.
- The following table summarizes all the Generate step options for all Actions types.
Table: Surface Spy Generate Step Options
| Option | Description |
|---|---|
| Action | The Action Drop Down has the following options available. Click: It performs a click action. Set Value: It performs Set Value on a region/image. Get Value: It Gets Value from a region/image. Find Image: It checks for an image and returns true or false. |
| Click Type | The Click Type Drop Down has the following options available. This option is available if Action chosen in Click. Click: It performs left click action. Right Click: It performs right click action. Double Click: It performs double-click action. Middle Click: It performs left Middle click action. Mouse Move: It performs Mouse Move action. |
| Value | Specify a Value to be set on a region/image. |
| Output field name (for Action Get Value) | This field is active when the Action chosen is Get Value. Provide a field name to hold the value retrieved from a region. |
| Output field name (for Action Find Image) | This field is active when the Action chosen is Find Image. Provide a field name to hold a Boolean value(Y/N) indicating whether the image was found or not. |
| Position | The Position Drop Down has the following options.Perform the Action chosen above at the position selected here. Left: Center Left position of the Image. Right: Center Right position of the Image. Center: Center of the Image. Custom: The relative position from the entire Image, it could be anywhere on the screen. If the relative position of the relative element to click is closer, it is preferable. |
| Image Index | Image Index is retrieved once an image is clicked from the selected images. |
| Timeout | Specify this is the Timeout for step execution. By default, timeout is 5 seconds. |
| Match Pattern | The Match Pattern Drop Down has the following options available. - Retrieve Single closest match - Retrieve Multiple close matches - Retrieve All close match |
| Button: Generate | Click Generate button to generate the step with the configurations above. |
- The Match Pattern drop-down field has the following options as shown below,
- Retrieve Single closest match
- Retrieve Multiple close matches
- Retrieve All close match
-
Once you outline an area using Capture Image the next step is to Locate Images. Clicking on Locate images icon searches for matching images (/patterns) depending on the Match Pattern chosen as mentioned above.
-
Let us select Retrieve Single closest match in the match Pattern drop down. Now click on Locate Images (
 ) icon. It gives an error Multiple Match Found as it has found more than one close matches.
We Click on an image to select and press Esc key to exit.
- Let us select Retrieve Multiple close matches in the match Pattern drop down. Now click
- Let us select Retrieve All matches in the match Pattern drop down. Now click on Locate Images () icon. It locates All Matches as seen below (not below 50% or above 150% of the original size).
- In this section we saw, how Surface Spy is used Capture and Locate Images and the various options available.
Close Surface Spy
1.You may click the X button on the AutomationEdge Surface Spy window to close Surface Spy.
2.You may also click X on the expanded AutomationEdge Surface Spy window to close Surface Spy.
3.Surface Spy also closes when you close Process Studio.