Work with Users
System Administrators are the super users and have access to the entire AutomationEdge system. The System Administrator can create users with the following roles:
System Administrator and
License Administrator or (Tenant) Admin.
SSO user type is not supported for Sysadmin role.Sysadmin users cannot use Process Studio.
Add New User
To create a new user with an Admin role, navigate to the User List menu.
To add a new user:
-
Navigate to the Users -> User List menu. The System Users page appears.
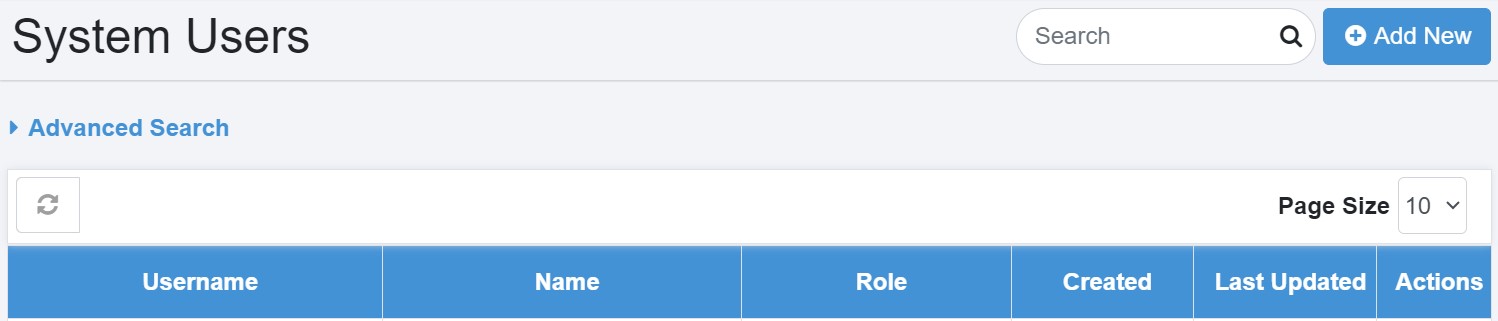
Figure 19 :System Users
-
Click Add New. The Add New User dialog appears.
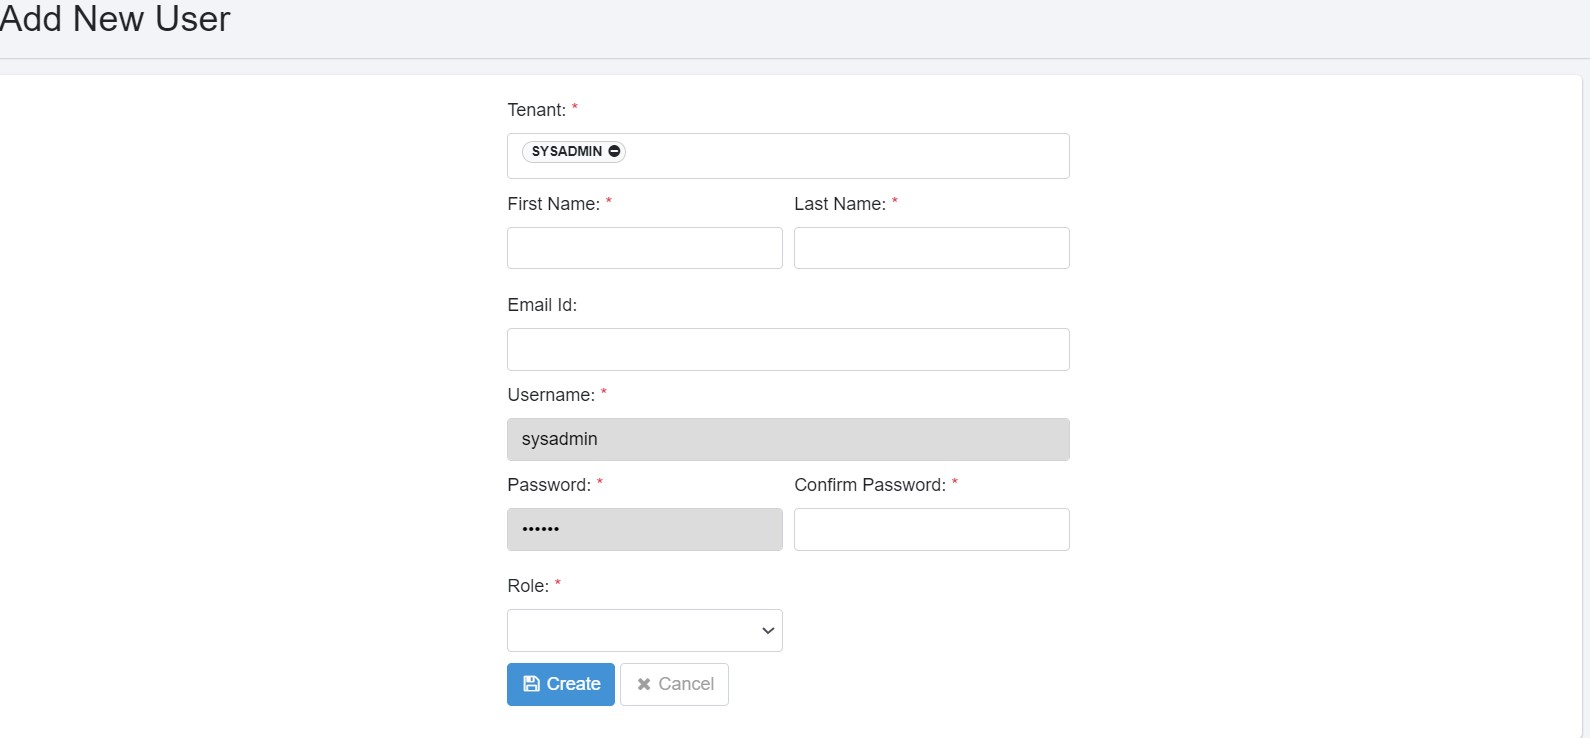
Figure 20: Add new user
- Enter the field details:
| Field Name | Description |
|---|---|
| Tenant* | Select the tenant. |
| First Name* | Specify a first name for the tenant user. |
| Last Name* | Specify a last name for the tenant user. |
| Email Id | Specify the tenant's email ID. |
| Username* | Specify the tenant user's sign in name. |
| Password* | Specify the password with which the tenant user will sign in. |
| Role* | Select either License Admin or System Admin role for the user. |
*: indicates a mandatory field.
- Click Create. The user is created and the details are displayed on the System Users page.
Tenant Users
The System Admin can create different usernames with the admin role. You can view all the details of tenant users created on this page.
Add new User
To add a new tenant user use the following steps:
-
Under Users, click Tenant Users. The Tenant Users page appears.
-
Click Add New. The Add New User page appears.
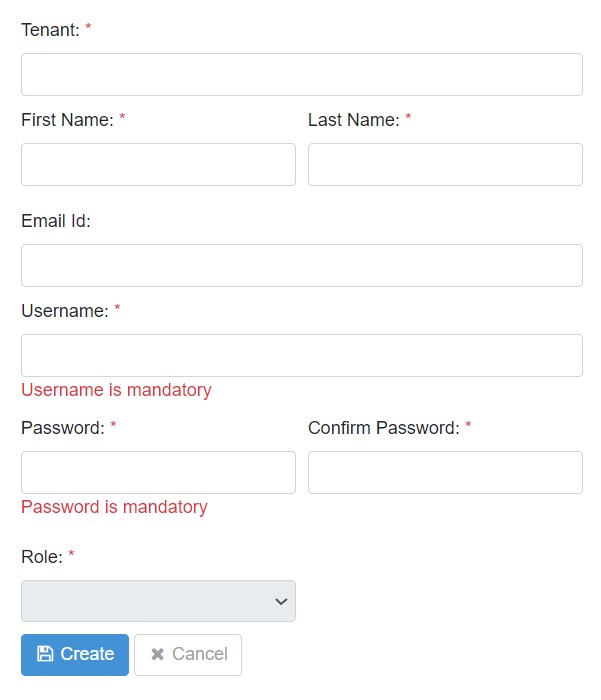
Figure 21: Add New User
The System Administrator can create Native user types.Native User is the default value. Details of the users are kept in AE-DB. User authentication done by AE.
| Field Name | Description |
|---|---|
| Tenant* | Select or search for the tenant in which you want to create the user. |
| In the search box available in the field, you can fetch the tenant of your choice with ease. | |
| First Name* | Specify a first name for the tenant user. |
| Last Name* | Specify a last name for the tenant user. |
| Email Id | Specify the tenant's email ID. |
| The Send verification link over email field becomes available only if you specify the email address. | |
| Send verification link over email | Select the checkbox to send a verification email link to the user. |
| Users can verify the sign in details through the link, which will activate their user account. Users will receive message confirming that the verification is successful. | |
| Users can also, reset their password after they activate their account. | |
| Important: To use the field, user must set the email configuration details in the Email Configuration section. The link will be active for 24 hours only. Ensure that the proper URL is added to the ae.portal.baseURL property in the ae.properties file. Reach out to your support team if you face any issues when accessing the URL. | |
| Username* | Specify the tenant user's sign in name. |
| Password* | Specify the password with which the tenant user will sign in. |
| Force Change Password | When selected, the system forces the user to change the password on next login. |
| Role* | Select Admin role, which is the Tenant Admin role. |
| @ Note: The System Administrator can create users with Tenant Admin role only. | |
| *: indicates a mandatory field. |
- Click Create. The user is created and the details are displayed on the Tenant Users page.
The state of a new user is UNVERIFIED.
To change the state of the new user to ACTIVE, complete the following steps:
I. Access AE sign in page. Enter the user's credential details in the username and password field.
II. Click Sign In. The Change Password page appears.
After the user signs in for the first time, changing the password is a mandatory step. |
-
Enter the old and new password in the respective fields.
-
Click Change. The password updated successfully message appears and the sign in page appears.
Sign in with the new password. The state of the user is ACTIVE.
If you want to edit the user Click the Edit icon (![]() ) corresponding to the tenant user you wish to edit, follow same steps as mentioned in Add new user section.
) corresponding to the tenant user you wish to edit, follow same steps as mentioned in Add new user section.
Tenant User State
In this section, we discuss the User States.
-
User State Possible Values
The possible values for User Account State are as follows,
-
Unverified
A newly created user account is an UNVERIFIED state. When the user tries to log in for the first time, a dormancy check is applied, and if the account happens to be dormant, then the account state changes to DISABLED otherwise, to ACTIVE.
-
Active
A user performs in a usual way when in this state.
-
Locked
A user account locks on crossing the max Number of Attempts for unsuccessful login set in the Settings -> Sysadmin Policy/Tenant Policy menu. The schedules configured by the locked user may continue to run.
-
Dormant
If a user account has had no activity for an extended period, it goes to the dormant state. Set the Dormancy Period (In months) in the SettingsàSysadmin Policy menu (after which if an account has had no activity becomes dormant). A dormant account can be enabled or disabled by the System or Tenant Administrator.
-
Disabled
A user can be manually disabled. A confirmation pop-up for disabling user displays. If a user is disabled, their schedules get automatically disabled.
-
Deleted
A User Account is in the DELETED state when an Administrator deletes the account. The User is soft-deleted (Disabled in the background). This state does not display on the UI.
-
Enabled
A user can go to enabled state from disabled, dormant or locked state. Once the user logs in, the state changes from Enabled to Active.
2.User States Inter relationships
Check the following image that depicts the inter relationship between the User States,
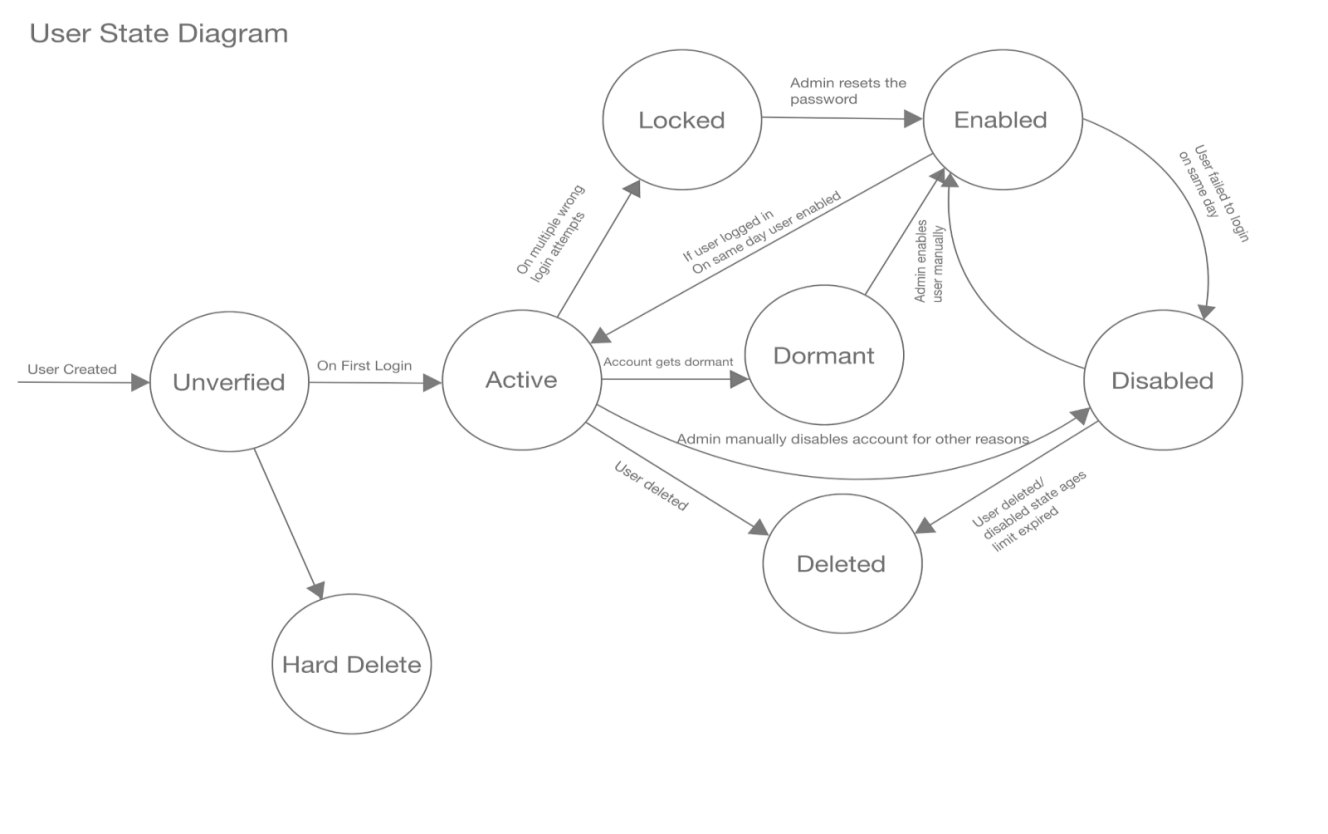
Figure 22: User State interrelationship
3.User State -- Login behavior
Additionally, to complement the previous User State interrelationship diagram, the following diagram illustrates the login behavior of users within various states.The diagram depicts the different user states.
-
If user is in Active State upon login, user goes to the AutomationEdge UI Landing page.
-
If a user is in an Enabled or Unverified state upon login, user account is marked as Active and user goes to the AutomationEdge UI Landing page.
-
If a user is in Locked, Disabled, Dormant or Deleted state upon login, a generic failure message is displayed.
4.User States -- Visual Depiction
-
AE Tenant Users menu is seen in the snapshot below with different users in LOCKED, ACTIVE, DISABLED, DORMANT, ENABLED and UNVERIFIED states.
-
To change the state of any user, click on the State link in the State column below and perform further actions. The following sections discuss the steps to change the user state.
Unlock User
Unlock the users who are in a Locked state.
The System Administrator can unlock Tenant Administrators. System Administrators or Tenant Administrators can unlock Tenant Users.
Following are the steps to unlock a tenant user.
-
Navigate to Users->Tenant Users menu. Tenant users page appears.
-
In the State column, click the LOCKED link corresponding to the tenant user you wish to unlock. A Select Action pop-up appears, allowing you to unlock or disable the locked user from the drop-down list.

Figure 24: Select Action on locked user
-
Select Unlock User.An Unlock User pop-up window appears
-
Provide the new password and confirm password. User ENABLED successfully message appears.
-
Now the user is unlocked. You may now log in with the user with the newly set password.
-
On the first login, it asks you to change the password. Once you change the password user state changes to Enabled.
-
Login with the new password. The user state changes to Active.
Enable User
Enable Dormant or Disabled tenant users.
The System Administrator user can enable Tenant Administrators. System Administrators or Tenant Administrators can enable the Tenant Users.
Following are the steps to enable a tenant user.
-
Navigate to Users->Tenant Users. Tenant Users page appears.
-
In the State column, click on the DORMANT/DISABLED corresponding to the tenant user you wish to enable. A Select Action pop-up window appears.
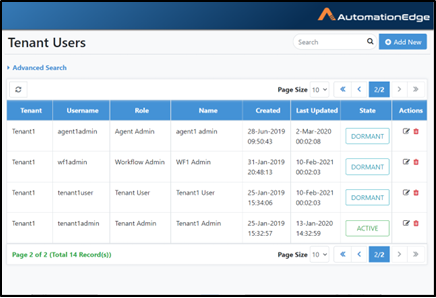
Figure 26: Enable Tenant User
- Select Enable User. An Enable User pop-up window appears.

Figure 27: Select operation on locked user

Figure 28: Enable User
-
Click Enable.User ENABLED successfully message appears.
-
Log in with the user credentials. Upon login, the user state changes to Active.
You can also enable a dormant or disabled user and then select Reset Password checkbox for a new password, if required. Enter new password, and then click Enable.The Reset Password option is unavailable for SSO and LDAP users
Disable/Delete User
System Administrators can manually Disable/Delete Active Tenant Administrators as well as Tenant Users. Tenant Users can be Disabled/Deleted by System Administrators or Tenant Administrators. Dormant users can be enabled/disabled.
Following are the steps to Disable/Delete a tenant user.
-
Navigate to Users->Tenant Users. Tenant Users page appears.
-
In the State column, click the ACTIVE link corresponding to the tenant user you wish to Disable/Delete. A Disable User pop-up window appears.
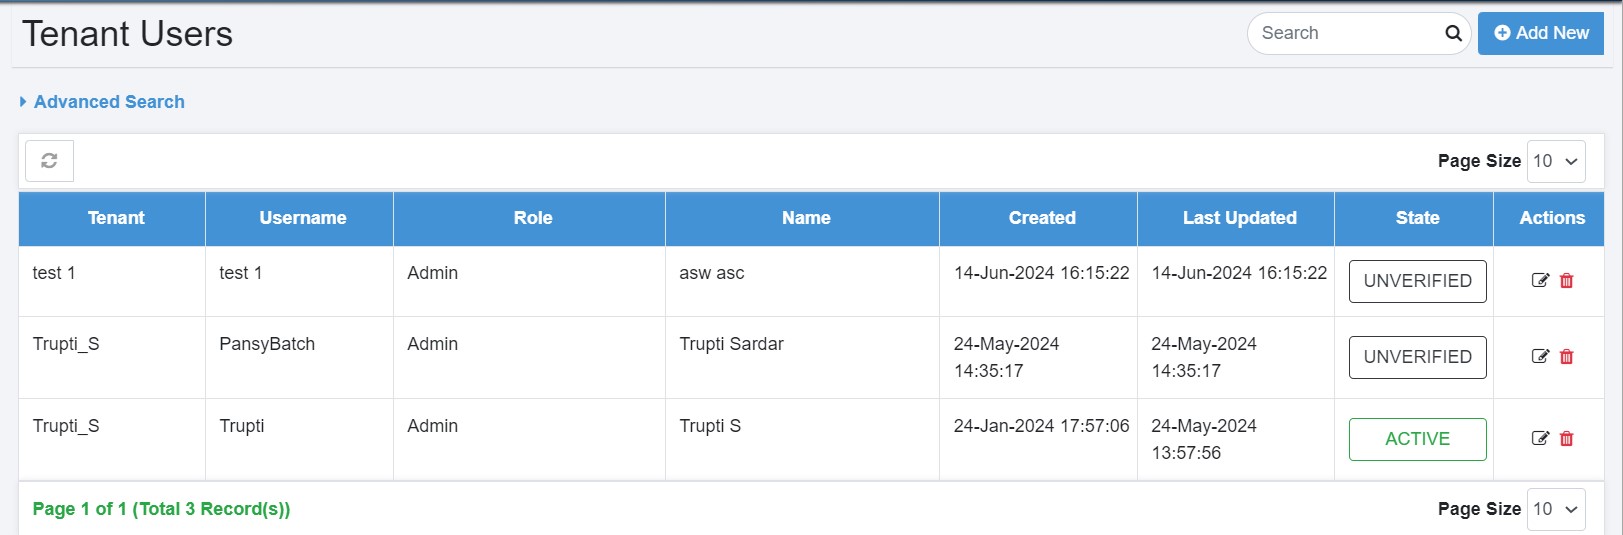
Figure 30:Disable/Delete Tenant User
- Click Disable to disable the user.
In addition, if the Delete this user checkbox is selected, you need to provide a period in months after which it deletes the user (It is a soft delete). After deletion you cannot restore the user account. Deleted state is not displayed on UI.
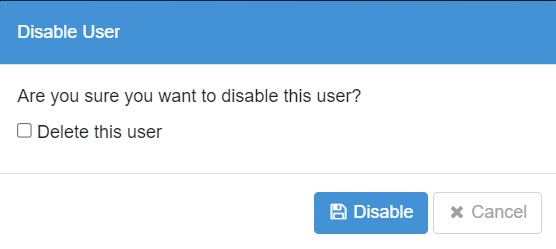
Figure 31: Delete User
-
In this case we will leave Delete this user unchecked.
-
User account Disabled successfully message appears.
-
Once again navigate to the Tenant Users menu.
-
You can now see that the user is Disabled.
-
For the second scenario, check the Delete this user checkbox.
-
Provide a period in days after which the user will be deleted (soft delete). Click Disable. User disabled successfully.
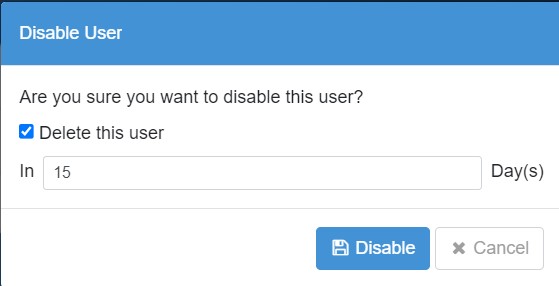
Figure 33:Provide and confirm New Password