Work with Tools menu
In the chapter, you will learn about how to customize the look and feel of Process Studio and view the plugins information.
The chapter consists of the following topics:
Customize the behavior and look and feel of Process Studio
Use Options menu to customize the behavior and the look and feel of Process Studio.
To customize the behavior and look and feel of Process Studio:
-
In Process Studio, click Tools. The menu options appear.
noteYou can click
 to open the Process Studio Options dialog.
 -
Select Options.... The Process Studio Options dialog appears.
-
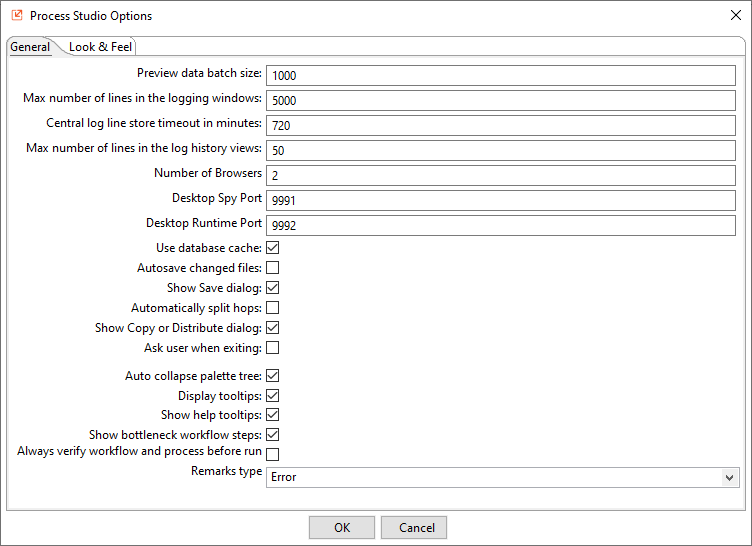
The Process Studio Options dialog, has two tabs, General and Look & Feel.
General tab
You can view and modify the general details of Process Studio.
Field name Description Preview data batch size Specify the batch size of the preview data buffer. Max number of lines in the logging windows Specify the maximum number of rows to display in the logging windows. Central log line store timeout in minutes Specify the time in minutes in which the central log line store will timeout. Max number of lines in the log history Specify the maximum number of lines you can view in the log history. Number of Browsers Specify the maximum number of browsers available in a GUI Automation plugin step dropdown list. Desktop Spy Port Specify the four-digit port number on which the Desktop Spy plugin runs. The default port value is 9991. Desktop Runtime Port Specify the four-digit port number on which the Desktop driver runs. The default port value is 9992. Use database cache Select the checkbox to enable caching of information stored on the source and target databases.
In some instances, caching causes incorrect results when you are making database changes. To prevent errors, clear the checkbox instead of manually clearing the cache every time.Autosave changed files Select the checkbox to save the changes in a file. For example, if you make changes to the workflow in Process Studio. Show Save dialog Select the checkbox to display the save dialog when a workflow or process is changed. Automatically split hops Select the checkbox to enable confirmation messages when you want to split a hop Show Copy or Distribute dialog Select to display the warning message that appears when you link a step to multiple outputs. This warning message describes the two options for handling multiple outputs:
- Distribute rows: Destination steps receive the rows in turns (round-robin).
- Copy rows: All rows are sent to all destinations.Ask user when exiting Select the checkbox to display the confirmation dialog when a user chooses to exit the application. Auto collapse palette tree Select the checkbox to collapse the palette tree automatically. Displays tooltips Select the checkbox to display tooltips for tools on the main toolbar. Show help tooltips Select the checkbox to display help tooltips. Show bottleneck workflow steps Select the checkbox to display the bottleneck workflow steps. Always verify workflow and process before run Select the checkbox to enable automatic verification of a workflow or process before it is run.
The workflow or process does not execute if there are errors.Remarks type Select the type of information that you want to display during verification.
- All
- Warning
- ErrorLook & Feel
You can view and modify the look and feel of Process Studio.
Field name Description Canvas Grid Size Specify the grid size on the canvas. Show Canvas Grid Select the checkbox to view the grid dots on the canvas. Preferred Language Select the language of your choice from the list. Alternative Language Select an alternate language of your choice from the list. Show Status Bar Select the checkbox if you want to show the status bar in the Process Studio. Click OK to save the changes.
Automate, capture window elements, and images or region
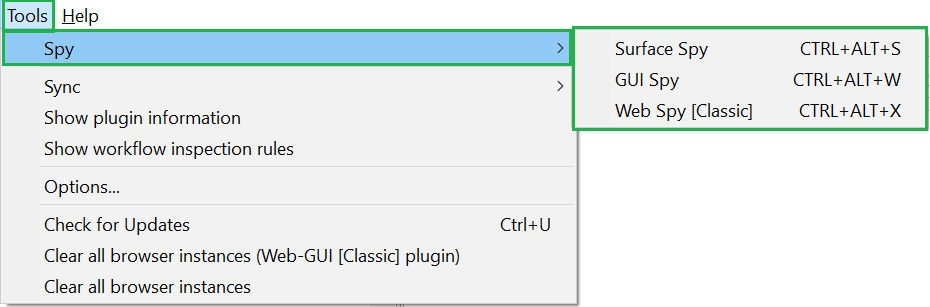
Use the Spy plugins to automate, capture window elements, and also capture images or region on the screen. Following are the three plugins available under the Spy menu:
The topic includes the following sections:
Desktop Spy
Use the Desktop Spy options plugin to extract windows element attributes. Desktop Spy is used to capture elements in.Net based Windows applications and applet-based applications.
Access Desktop Spy option through, Tools 🡪 Desktop Spy or CTRL+ALT+D.
Surface Spy
Use the Surface Spy option to capture images and regions on the screen. You can locate the image based on the specified matching pattern. It is advantageous on remote machines with no handle to the content, and everything is an image or pattern.
Access Surface Spy option through, Tools 🡪 Surface Spy or CTRL+ALT+S.
GUI Spy
Use the GUI Spy option for automating GUI robotic process automation (RPA). It can extract, web and windows element attributes, giving users a seamless GUI automation experience.
GUI Spy can generate individual steps on the workflow. Alternatively, use the GUI Spy Recorder to record several steps and place them on the workflow in one go.
Access GUI Spy option through, Tools 🡪 GUI Spy or CTRL+ALT+W.
Web Spy [Classic]
Use the Web Spy [Classic] option for automating GUI robotic process automation (RPA). It can extract, web and windows element attributes, giving users a seamless GUI automation experience.
Web Spy [Classic] can generate individual steps on the workflow. Alternatively, use the Web Spy Recorder to record several steps and place them on the workflow in one go.
Access Web Spy [Classic] option through, Tools 🡪 Web Spy [Classic] or CTRL+ALT+X.
View plugin details
View the details of the plugins available in the Process Studio.
To view plugin details:
-
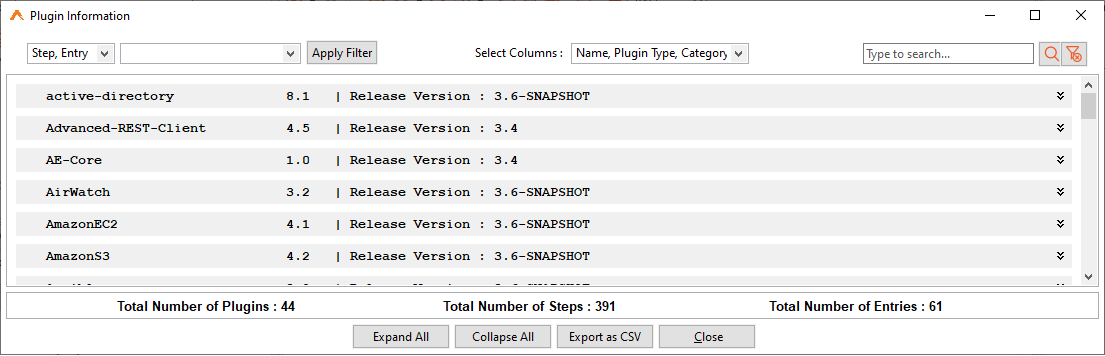
Click Tools, and select Show plugin information.... The Plugin browser dialog appears.
-
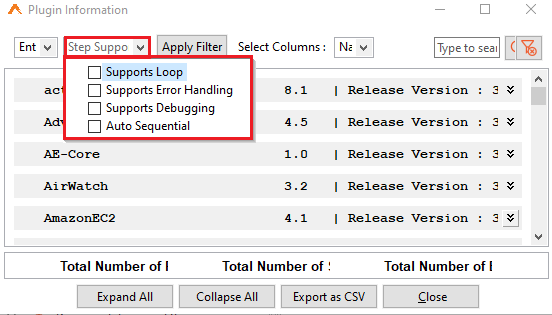
You can set additional filters to search for more detailed information about steps or entries. Select any one or all the checkboxes and click Apply Filter. The steps or entries are filtered out.
-
In Select Columns, select the columns that you want to view on the Plugin Information page.
-
To view the details of a particular plugin, use the search box.
-
Click Expand All to expand the view or Collapse All to collapse the view.
-
Use Export as CSV to export the plugin details in CSV format.
View workflow inspection rules
View the workflow inspection rules that you configured through AE UI.
For more information about the inspection rules, see Workflows 🡪 Inspection section in the AutomationEdge User's Guide.
To view workflow inspection rules:
-
Click Tools and select Sync 🡪 Inspection Rules. The rules are synced and Process Studio restarts.
-
Again, click Tools 🡪 Show workflow inspection rules. The Workflow Inspection Rules dialog appears.
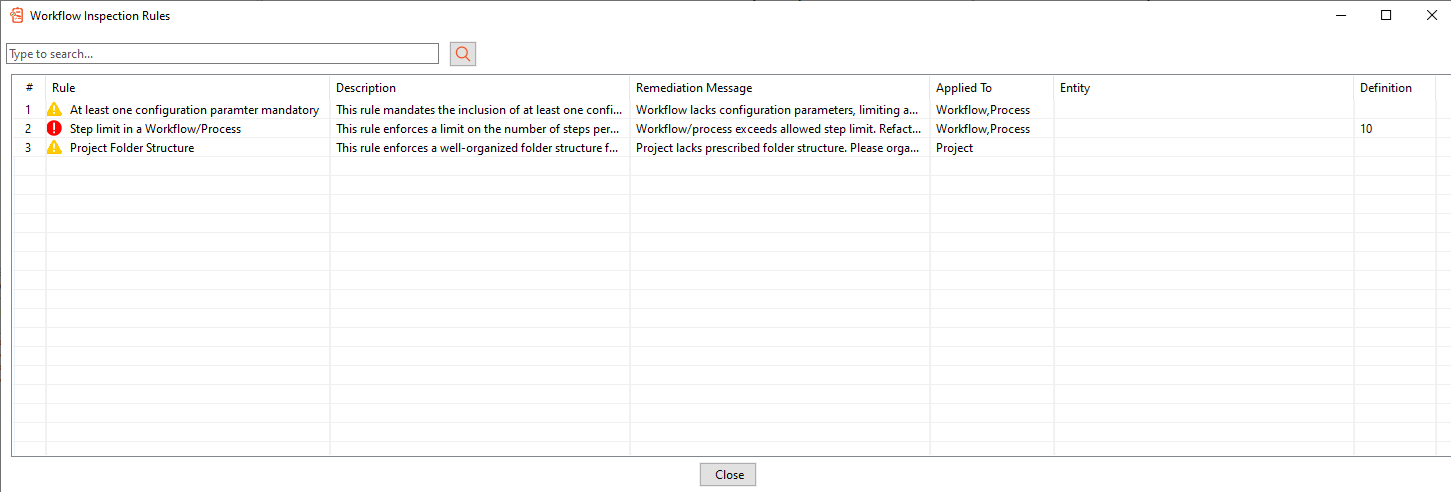
-
View the list of rules configured for the workflow.
noteTo fetch a rule, enter the rule detail in the search box, and click
 .
.