Work with Workflows
The Workflows → Workflow Operations feature gives you control over handling the state of the workflows, that is, activate or deactivate the workflows. As a System Administrator, you can enable (activate) or disable (deactivate) workflows in the following scenarios:
- System maintenance: Temporarily stop a workflow while the application is undergoing an update. For example, Framework change.
- Debugging: Temporarily stop a specific workflow that is behaving unexpectedly to prevent it from consuming resources or creating errors.
- Version control: Keep older versions of a workflow in the system for reference while ensuring only the newest version is running OR updating / uploading plugins. The feature ensures:
- Safety during system maintenance, that is, prevents bots from running accidentally while you are still working on them.
- All settings, logic, and history remain, that is, there is no loss of data.
- Reuploading of workflows is not required, that is, an instant restart.
In the chapter, you will learn about enabling or disabling the published workflows. You may need to enable or disable the workflows when there is a framework change or a plugin update.
The chapter includes the following topics:
Disable all workflows
You must disable the published workflows if you are updating the plugins that are used in various active workflows. The system does not allow updating plugins unless the workflows are disabled.
When you disable the workflows, users with Admin and Workflow Administrator roles receive an email notification.
After updating the plugins, enable the workflows again.
To disable all workflows:
-
In the menu, click Workflows -> Workflow Operations. The Workflow Operations page appears.
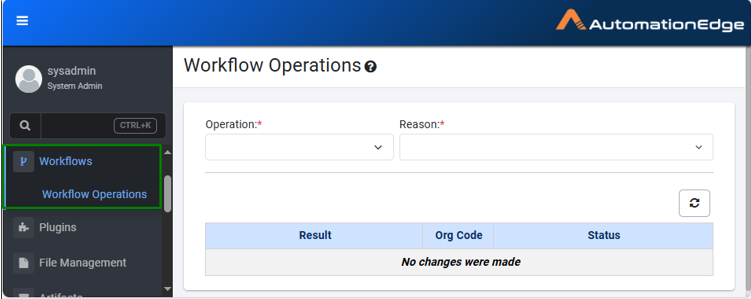
Workflow Operations page -
Enter the following field details:
Field Name Description Operation* Select the operation that you want to perform on the workflows. For example, Disable all workflows. Reason* Select the reason for disabling the workflows. * indicates mandatory field.
-
Click Disable. The details of the disabled workflows are available in *.csv file that appears on the Workflow Operations page. For example, AE_AE_ORG_1186_DisableWorkflowsResult17033563780846377897.csv
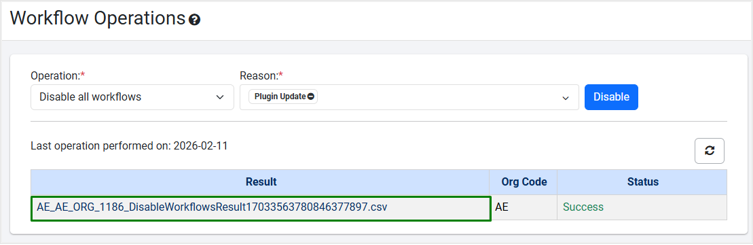
Workflow Operations – Disabled workflows result file (csv format)The following field details are displayed:
- Result: Displays the files that contain the workflow details of the organizations (tenants). The .csv file is available for two days only after generation, that is, it will be removed from the UI.
- Org Code: Displays the organization code of the tenants whose workflows are disabled.
- Status: Displays if the operation was successful or not. The Disable all workflows operation may fail if the system / AE is unable to generate the Result CSV file on the disk.
NoteClick
 to refresh the page view.
 -
In the Result column, click the file name. The details dialog appears.
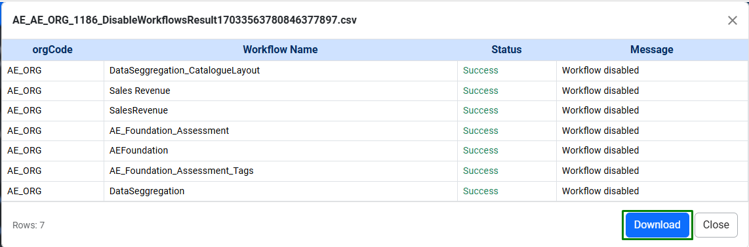
Workflow Operations – Disabled workflows viewThe dialog displays the following field details:
- orgCode: Displays the code of the organization (tenant) whose workflows you have disabled.
- Workflow Name: Displays the name of the workflows that are disabled.
- Status: Displays if the operation was successful or not.
- Message: Displays the final message after the selected action is performed.
Note-
The file is available for two days and is removed through the nightly job at the end of the second day. For example, if the file is generated on Wednesday, then it will be removed from the page through the nightly job that will run on Friday. The file is removed from your system and the page.
OR
- If you again perform an operation before the completion of the two days, then the existing file will be overwritten with the most recently performed operation file.
-
Click Download. The file is downloaded to your system.

Downloads
Enable all Workflows
Enable the published workflows after plugin update and / or framework version change is complete. When you enable the workflows, users with Admin and Workflow Administrator roles receive email notification.
To enable all workflows:
-
In the menu, click Workflows → Workflow Operations. The Workflow Operations page appears.
-
Enter the following field details:
Field Name Description Operation* Select the operation that you want to perform on the workflows. For example, Enable all workflows. Reason* Select the reason for enabling the workflows.
- Framework Version Change: When upgrading or migrating the AE instance to a new framework version all the active workflows are disabled automatically, and the system sets the reason as Framework Version Change.
After the upgrade or migration is complete, you can activate all the disabled workflows together. When you enable the workflows, users with Admin and Workflow Administrator roles receive email notification.
- Plugin Update: Select the option when enabling workflows that you disabled when upgrading the plugins.* indicates a mandatory field
-
Click Enable. The details of the enabled workflows are available in *.csv file that appears on the Workflow Operations page.
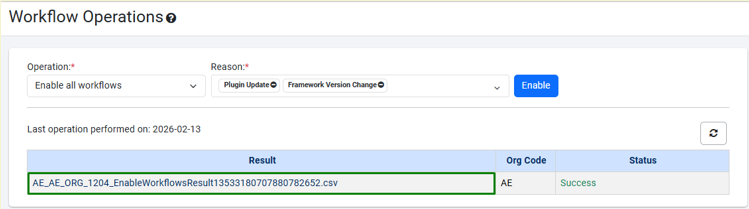
Workflow Operations – Enabled workflows result file (csv format)NoteFor more details, see step 3 to 5 in the Disable all workflows section.