Surface Actions: How to guide
- Drag the Surface Actions step on the canvas or generate a Surface Actions step from Surface Spy. For more information, see Appendix: Surface Spy Tutorial. OR If the step is not generated using Surface Spy, then open the step and click Edit Image, and then select the template image.
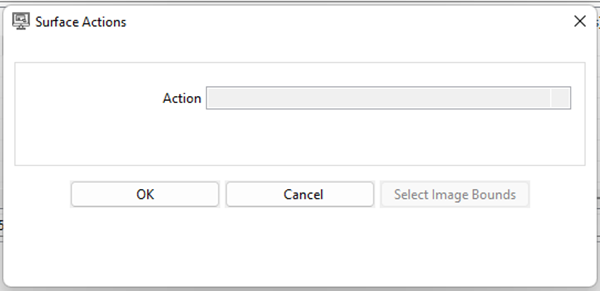
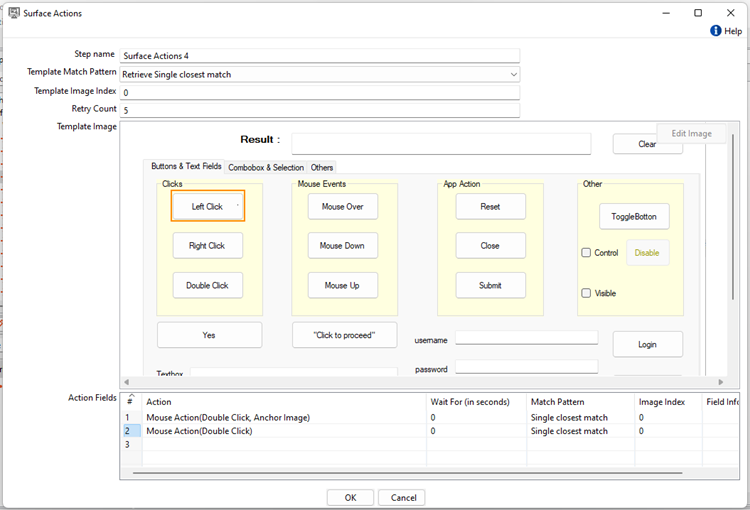
- Click on the Surface Actions step. The Surface Actions dialog appears.

- The Surface Actions dialog displays the captured template image, and then in the Action column, click in the first-row cell. The Surface Actions dialog appears.
- Enter the common field details. In addition to the common fields, you will also see the following field details, depending on the action selected.
| Field Name | Description |
|---|---|
| Action | Select an action from the following options: • Drag-Drop • Find Image • Mouse Action • Read Text • Retrieve Image • Special Key • Write Text The data type is String and the field is mandatory. |
| Action Type | Select the type of action you want to perform. The data type is String and the field is mandatory. Note: Action type is not applicable to the following actions: • Drag-Drop • Find Image • Read Text • Retrieve Image |
| Action Type contains the following options depending on the selected action: | |
| Action | Action Type Value |
| Mouse Action | Select an option from the following: • Left Click • Right Click • Double Click • Middle Click • Mouse Move |
| Action type | Available list of action types: • Append (Style - Copy) • Append (Style - Type) • Insert At Start (Style - Copy) • Insert At Start (Style - Type) • Replace (Style - Copy) • Replace (Style - Type) • Current Caret/Cursor Position (Style - Copy) • Current Caret/Cursor Position (Style - Type) Description of each action type: • Replace – It replaces the existing text with new text. • Append – It appends the new text to existing text. • Insert At Start – It adds the text at the start of existing text. • Current Caret/Cursor Position – It adds the given text at the current cursor position. • Style-Type: It types the given text character by character. • Style-Copy: It inserts the given text in one go. Note: The current Caret Position option is only applicable if Template Based Action is selected as No. |
| Special Key | The Action Type in special keys has three options as follows: 1. Default: Performs Key-press and Key-release operations for the specified key(s). 2. Key-press: Simulates physically pressing down a key on a keyboard. Triggers the key-down event. 3. Key-release: Simulates lifting or releasing a key. Triggers the key-up event. Select from: • Default • Key-press • Key-release Note: All the pressed keys must be released in the step. If any key is not released, the step will throw an exception. |
| Use Anchor Image | An anchor image is used as a reference point for identifying and fetching the target from the active screen. Select either Yes or No. Note: • If Yes, it searches for the anchor image on the active screen. If found, the step performs the specified action on the target area. Requires two selections: • Anchor Image Bounds • Target Image Bounds • If No, it searches the Target Image on the active screen. If found, it performs the specified action. Requires: • Target Image Bounds Not applicable to: • Drag-Drop • Find Image • Special Key The data type is String and the field is mandatory. |
| Anchor Image Bounds | Select the Anchor Image Bounds of the template image using the Select image bounds button. |
| Target Image Bounds | Select the Target Image Bounds of the template image using the Select image bounds button. |
- Actions
- Mouse Action:

| Field Name | Description |
|---|---|
| Click Position | Select the position to perform the action on the selected area of the image. Note: The position is applicable to the target image area. Select an option from the following: • Centre • Right • Left • Top Left • Top Right • Top Middle • Bottom Right • Bottom Left • Bottom Middle |
- Write Text:

| Field Name | Description |
|---|---|
| Value | Provide the text to perform the Write Text operation. Leave the checkbox unchecked to accept the value from a field in the previous steps of the stream using a drop-down list. |
| Verify Entered Text | Select Yes or No. If you select Yes, then it will verify if the inserted text is correctly inserted or not. If the inserted text is different than the value in the Value field, it will throw an exception. Note: 1. You must have the system clipboard access. 2. It will not work with password fields. 3. Sometimes due to incorrect image OCR data, it will not match with the given data in the Value field. 4. The field will read the text as per the given OCR provider. 5. Not applicable for “Current Caret Position” option to write text. 6. OCR results using Tesseract may be inaccurate due to image quality or noise, which may affect the verification of entered text. |
| Template-Based Action | Select Yes or No. If you select Yes, then it will perform the Write Text action based on the selected area of the template image. If you select No, then the Write Text action will be performed at the current position of the mouse cursor on the active screen. Note: To perform Template-Based Action with the option as No, you must have clipboard access to the system. If the type of fields is non-editable, read-only, disabled, or masked, then it is recommended to use Template-Based action as Yes instead of No. |
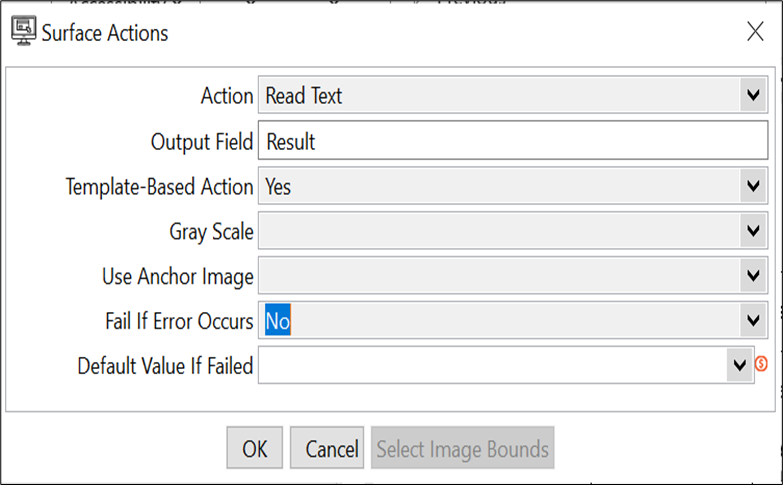
- Read Text:
| Field Name | Description |
|---|---|
| Template-Based Action | Select Yes or No. If you select Yes, then it will perform the Read Text action based on the selected area of the template image. If you select No, then the Read Text action will be performed at the current position of the mouse cursor on the active screen. Note: To perform Template-Based Action with the option as No, you must have clipboard access of the system. If the type of fields are non-editable, read-only, disabled, or masked, then it is recommended to use Template-Based action as Yes instead of No. |
| Gray Scale | Select Yes or No. If the selected option is ‘Yes’ then it will convert the specified area of the active screen of the image to Gray-Scale to read the text. |
| Fail If Error Occurs | Specify Yes, to fail the step when an Image is not found, else specify No to not fail the step on error. Allow values: Yes, No. Default Value: Yes. |
| Default Value If Failed | Specify the default or null value to be returned when no value is retrieved, or an error occurs. This field ensures the process execution without interruption. Note: This field will be available only if Fail If Error Occurs is No. |
| Output Field | It is a field to define the output variable name. The default output variable name is “Result”. |
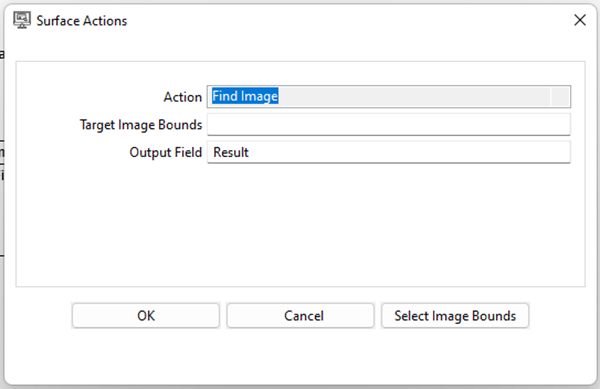
- Find Image
| Field Name | Description |
|---|---|
| Output Field | It is a field to define the output variable name. The default output variable name is “Result”. |
- Retrieve Image

| Field Name | Description |
|---|---|
| Folder Path | Click the Browse button and select the folder path where you want to save the image file. |
| Browse | Click to open the folder dialog for selecting the folder. |
| File Name | Specify the name of the image without an extension. |
| File Extensions | Provide the image file extension. Select an option from the following: • .png • .jpg • .jpeg • .bmp |
- Drag-Drop

| Field Name | Description |
|---|---|
| Action Type | Select the action type. Default: Move It will move the object from the Source Point to the Destination Point. |
| Source Image Bounds | Select the Source Point from the template image with the help of the ‘Select image bounds’ button. |
| Destination Image Bounds/Point | Select the Destination Point from the template image with the help of the ‘Select image bounds’ button. |
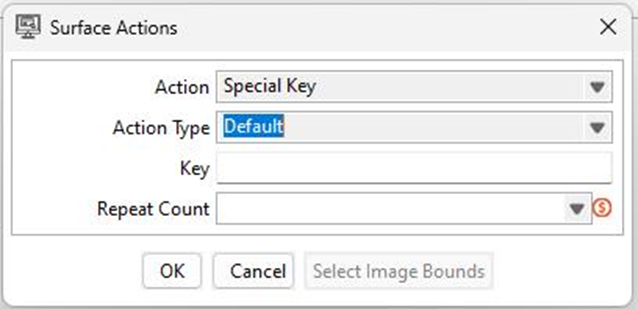
- Special Key
| Field Name | Description |
|---|---|
| Keys Combination/Key | Provide the single key or combination of keys in separate square brackets ‘[]’ for each key. For example: • [enter] • [win] • [ctrl] • [ctrl][c] • [alt][enter] Note: • The single alphabetic and numeric keys are not allowed. • The Java Robot class cannot simulate certain key combinations and actions reserved for system use, such as system-level shortcuts and secure attention sequences, due to security restrictions in modern operating systems like Windows. These actions are intercepted by the operating system to ensure security and integrity. You cannot perform actions like logging off, locking the screen, or invoking system tools. For list of keys, see Appendix: Surface Actions: Special Keys. |
| Repeat Count | It repeats the press and release operation of the specified key(s) for the given count. The option is only visible if the Action Type is ‘Default’. For example: If the key is [tab] and the Repeat Count is 5, then it will simulate the tab key press and release five times. |
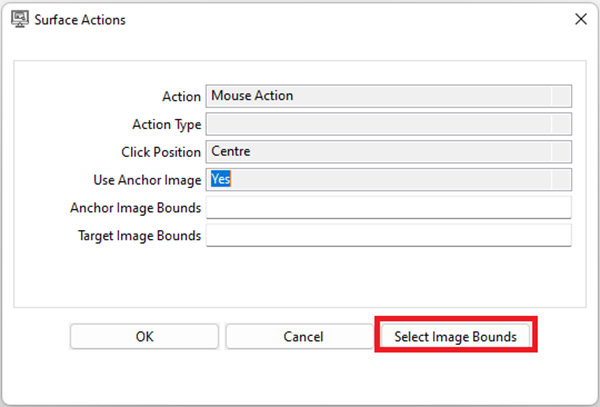
Set Image Bound button functionality
- The ‘Template Image’ must be added in the step.
- Select the action from the combo. If the selected action supports the ‘Anchor Image’ then select the appropriate option from the ‘Yes’ or ‘No’ as required.
- The Select Image Bounds button is used to select the action area(s) on the template image.
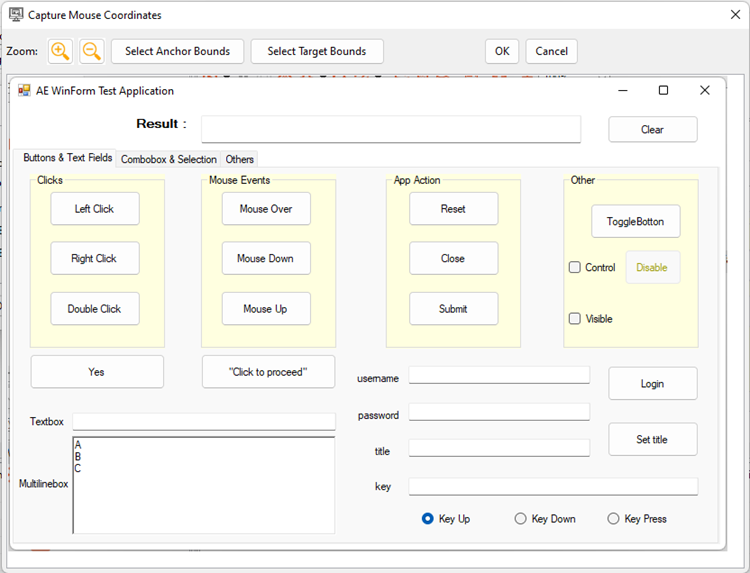
- Click Select Image Bounds. It will open the ‘Template Image’ as seen in the following image:
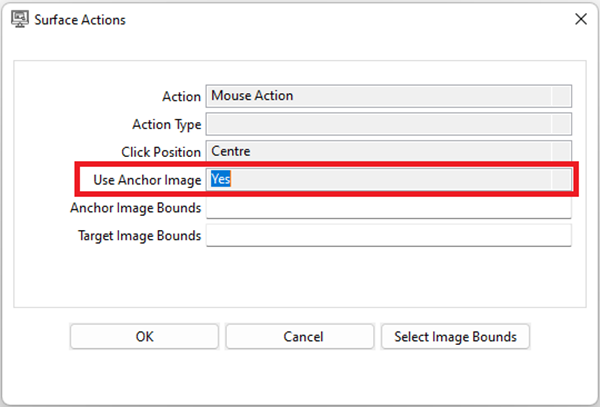
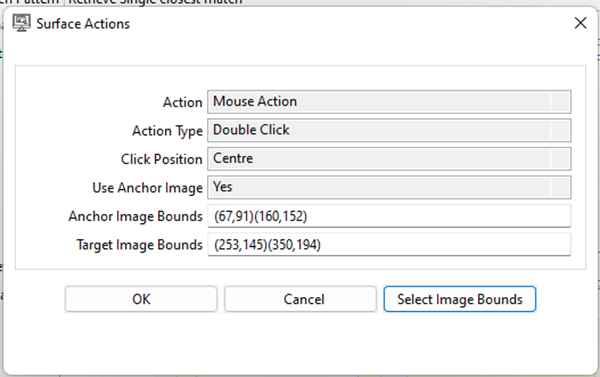
- Steps to select the image bounds if the Anchor image is “Yes” If the Anchor Image option is ‘Yes’ then select two image areas as seen in the following screenshot:
- Anchor Image Bounds
- Target Image Bounds
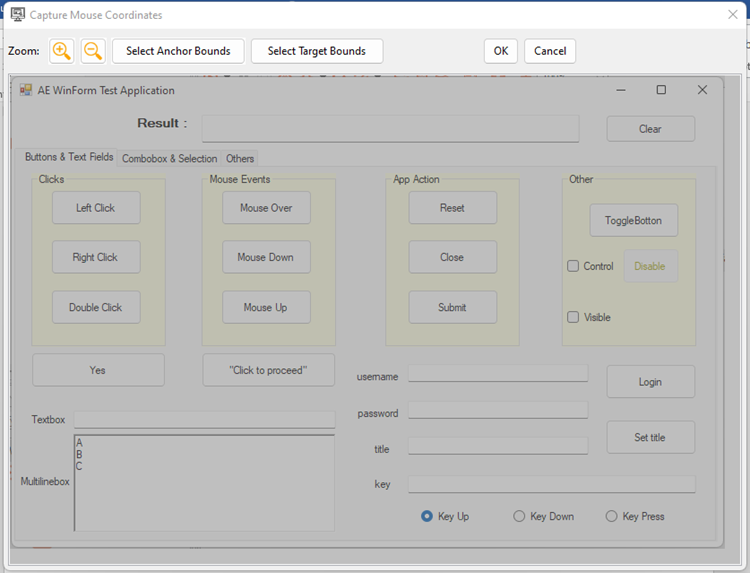
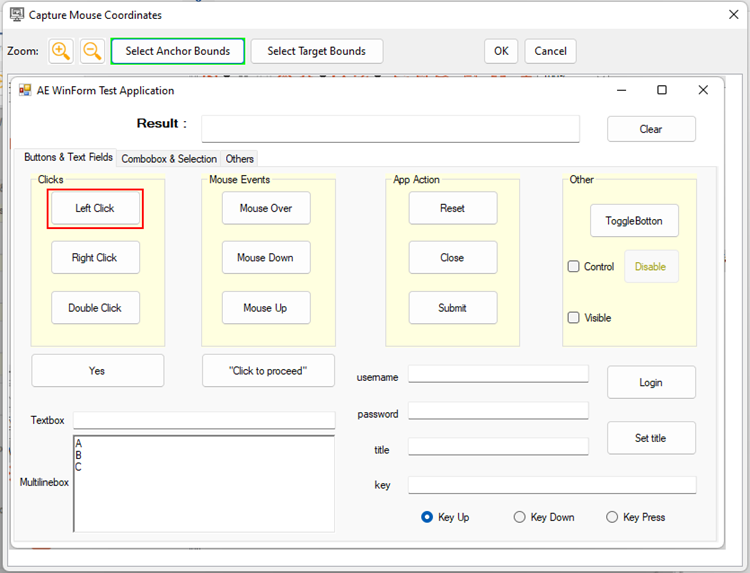
- Click Select Anchor Bounds to select the Anchor Image Bounds, once clicked on the button image will be highlighted with ‘Gray Color’ as seen in the following image:
- Select Anchor Image Bounds. The image is highlighted with the ‘Red’ color.
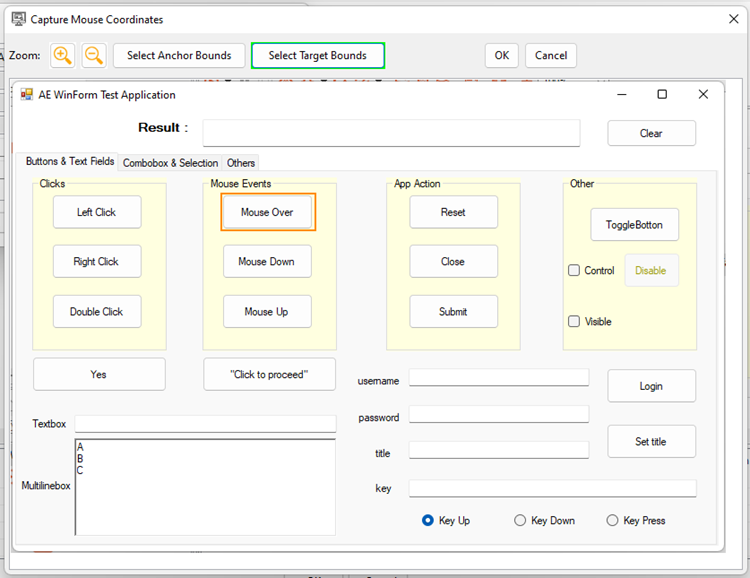
- Click Select Target Bounds to select the Target area by using the mouse pointer and the canvas will be highlighted with an ‘Orange’ color as seen in the following image:
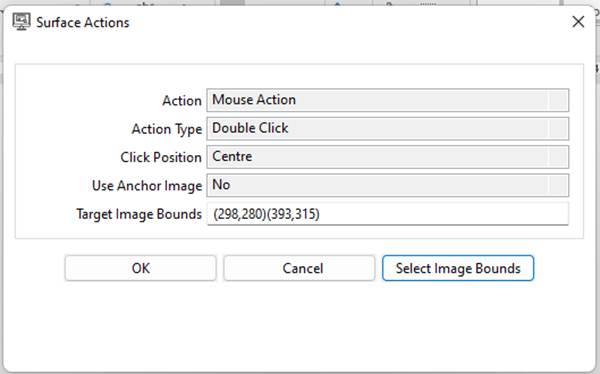
- After selecting the target area click on the ‘OK ‘button, it will close the Capture Mouse Coordinates popup window, and the selected coordinates will be reflected in the Anchor Image Bounds and Target Image Bounds on the Action popup.
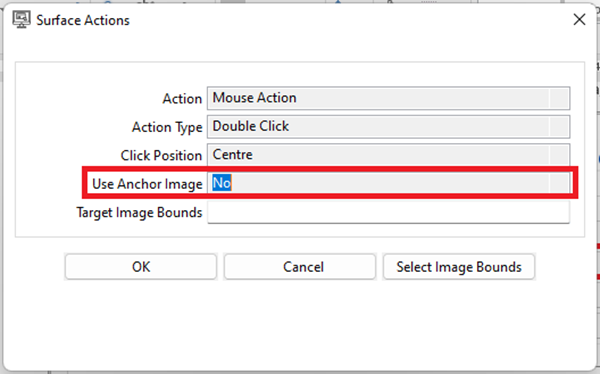
- Steps to select the area if the Anchor image is “No” If the Anchor Image is selected as ‘No’ then only need to select the single image area.
- Click Select Target Bounds to select the Target area by using the mouse pointer and the canvas will be highlighted with an ‘Orange’ color as seen in the following image:

- After selecting the image area click OK. The Capture Mouse Coordinates popup window closes, and the selected coordinates are reflected in the Target Image Bounds on the Action popup.
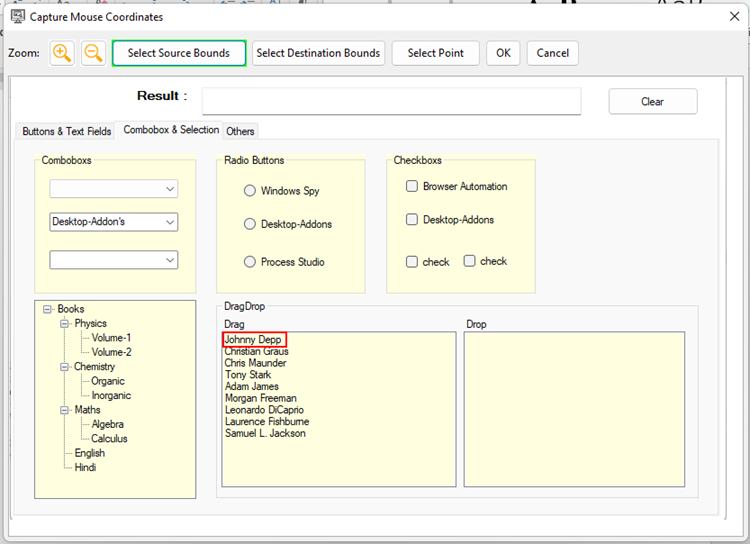
- Steps to select the Drag-Drop points In the Drag-Drop action need to provide Source Point and Destination Point.
- Click Select Source Bounds and select the area from the Template Image. After selecting, the area is highlighted with a ‘Red’ color as seen in the following image:
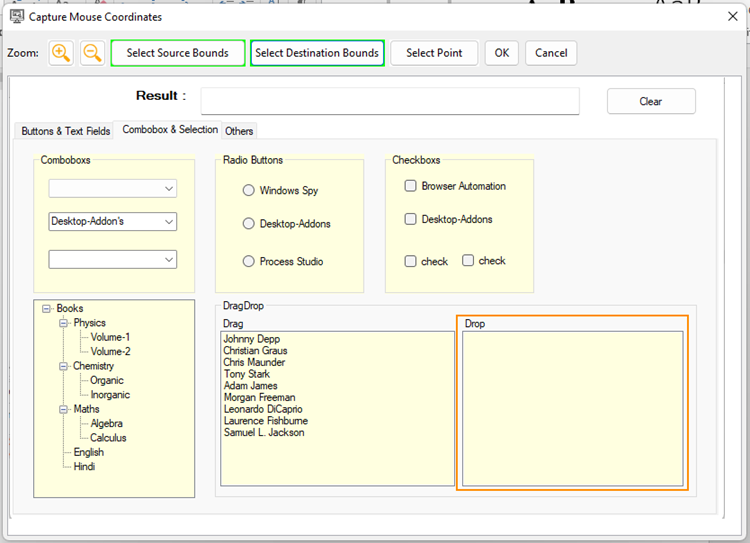
- Select the Destination Point from any of the following two options:
- Point To select the drop point, double-click on the area where you want to drop the dragged element and press ‘Escape’ from the keyboard to reflect the selected area and point in the Action popup.

- Region Click Select Destination Bounds to select the destination region. After selecting, the area is highlighted with an ‘Orange’ color as seen in the following image.
- After selecting the Destination Point, click OK to reflect the selected area in the Action popup.

- Spot Coordinate feature We have introduced the Spot Coordinates Feature to visually represent the actual operation positions on the template image with respect to different actions specified in table rows. To spot the coordinates of the row user just needs to select the Action Fields table row. For example:
- With Anchor Image The image highlighted in ‘Red’ color is the Anchor Image and the image highlighted in ’Orange’ color is the Target image.

- Spot coordinates without Anchor Image. The image highlighted with ‘Orange’ color is the selected image for the action.
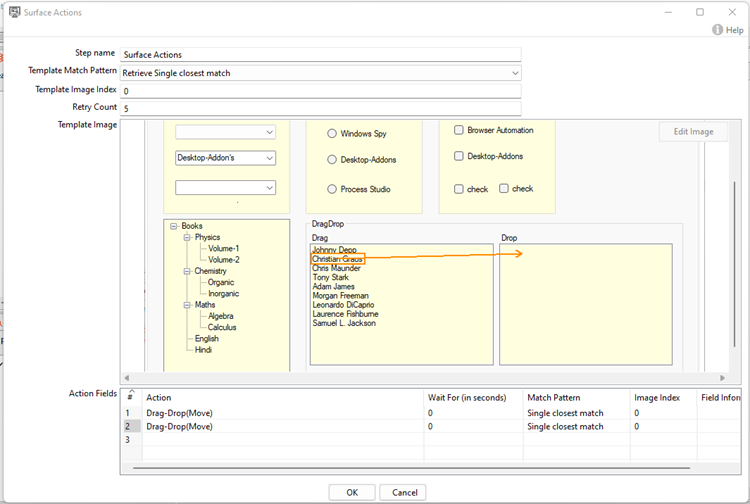
- Spot coordinate of Drag-Drop. In the image, the highlighted Source area and Destination area and line with the arrow shows the direction of the Drag-Drop action, its starting from center of the source point to center of destination point.

The image is spotted with the Drag-Drop area from the center of the source area to the drop point.
- Reattempt with Region-Based Matching The region-based matching feature in the Surface Actions works as follows:
-
Template Image Matching: Initially, it attempts to locate a given template image on the screen. If the plugin finds the image, it proceeds to execute the desired action.
-
Image Cropping and Individual Matching: If the template image is not found, the plugin crops selected areas provided as Anchor or Target Image Bounds within the template image. Afterward cropped image is tried to be matched separately on the active screen instead of the whole template image.
-
Action or No Match: If the cropped image matches with the portion of the active screen, the plugin performs the intended action. If the cropped image does not match the portion of the active screen, it throws an exception as ‘Image not found on active screen.’