Manage Workflows and Processes
This section covers common management tasks for workflows and processes, such as organizing files, handling errors, grouping steps or entries, and setting the main execution file.
Create a folder
This section explains the steps to create a folder.
To create a folder:
-
Under project, select Workflow and Processes and right-click. The contextual menu appears.
-
Select Folder, the Create Folder dialog appears.
-
Enter the name of the folder and click Create. The folder is created under the selected project.
Note- Select the new folder and right-click on it. The contextual menu appears. If there is an existing folder the Delete option is also available in the contextual menu.

- You can also select Resources, and then select New Folder to create a new folder.
- Select the new folder and right-click on it. The contextual menu appears. If there is an existing folder the Delete option is also available in the contextual menu.
Add a file
This section explains the steps to add a file.
To add a file:
- Select Resources and right-click on it. The contextual appears.
- Select Add File. The Open dialog appears.
- Select the file you want to add to the project. The file is added to the Resources container.
Error handling
For simple workflows, it is a good practice to set an error-handling step for steps in the workflow. You can set custom error message for each step, if required. Adding a custom message allows you to perform error handling through a single step for steps that have error handling support.
Access the Set Custom Error Message and Error Handling… step through the contextual menu.
To add custom error message:
-
On the canvas, select and right-click the step to which you want to add the custom error message. The contextual menu appears.
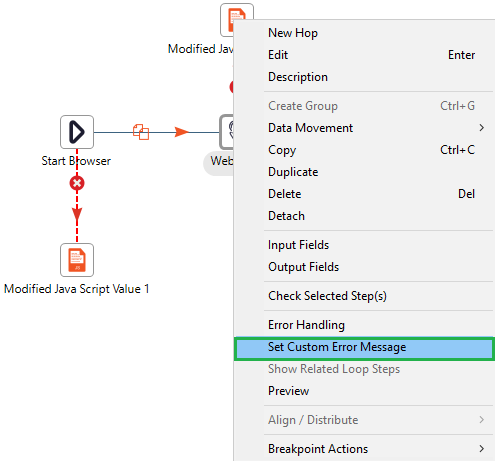
Set Custom Error Message option -
In the contextual menu, select Set Custom Error Message. The custom error message dialog appears.

Set Custom Error Message dialog -
Enter the error message you want and click OK. The message is set for the step.
Note- After setting the custom message, you need to enter the details in the Step error handling settings dialog. For field details, see the AutomationEdge Standard Plugin Reference guide.
- For complex workflows, use the Try-Catch
 step to group the steps and capture errors in it. With the step you need not add error-handling step for every step.
Group steps or entries
In case of huge workflows or processes with multiple steps or entries it becomes difficult to keep track or maneuver through the workflows or processes. Therefore, to enable users to work with complex workflow with
ease, Process Studio has the Create Group option. The ![]() icon
represents the grouped steps or entries.
icon
represents the grouped steps or entries.
Limitations
-
It may not be possible to copy-paste the group, if it contains, try-catch or looping steps.
-
Multi-level grouping is not supported.
To create a group:
-
In the workflow, select the steps that you want to group and right click on them. The contextual menu appears.
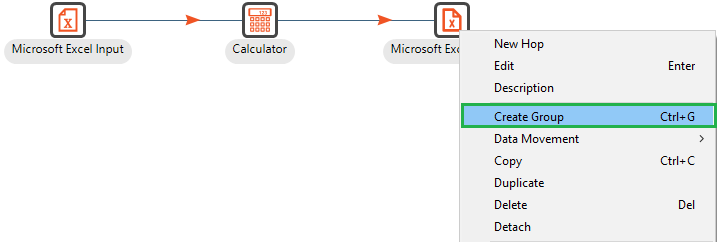
Create Group contextual menu -
Select Create Group. The Group dialog appears.

Group dialog -
Enter a name for the group, and then click OK. The selected steps are grouped together and a new group icon replaces them on the canvas.

Group view on canvasNoteThe group appears in the View pane as follows:

To edit a group:
-
On the canvas, double-click the group icon. The Edit Group dialog appears.

Edit Group dialog -
Modify the field details.
Field Description Group Name* Modify the name of the group. Group Description Modify the description of the group. Grouping Steps Provides a list of steps grouped together.
Right-click on each step and check the menu options available.* indicates a mandatory field.
-
In the dialog, click New Hop to reset the existing hops.
-
To remove a step from the group, select a step and click Remove. The step is removed from the group but is not deleted from the workflow.


Group dialog with step removedNote- Select the group and right-click on it. In the contextual menu:
- Select Ungroup to remove the grouping and view the steps and entries.
- Select View Group to view the group steps.
- Select Edit to modify the group details.
- Select Copy to copy the group.
- Select Delete to delete the group. Deleting the group will also delete the steps, entries, and hops in the group.

Set as main file
You can directly set a workflow or process as the main file without editing the project details.
To set as main file:
- In the Project Explorer, select the workflow or process in the project and right-click. The contextual menu appears.
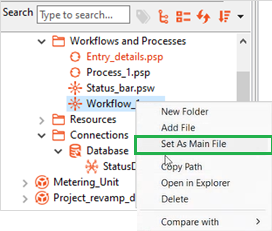
Set As Main File contextual menu
-
In the contextual menu, click Set As Main File. The main file color changes to red.

Main file set for the project