Add an SMTP email configuration
To configure SMTP email:
-
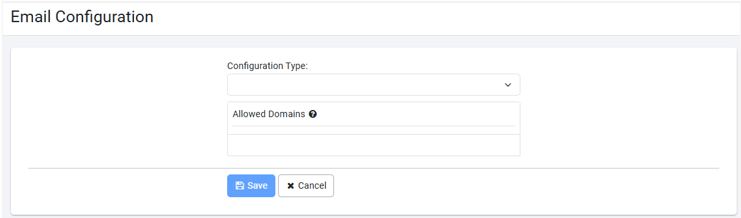
In the menu, click Settings 🡒 Email Configuration. The Email Configuration page appears.

-
Click Add. The Email Configuration dialog appears.
-
In Configuration Type, select SMTP Configuration. The Email Configuration fields appear.
-
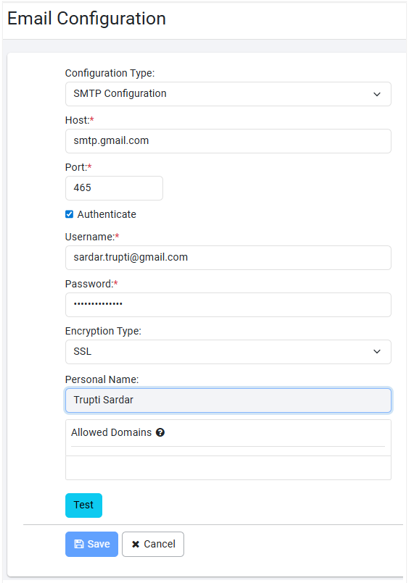
Enter the details, as required.
Field Description Host* Enter the hostname or IP address of the SMTP server. For example, smtp.gmail.com. Port* Enter the port number for LDAP connectivity. For example, for Gmail SMTP server SSL 465, TLS 582. Authenticate Select the checkbox to use authentication to connect to the SMTP server.
Note: The Password field is available only if you select the checkbox.Username* Enter the name of the user for authentication. Password* Enter the password for authentication. Encryption Type Select the type of encryption you want. Available options are:
• None: Select the encryption type None if your SMTP server does not support encryption
• SSL: Select the encryption type SSL to enable Secure Sockets Layer (SSL) encryption.
• TLS: If you select TLS, the Protocol field is available.
In the Protocol list, select one or more protocols for setting up SMTP configuration.
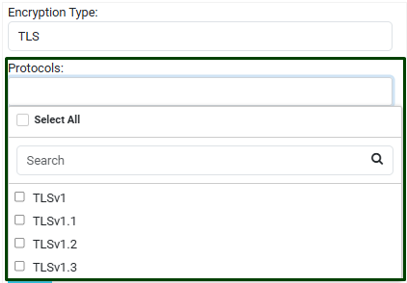
You can select one or more protocols for setting up SMTP configuration.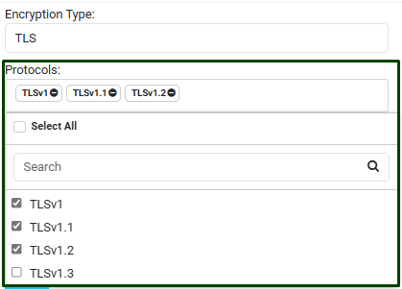
Personal Name Enter the personal name of the user that appears in the email. Allowed Domains Enter the names of domains to which you want to send the emails.
You can add multiple domains by separating them with commas or press Enter after each domain.
For example, if you have added gmail.com in the domain list then you can send emails only to the Gmail domain users.
Note: If you have not created the allowed domain list, then you can send emails to users of any domain. And, if you create the allowed domain list, then you can send emails to users of the listed domains only.
You will see an error message, if you try to send email to users outside the listed domains.
Allowed domains are applicable throughout AutomationEdge.'*' indicates the fields are mandatory.
-
Click Test to validate the SMTP connectivity. A message confirming the success of the connectivity appears.
-
Click Save. The SMTP configuration details are saved.
Note:
To modify the configuration details, click Edit.