Setup and execute Sales Revenue on Cloud instance
The section informs you about how to assign workflows to Agent, permissions to workflow, execute workflows, and monitor requests through the AutomationEdge server.
Workflows assignment to Agent
After the workflow is published to AutomationEdge using Publish or Export–Import process you need to assign workflow to one or more Agents.
- Click Agents - Workflow Assignment. The Workflow Assignment page appears.
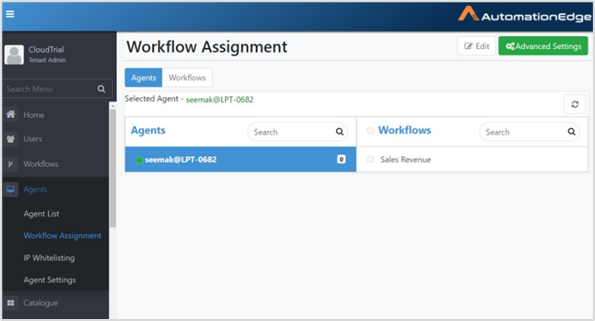
- In the Workflow Assignment page, click Edit. You can now modify the details under the tabs.
- In the Agents tab:
- Under Agents, select the checkbox corresponding to the agent.
- Under Workflows, select the workflows to assign to the agent.
- Click Save. A message appears confirming the assignment.
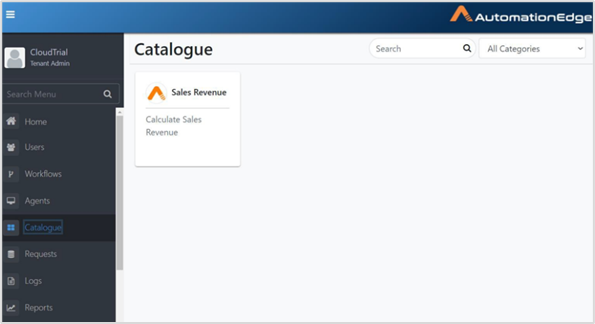
- Click Catalogue. The Catalogue page appears with the Sales Revenue workflow.
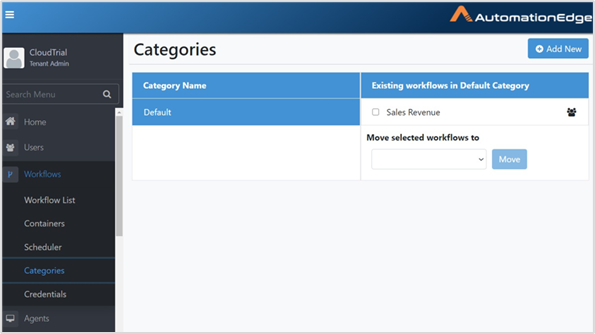
Assign permissions to workflow
To see the workflow as a catalogue item for other users provide necessary Read/Write/Execute permissions to Users/Groups under Workflows Categories.
- Click Assign Permissions (
 ) corresponding to the workflow for which you want to provide permissions to users. The Assign permissions to Workflow – Sales Revenue page appears.
- In the Assign permissions to Workflow – Sales Revenue page, select the following: Type: Select either Users or Groups depending on who you want to assign the permissions to. In the example, select Users. Members: Select the users to whom you want to assign the permissions to. Permissions: Select the checkbox corresponding to the permissions you want to assign to the users. You can assign either Read and / or Execute and / or Write permissions.
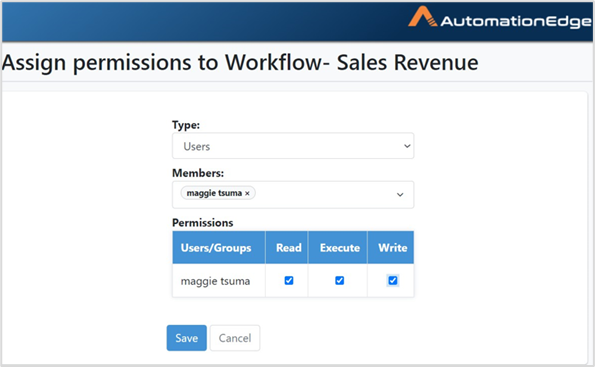
- Click Save. A message confirming that the permissions are set successfully appears.
Execute workflows
Execute the workflow from catalogue:
- Click Catalogue - Catalogue page. Published workflows appear on the page.
- Click the Sales Revenue workflow. The Request Details dialog for the workflow appears.
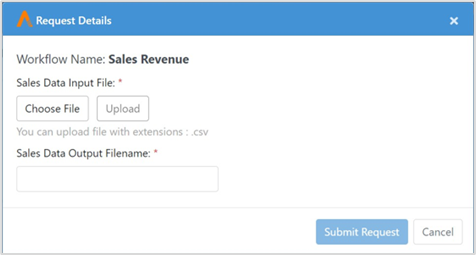
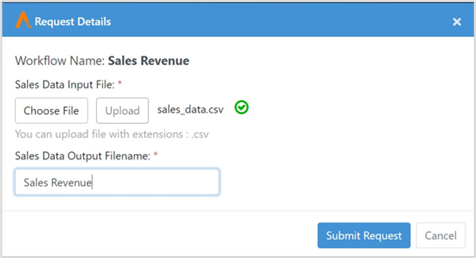
- Enter the following details: Sales Data Input File is a parameter of type file. Click Choose File button to browse and select the file to upload. Click Upload. The file is uploaded. In Sales Data Output Filename, provide a name for the file, and then click Submit Request.
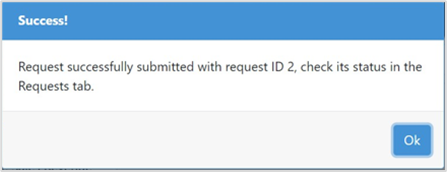
A message confirming successful request submission appears with the request ID.
Monitor requests
Monitor the workflow execution through the Requests menu.
- Click Requests. In the Requests page, select the Sales Revenue workflow.
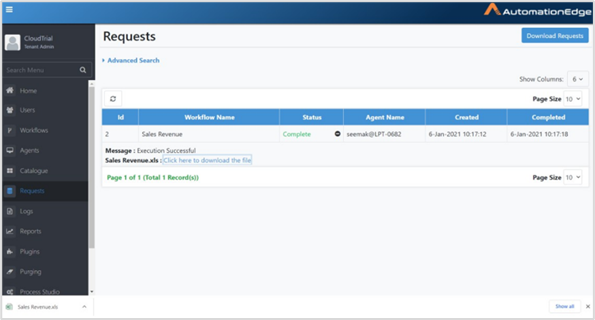
- Download the output file, Sales_Revenue.xlsx. View the Sales_Revenue file.

Publishing of the Sales Revenue project and executing Sales Revenue Workflow on AutomationEdge server is complete.