Create Project
Description
Jira Create Project plugin step is designed to create a software or business project in an instance of JIRA software.
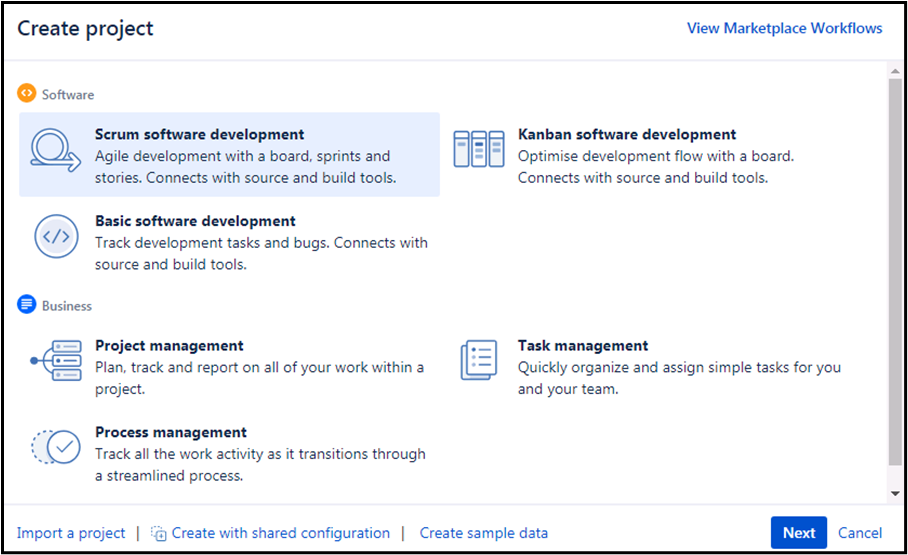
The project types seen in the screenshot below can also be chosen in the plugin options as described in the Input Tab table below.
Configurations
| No. | Field Name | Description |
|---|---|---|
| 1 | Step Name | Name of the step. This name has to be unique in a single workflow. |
| Connection | ||
| 2 | Server Name | The JIRA instance name/IP/hostname should be provided. |
| 3 | Port | The port number of the JIRA instance should be provided. |
| 4 | Username | A username with appropriate permissions to authenticate to JIRA instance and create project. This field is mandatory. |
| Password | ||
| 5 | Accept Value as variable/static | Leave checkbox unchecked to accept Password value from a field in the previous steps of the stream using a drop down list. Else enable checkbox for Password field to appear as Text box. |
| 6 | Password/API | Provide password of the username to authenticate in case of on premise instance and API Key in case of on cloud instance Password/API is entered using a widget. The widget handles both Text (static value or environment variable) and Combo (drop down containing values from previous steps). This field is mandatory. If checkbox above is enabled Password/API field appears as Text box and accepts static or variable values. Else if checkbox above is disabled Password field appears as a drop down to select fields from previous steps. Note: Following is the link to find the steps to generate token for on-cloud JIRA instance: https://confluence.atlassian.com/cloud/api-tokens-938839638.html |
| 7 | Test Connection | Verifies whether the connection is established or not. Note: For the purpose of verification fields coming from previous steps are not allowed since field values can only be accessed when workflow is in running state. Static values and environment variables are allowed. |
| Input Fields | ||
| 1 | Project Key | Provide a project key for the new project. |
| 2 | Project name | Provide the name of the new project to be created. |
| 3 | Project type | Provide a project type. The list of project types can be populated using the Get button described below. |
| 4 | Button: Get | Clicking on this button brings up a list of project types (viz. software, ops,service_desk, business). |
| 5 | Project Template Key | Select a valid project Template Key based on the type of project selected. The list of Project Template Keys can be populated using the Get button described below. |
| 6 | Button: Get | Clicking on this button brings up a list of project Template Keys as below, - com.pyxis.greenhopper.jira:gh-scrum-template - com.pyxis.greenhopper.jira:gh-kanban-template - com.pyxis.greenhopper.jira:basic-software-development-template - com.atlassian.jira-core-project-templates:jira-core-project-management - com.atlassian.jira-core-project-templates:jira-core-task-management - com.atlassian.jira-core-project-templates:jira-core-process-management |
| 7 | Project description | Provide the description of the new project to be created |
| 8 | Project lead(Username/Account ID) | Mention the Username(/Account ID) who will be set as the lead for the new project.(This will accept only valid users on JIRA) |
| 9 | Button: Get Username | Clicking on this button brings up the list of JIRA usernames. |
| 10 | URL | Provide a URL for online help |