Start Loop
Description:
This step marks begin of loop execution.
Single Threaded: The steps in the loop will be executed as a single thread. The other input rows are paused until a continue signal is received from loop continue step.
Input Row: The same input row is passed for each iteration of that particular row. Additional fields can be added to this input row, which would be populated during the loop iteration and available after the loop iteration. All other fields generated by steps during loop iteration will be destroyed i.e. their scope would be valid only for that particular iteration.
Loop Condition: A dynamic condition block will be provided. This can be used to construct simple as well as complex conditions. Based on the output of this condition, the input row will be routed to either continue (in case of condition failure) or end the loop (in case of condition success).
Implicit Counter: The user can provide a counter name and number of iterations for which the loop would execute.
Output Hops: There will be two output hops, for ‘true’ and ‘false’ condition. It is mandatory to have Loop Continue at the end of true path.
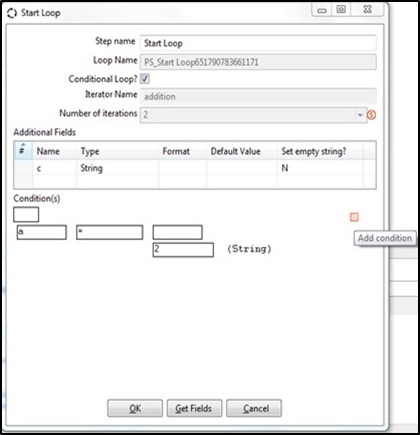
This step has the following user inputs as shown in the screenshot and configuration table below,
- Counter Name
- Loop iteration count
- Dynamic Conditions block
- Table for Additional field names
Configurations:
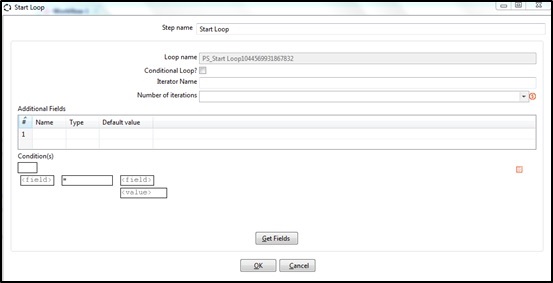
Figure: Start Loop Step UI
| No. | Field Name | Description |
|---|---|---|
| 1 | Step Name | Name of the step. This name has to be unique in a single workflow. |
| 2 | Loop Name | A Loop Name generated automatically. |
| 3 | Conditional Loop? | Enable check box if you want to loop based on a condition. If enabled Iterator name below is disabled. |
| 4 | Iterator Name | This field is enabled Conditional Loop above is not checked. Provide an iterator name. |
| 5 | Number of iterations | Provide an integer value for number of iterations for each row. |
| Table: Additional Fields1 | This table is used to create user defined additional fields. Additional fields are added as columns to the row. They are permanent and visible even after the loop is over. Note: Any fields created within a loop are not permanently available after loop execution. Only Additional fields specified in Loop Start are available even after loop execution. | |
| 1 | Name | Provide names of all additional fields you want to define. |
| 2 | Type | Select a data type for the additional field. |
| 3 | Format | Select a format for the data Type selected above. |
| 4 | Default value | Provide a default value for the additional field. |
| 5 | Set empty string? | Select Y or N. If default value is not provided set ‘Set empty string?’ to Y. This sets a null value as an empty string. |
| Block: Conditions | Conditions Block is a set of five fields. These fields can be populated with Previous field, Addition fields or Static values. Click the field to populate a value as a toggle or from a popup that comes up. The first field specifies a toggle for a condition. Leave it default to blank or click once to toggle it to NOT. The second is the field to compare. The third field is an operator The fourth field is the field to be compared against or alternately specify a static value in the sixth field to be compared against. Click on the small rectangular icon on the right hand side of the block to add a condition. You can Add a condition with the following operators: OR, AND, OR NOT, AND NOT, XOR. Multiple condition list by icon on right side. Right click on a condition to get a pop-up menu with the following options: Edit condition, Delete condition, Add sub - condition, Move condition to sub-condition | |
| Button: Get Fields | In the Conditions Block above only previous fields are available. Click Get Fields to make Additional fields also available in the conditions block. |
Conditions Block Description:
- The first field is a Boolean and value can be set to null or NOT. This field acts like a toggle field and changes values upon click. The possible values are null or NOT.
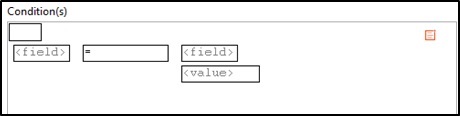
- Null condition
- NOT condition

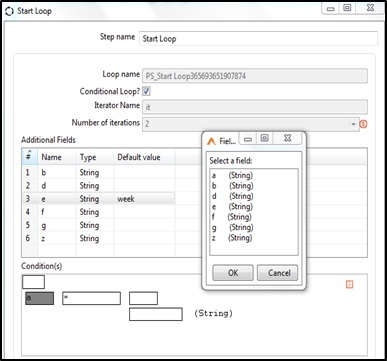
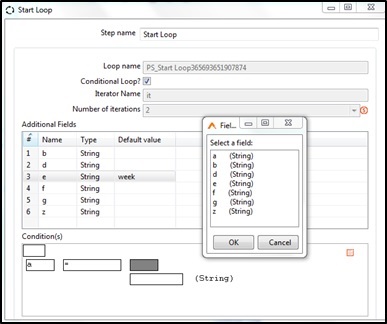
- In the second field User defined Additional fields can be selected.
- In this case ‘a’ is selected and is assigned a value 2. It can also be assigned a field value.

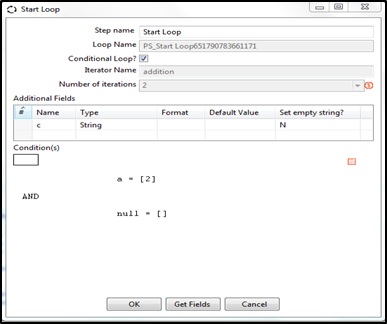
- Multiple conditions can be added using the Add condition on the right.
- In the snapshot below the first condition has been added and ready to add the second condition. Click on the null condition to populate it.
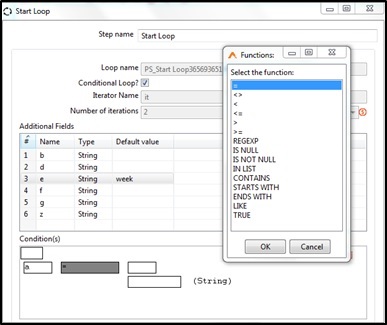
- In the third field select operational functions.
- In the fourth field previous step fields or Additional fields can be set. Values can be set either in the fourth step or in the fifth fields.
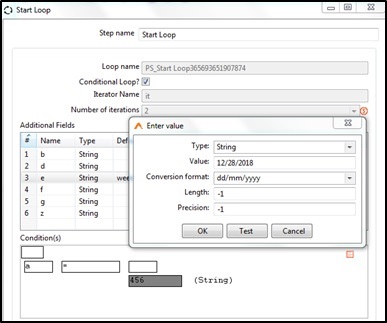
- In the fifth and final field provide a static value along with conversion format.